Is your Minecraft game lagging, stuttering, or crashing – especially when using mods? These are common signs that your game might need more memory.
Minecraft is a Java-based game, and by default, it doesn't use a lot of RAM. But if you're playing on large worlds, using shaders, or running heavily modded setups, allocating more RAM can significantly improve performance.
This guide will show you exactly how to allocate more RAM to Minecraft safely and efficiently, whether you're using CurseForge or the official launcher.
What You Need to Know First
RAM customization is only available in Minecraft Java Edition. If you're playing on Bedrock, memory is managed automatically and can't be changed manually.
How Much RAM Should You Allocate?
The ideal amount of RAM depends on how you're playing:
- Vanilla Minecraft: 2–4 GB
- Light modded gameplay: 4–6 GB
- Heavy modpacks (hundreds of mods): 6–10 GB or more
Keep in mind that you should never assign all of your RAM to Minecraft. Your operating system and background programs need memory to function properly.
Here’s how much RAM you should leave unused by Minecraft, depending on your setup:
- For Windows Users:
- 8 GB RAM: Leave at least 2–3 GB for your system. You can safely allocate 3–4 GB to Minecraft. If no other programs are running, you may go up to 6 GB, but this can limit resources for background tasks.
- 16 GB RAM or more: Leave 4–5 GB for other apps. You can safely allocate 6–8 GB or more to Minecraft.
- 4GB RAM (low-end laptops or older devices): It’s not recommended to allocate more than 1–1.5 GB to Minecraft.
- MacBook users: macOS needs extra RAM overhead. Leave at least 4 GB for the system.
Tip: Allocating more than 12 GB to Minecraft usually won’t help unless you're using heavy modpacks or shaders. In fact, too much can increase lag due to how Java handles memory.
How to Check Your Available RAM
On Windows:
- Press Ctrl+Shift+Esc to open the Task Manager.
- Click on the "Performance" tab.
- Look under "Memory" to see how much RAM you have in total.
On macOS:
- Click the Apple logo > About This Mac
- Total RAM appears under memory (e.g., 16 GB RAM)
How to Allocate More RAM to Minecraft Java Edition
Using CurseForge Launcher
There are two ways to allocate more RAM in the CurseForge Launcher:
1: Set Default RAM for All Profiles
This method applies to all Minecraft profiles by default.
- Open the CurseForge Launcher.
- Click the gear icon (Settings) in the lower-left corner.
- Go to the "Minecraft" tab.
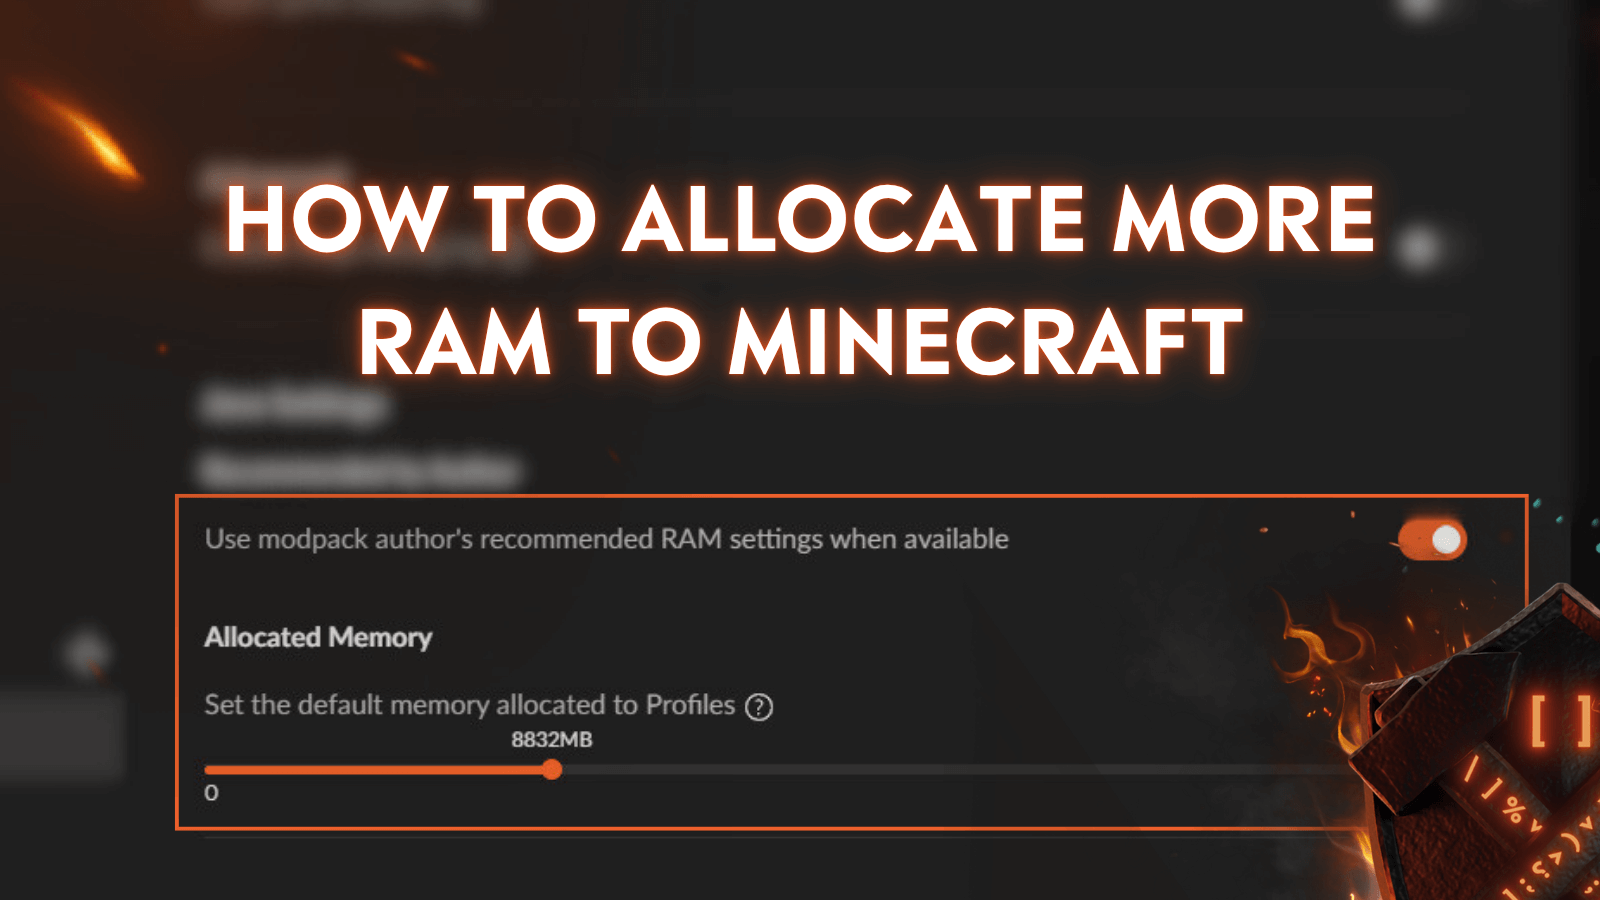
- Under "Java Settings", you’ll find a slider for allocated memory.
- Adjust the slider to the desired amount.
- Changes are saved automatically.
2: Set RAM per Profile
You can customize RAM for specific modpacks or profiles without affecting the global settings.
- Go to the "My Modpacks" tab and select the profile you want to edit.
- Click the three dots > "Profile Options".
- Select the "Custom RAM Allocation" option.
- Set your preferred maximum memory allocation (RAM).
- Click "Done" to save.
Via Official Minecraft Launcher
- Open the Minecraft Launcher.
- Click on "Installations".
- Hover over your version and click “...” > "Edit".
- Click "More Options".
- In the "JVM Arguments" field, look for this section: -Xmx2G
Change the number (e.g., -Xmx4G for 4 GB)

- Click "Save" and launch the game.
Can You Allocate More RAM to Bedrock Edition?
Unfortunately, no. Bedrock Edition does not allow users to change RAM allocation manually. It's designed to be lightweight and optimized for lower-spec devices – automatically handling memory based on system needs.
If you're experiencing lag in Bedrock, try these tips instead:
- Lower render distance and video settings.
- Close other apps running in the background.
- Use performance-focused worlds or maps.
How to Tell if It Worked
After launching Minecraft (Java Edition):
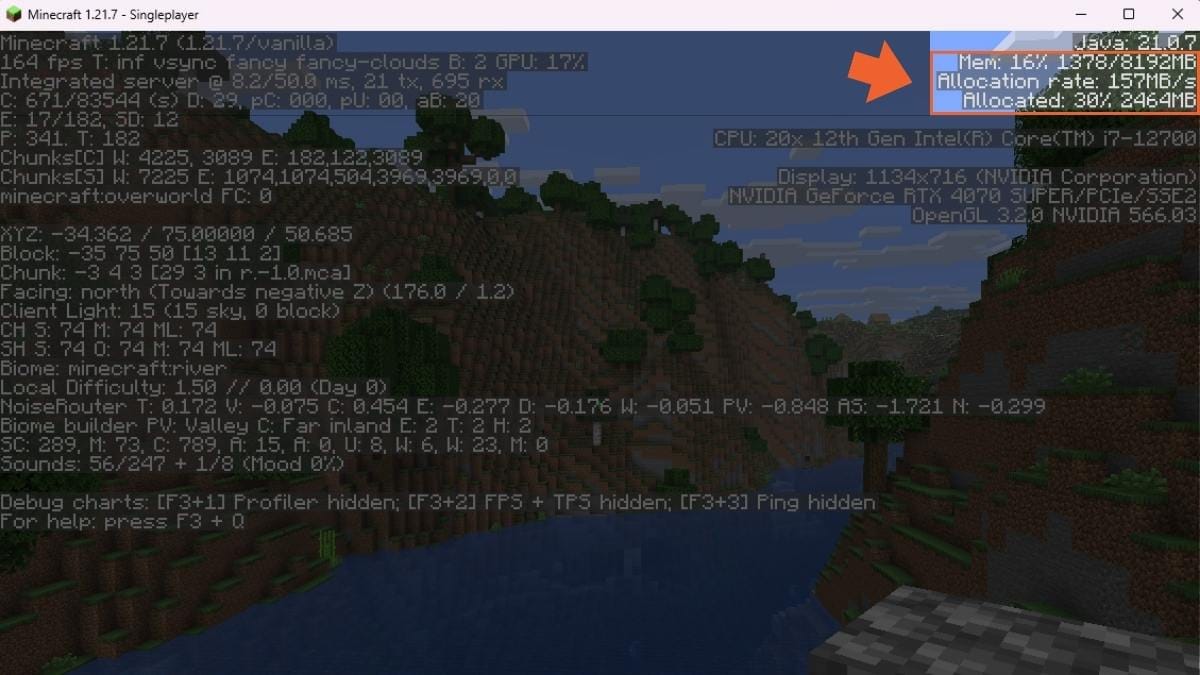
- Press F3 to open the debug screen.
- Look in the top-right for memory info like: Mem: 1200/6144MB
The first number (1200) shows how much memory Minecraft is currently using.
The second number (6144) shows the maximum memory Minecraft can claim, based on your allocation setting.
If the maximum matches what you set, your allocation change worked. Keep in mind that Minecraft (and Java) won’t always use the full amount unless it needs it.
Troubleshooting, Tips & Best Practices
Sometimes, things don’t go smoothly after increasing Minecraft's RAM. Here’s what to watch out for and how to handle it:
- Game won't launch: This often happens if you’ve allocated too much RAM. Your computer still needs memory to run the system and other apps, so avoid giving Minecraft more than 75% of your total RAM. Try lowering the amount and launching again.
- JVM errors or crashes: These are usually caused by using the wrong version of Java. Minecraft 1.18 or newer require Java 17 or later, so make sure you're up to date.
- Java version: You don’t need to install or check Java manually—Minecraft launchers (including CurseForge) come with the correct version bundled. As long as you’re using one of these launchers, you already have the right Java.
- To install the correct version, go to the official Adoptium website. Look for “Temurin 17” and download the installer for your operating system. Once it’s installed, restart your computer to apply the changes.
- If you’re using the CurseForge app, you usually don’t need to worry about this, as CurseForge bundles the right Java version automatically. But for manual setups or third-party launchers, you’ll need to handle Java installation yourself.
- Lag still persists: If increasing RAM doesn’t help with performance, the issue might lie elsewhere – like a weak CPU, slow hard drive, or problematic mods. RAM isn’t always the magic fix.