
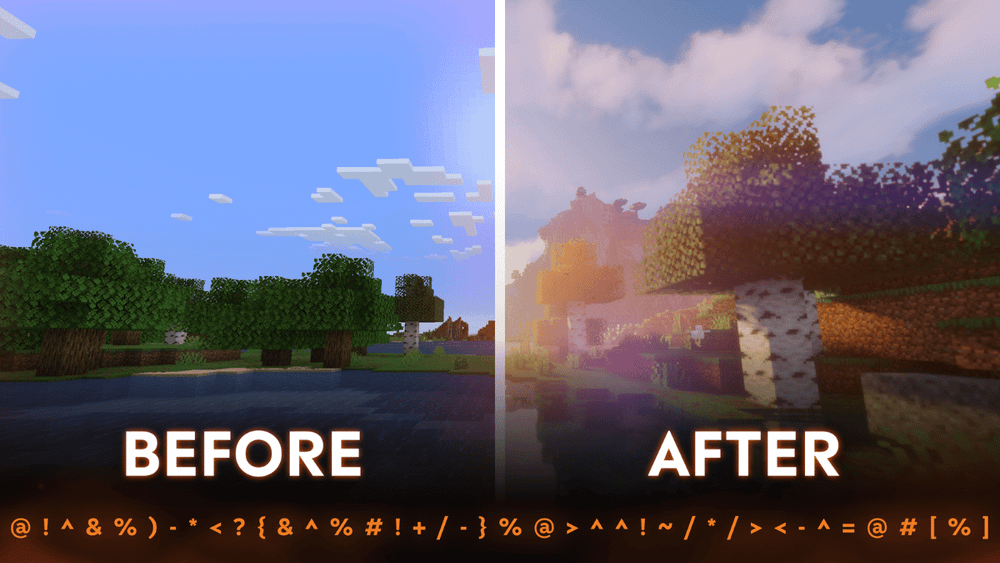
Are you getting tired of Minecraft’s low-res pixels and lackluster weather effects? Want to feel like you're in a AAA game while mining for that Obsidian? Then maybe it's time to take that red pill and load up some shader mods already, Steve.
Shaders can turn Minecraft’s blocky world into a visual masterpiece – and with CurseForge, Minecraft’s leading mod repository, installing them is safe, simple, and stress-free. So get those pickaxes crafted, we’re about to change your whole world, literally.
What Are Minecraft Shaders?
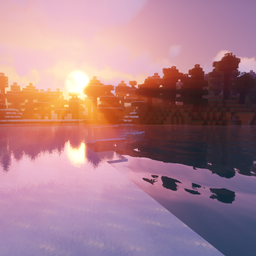
Shaders are custom GPU programs that replace Mojang’s vanilla rendering with advanced visual effects – bloom, depth‑of‑field, god‑rays, dynamic shadows, and much more. Minecraft players use shaders because they make the game look better.
I mean, who wouldn’t want to enjoy enhanced water reflections, realistic foliage motion, and cinematic skies? Think of shaders as your own personal lighting crew, like the ones found on movie sets.
Why would you want to install shaders on Minecraft?
Enhanced Graphics and Visual Fidelity
- Shaders crank up the graphics by adding PBR-style lighting, bloom, and soft shadows that make your game look like a AAA title.
- Water reflections and refractions go from flat blues to rippling mirrors, reacting dynamically to every sunrise, sunset, and cave torch.

Immersive Atmosphere
- Volumetric clouds, god-rays piercing through tree canopies, and misty fog layers turn your world into an epic movie set.
- Dynamic weather effects like wet surfaces during rain and swaying leaves in the wind make the environment feel alive and real.
Customization and Creativity
- With countless shader packs ranging from hyper-realistic to neon-fantasy, you can dial in that exact vibe for your play-through.
- In-game sliders let you tweak color grading, ambient occlusion strength, and bloom intensity so every screenshot feels like your personal masterpiece.
Requirements for Installing Shaders
To alter your vanilla Minecraft experience in any way, you will first need to use a compatible mod loader. It sounds simple, but it can definitely get complicated very fast. That’s why we highly recommend using the CurseForge dedicated desktop client – it manages all of this for you, safely and easily, ensuring you don’t pick up any unwanted payload along the way.
CurseForge implements both automated malware scans and manual moderation, making it the most secure mod‑hosting platform available.
Before installing shaders, ensure you have:
- A legal copy of Minecraft: Java Edition.
- The correct Minecraft version is installed and compatible with the shader you want to install (mods are version-specific).
Step 1 – Install the CurseForge Launcher
- Go to our Curseforge app download page (Click here).
- Download either the standalone or the Overwolf version.
- Run the downloaded installer and complete the setup.
- Launch the CurseForge app, check to see that it auto‑detected Minecraft.
- If Minecraft is not auto-detected, click the + icon (Add a Game) on the left-hand side and scan for it or manually add your .minecraft folder. On Windows, it’s usually located at "C:\Users\<YourName>\AppData\Roaming\.minecraft", and on macOS at "~/Library/Application Support/minecraft".
Step 2: Choose your Mod Loader and Shader Loader
Next, you’ll need to choose which mod loader you’ll be using. The choice here is between Minecraft Forge, Fabric, and NeoForge - most users choose their path depending on the mods they already have installed.
If you already use either Minecraft Forge, NeoForge, or Fabric for your modding needs, then it would make sense to choose the corresponding shader loader. If you’re not locked in yet, here’s a small comparison of the 3 shader loader routes:
|
OptiFine (Forge route) |
Iris + Sodium (Fabric route) |
Rubidium/Embeddium + Oculus/NeOculus (NeoForge/Forge route) |
|---|---|---|
|
|
|
Step 3: Create a Custom Profile on the CurseForge App
Now, depending on your loader of choice, we’re going to create custom profiles on the CurseForge app to streamline the process and make everything seamless for you.
| Forge + OptiFine Users | Fabric + Iris/Sodium Users | NeoForge + Rubidium/Embeddium + Oculus/NeOculus |
|---|---|---|
|
|
|
Step 4: Downloading & Installing the Shader Loaders
| Installing OptiFine on the Forge profile |
Installing Iris/Sodium on the Fabric profile |
Installing Rubidium/ Embeddium + Oculus/ NeOculus on NeoForge |
|---|---|---|
|
|
|
Step 5: Add Shader Packs via the CurseForge App
- Launch the CurseForge app and click on the “My Modpacks” button.
- Select the profile we created earlier, and click the “Add More Content” button.
- You can either search for a shader pack using the search function if you have one in mind, or click the drop-down menu, which selects Mods by default, and change it to “Shaders” to browse the vast selection of shaders.
- Once you have selected a shader pack, simply click the orange “Install” button, and you’re good to go.
- It’s always best to confirm that the shader pack is found under the “Shaders” tab on the main profile page.
By following these steps and searching for mods via the custom profile, you are always sure to download compatible mods to your desired profile, as the CurseForge app filters and displays only mods that are compatible with the profile.
Step 6: Activate Your Shader Pack In‑Game
- Back on the CurseForge app, click the “Play” button on your desired profile; in the Minecraft launcher, hit Play again.
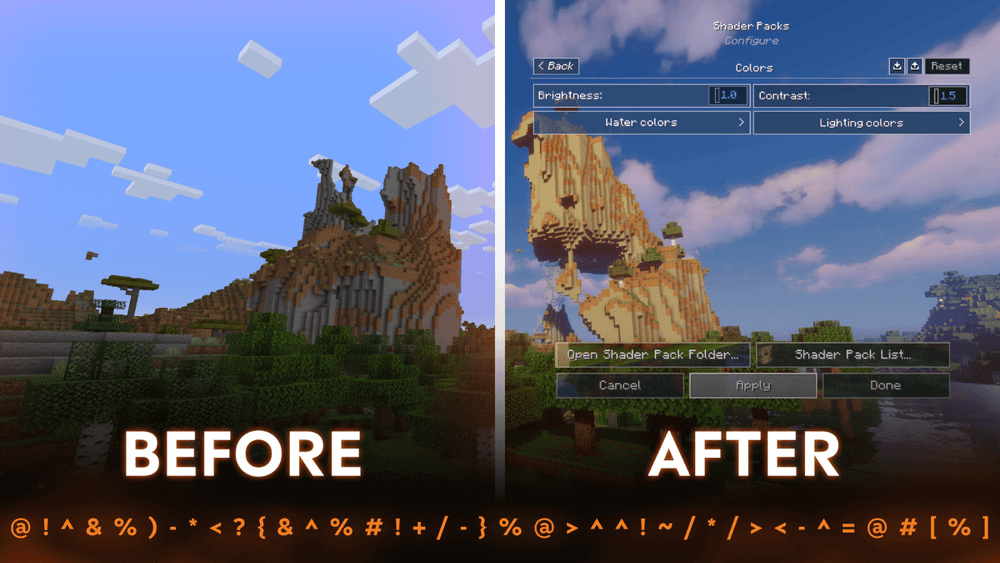
- Once in‑game, navigate to Options → Video Settings → Shader Packs, select the shader pack you want to load, click Apply at the bottom, and wait for the reload to finish.
That’s it! Load into your world and enjoy the new visuals!
Pro Tip: By maintaining two dedicated profiles, one for Forge + Optifine and one for Fabric + Iris/Sodium, you ensure a clean separation, letting you switch effortlessly between shader methods, giving you complete flexibility and control to try different combinations of mods and shaders.
Top 10 Shaders by Community Downloads
Now that you know how to install shaders, the question remains: Which ones should you go for? Do you want to enhance the look and feel of your worlds with an HDR-like look, or go for a completely different, spooky, or even wacky look?
Here are the top 10 most downloaded shaders by the community as of the writing of this article, for an updated view visit our category page here.
Complementary Shaders - Reimagined
Preserving the elements of Minecraft with exceptional quality, detail, and performance.
Vanilla
Complementary Shaders - Unbound
Transforming the visuals of Minecraft with exceptional quality, detail, and performance.
Fantasy
Sildur's Vibrant shaders
Very optimized shaderpack for MC: Java edition, around since 2012.
Fantasy Realistic
MakeUp - Ultra Fast | Shaders
High-performance shaders. Gameplay oriented. Lightweight.
Fantasy Realistic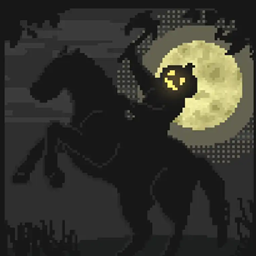
Insanity Shader
A highly customizable horror styled Minecraft shaderpack based on BSL.
Vanilla Fantasy
Pastel Shaders
An aesthetic, performant pastel-colored shaderpack with multiple color preset based on BSL.
Fantasy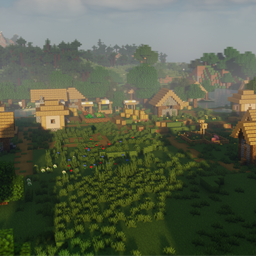
Solas Shader
A good performing fantasy stylized shaderpack with colored lighting and fancy visuals
Fantasy
👻 Hysteria Shaders
Atmospheric, highly customizable eerie shaderpack, successor of Insanity Shader.
Fantasy