Add-ons are one of the easiest ways to expand what you can do in Minecraft. They can introduce new mobs, change gameplay mechanics, or improve visuals without needing complicated mod loaders.
If you download add-ons from sites like CurseForge, installing them usually only takes a few seconds. Once you know where everything is, the process is straightforward.
This guide walks through the entire process step by step.
Step 1: Download a Bedrock Add-On
First, download the add-on you want to install via CurseForge
Most Bedrock add-ons are distributed in one of these formats:
.mcpack.mcaddon
Both formats are designed to work directly with Minecraft, allowing them to be imported automatically into the game.
We're going to go with Xiao Reimagined Shader to show you how it's done!
We'll go to the CurseForge website for Minecraft Bedrock
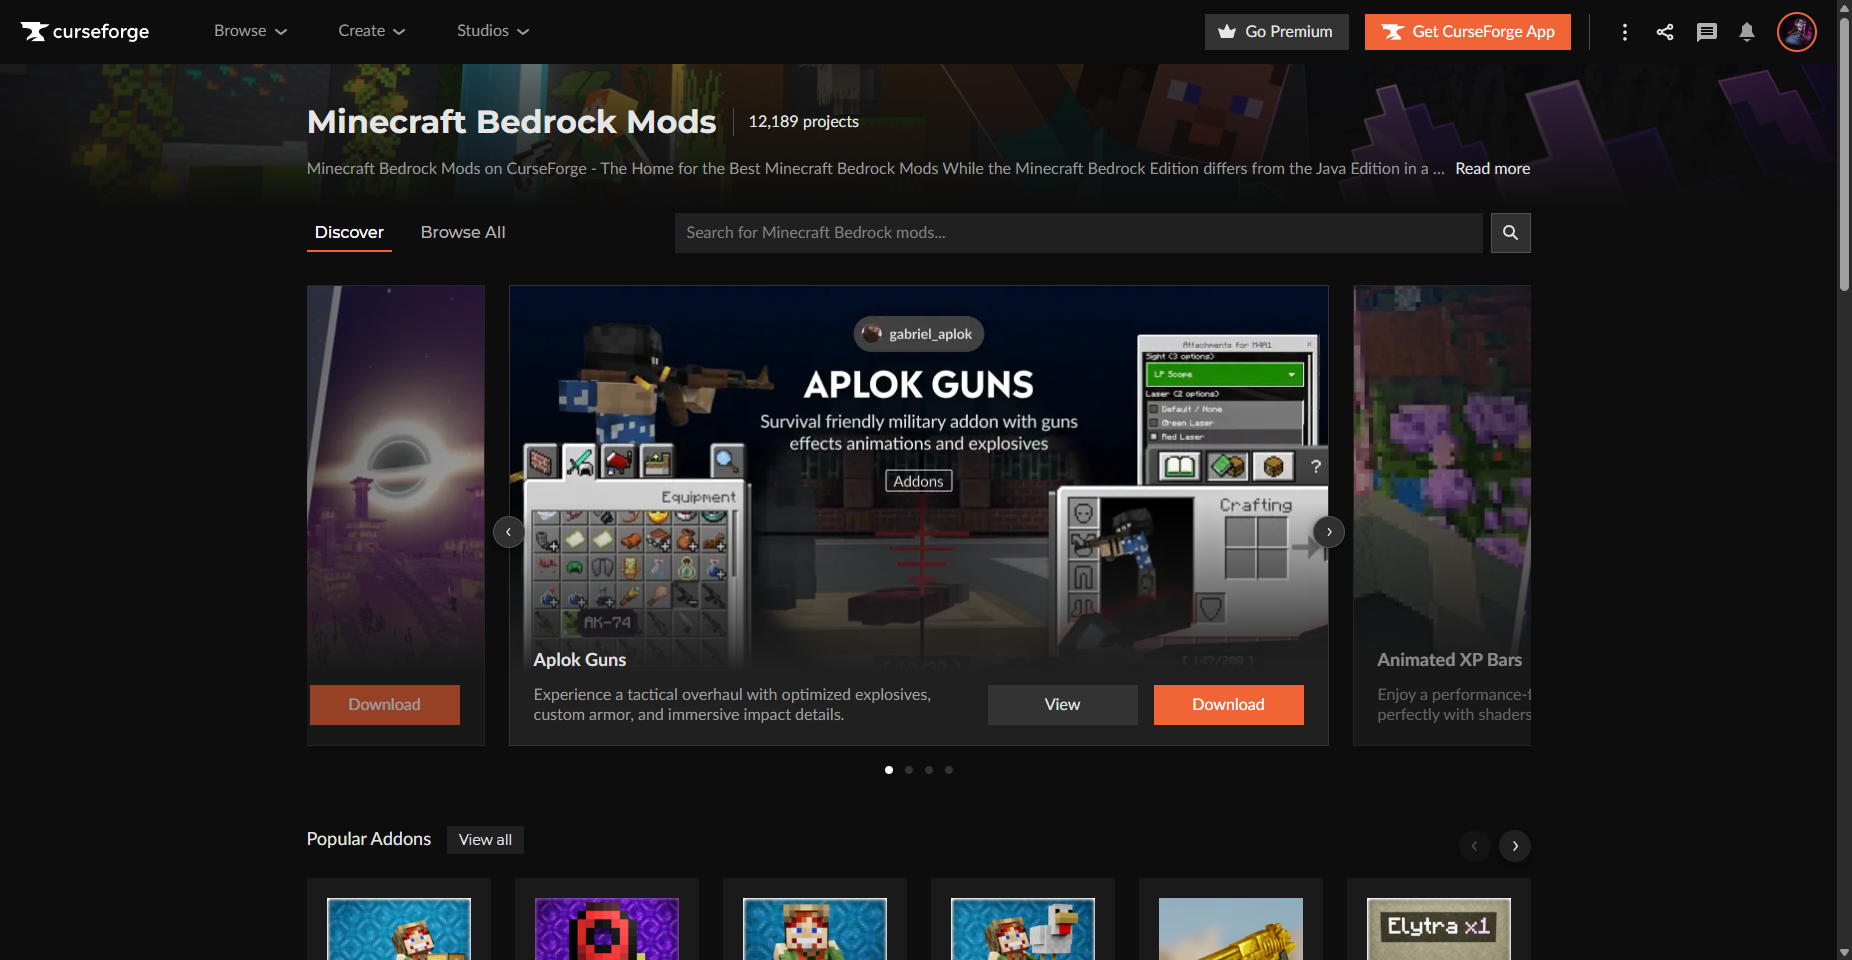
And we can search for our mod, or click the link above for Xiao Reimagined Shader
Click the orange download button to start our download
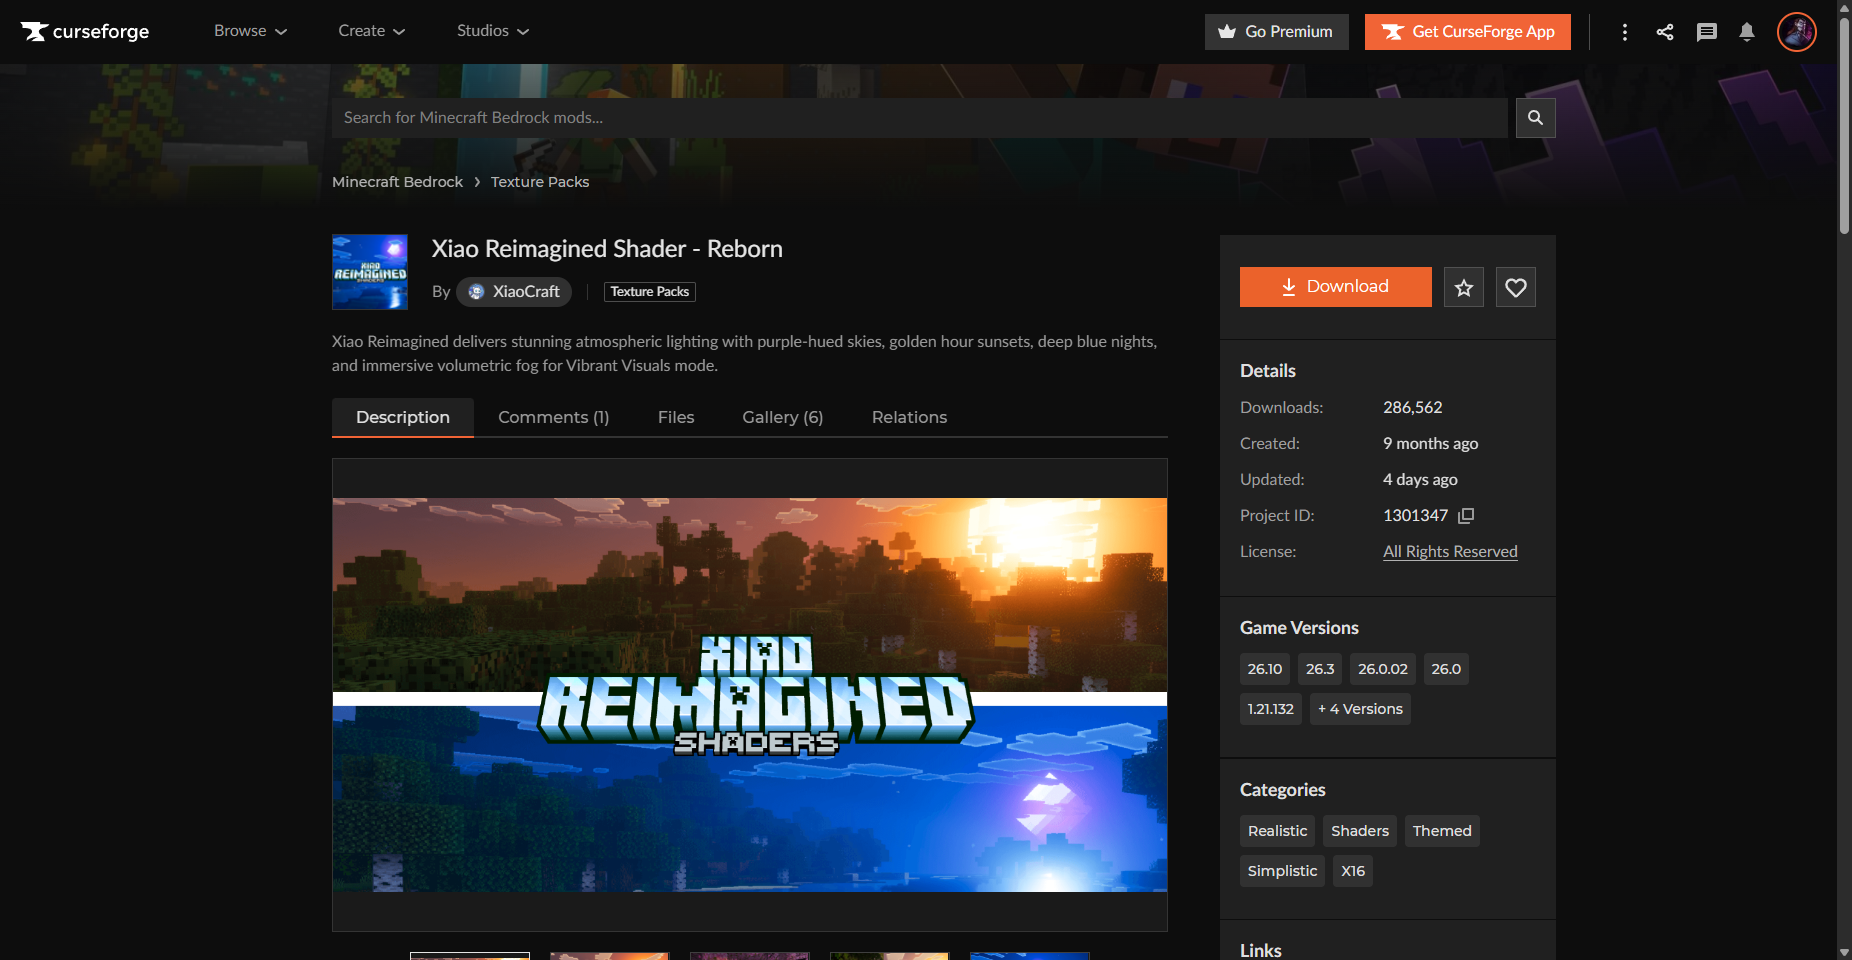
Once the file finishes downloading, you're ready to install it.

Step 2: Import the Add-On Into Minecraft
Locate the downloaded file and double-click it.
In most cases, Minecraft will launch automatically and begin importing the pack.
You should see a message appear in the corner saying:
Import Started
After a few seconds, it should change to:
Successfully Imported
At this point, the add-on has been installed into the game. However, it still needs to be activated inside a world before it will actually do anything.
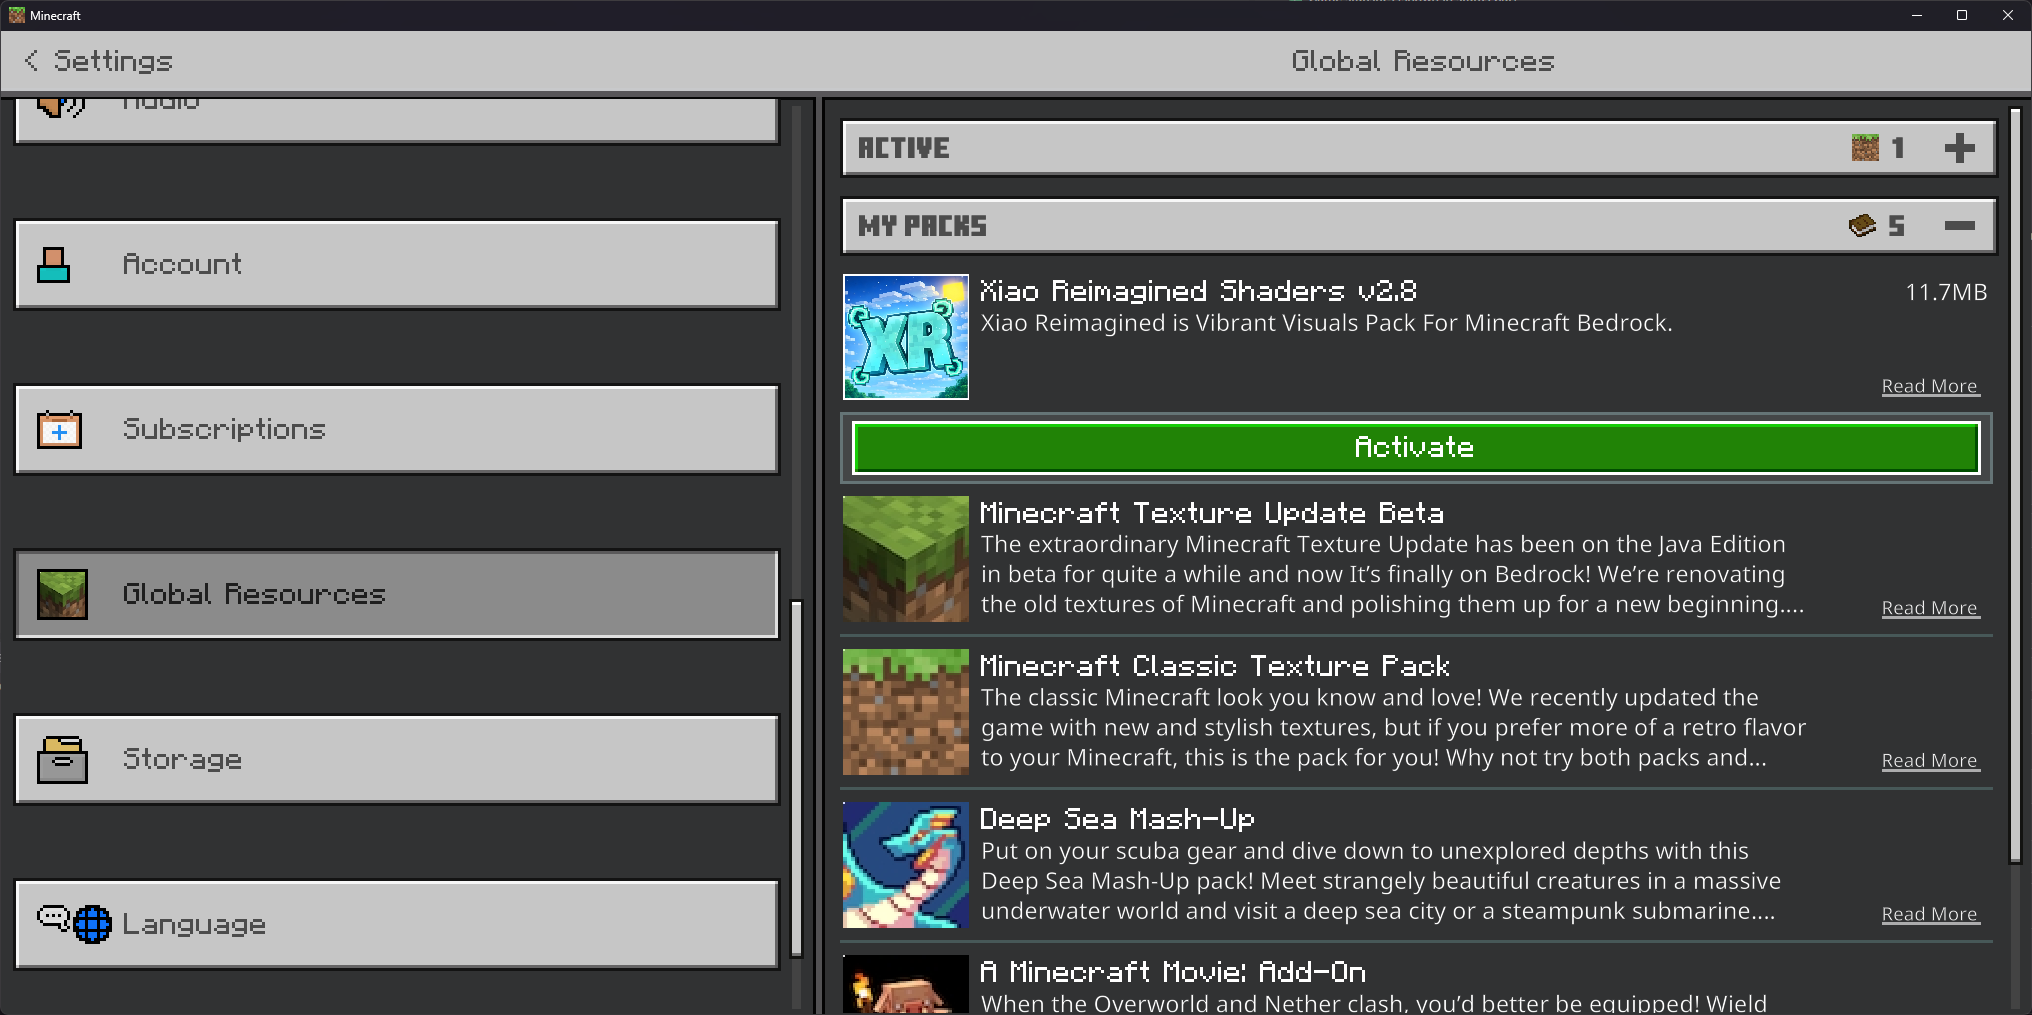
Step 3: Enable the Add-On in a World
Installing a pack doesn't automatically activate it.
To enable the add-on:
- Open Minecraft
- Click Play
- Create a New World or edit an existing world
- Scroll down to Resource Packs
- Select the add-on and activate it
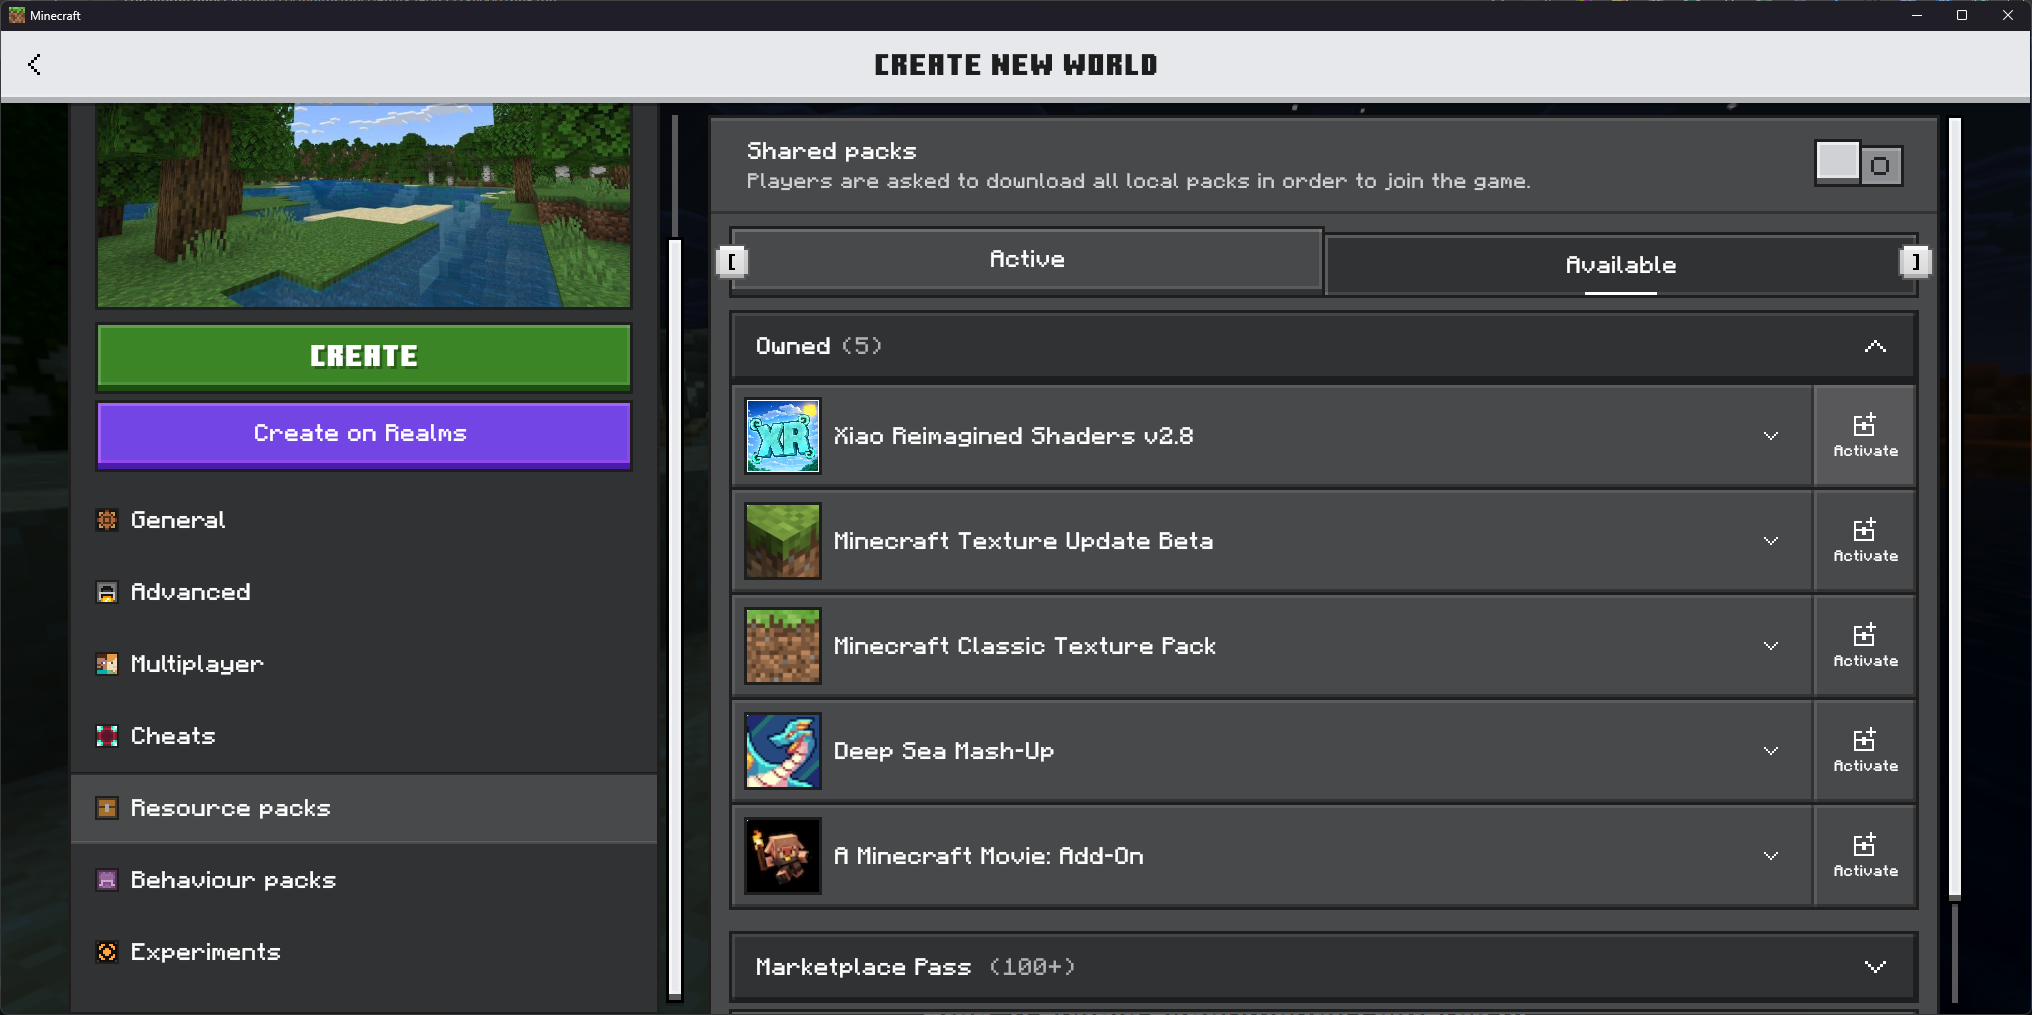
If the add-on includes gameplay changes, it will also appear under Behaviour Packs. Make sure it is enabled there as well.
Once the pack is active, start the world, enable them only if the add-on documentation mentions them, and the add-on should load with it.
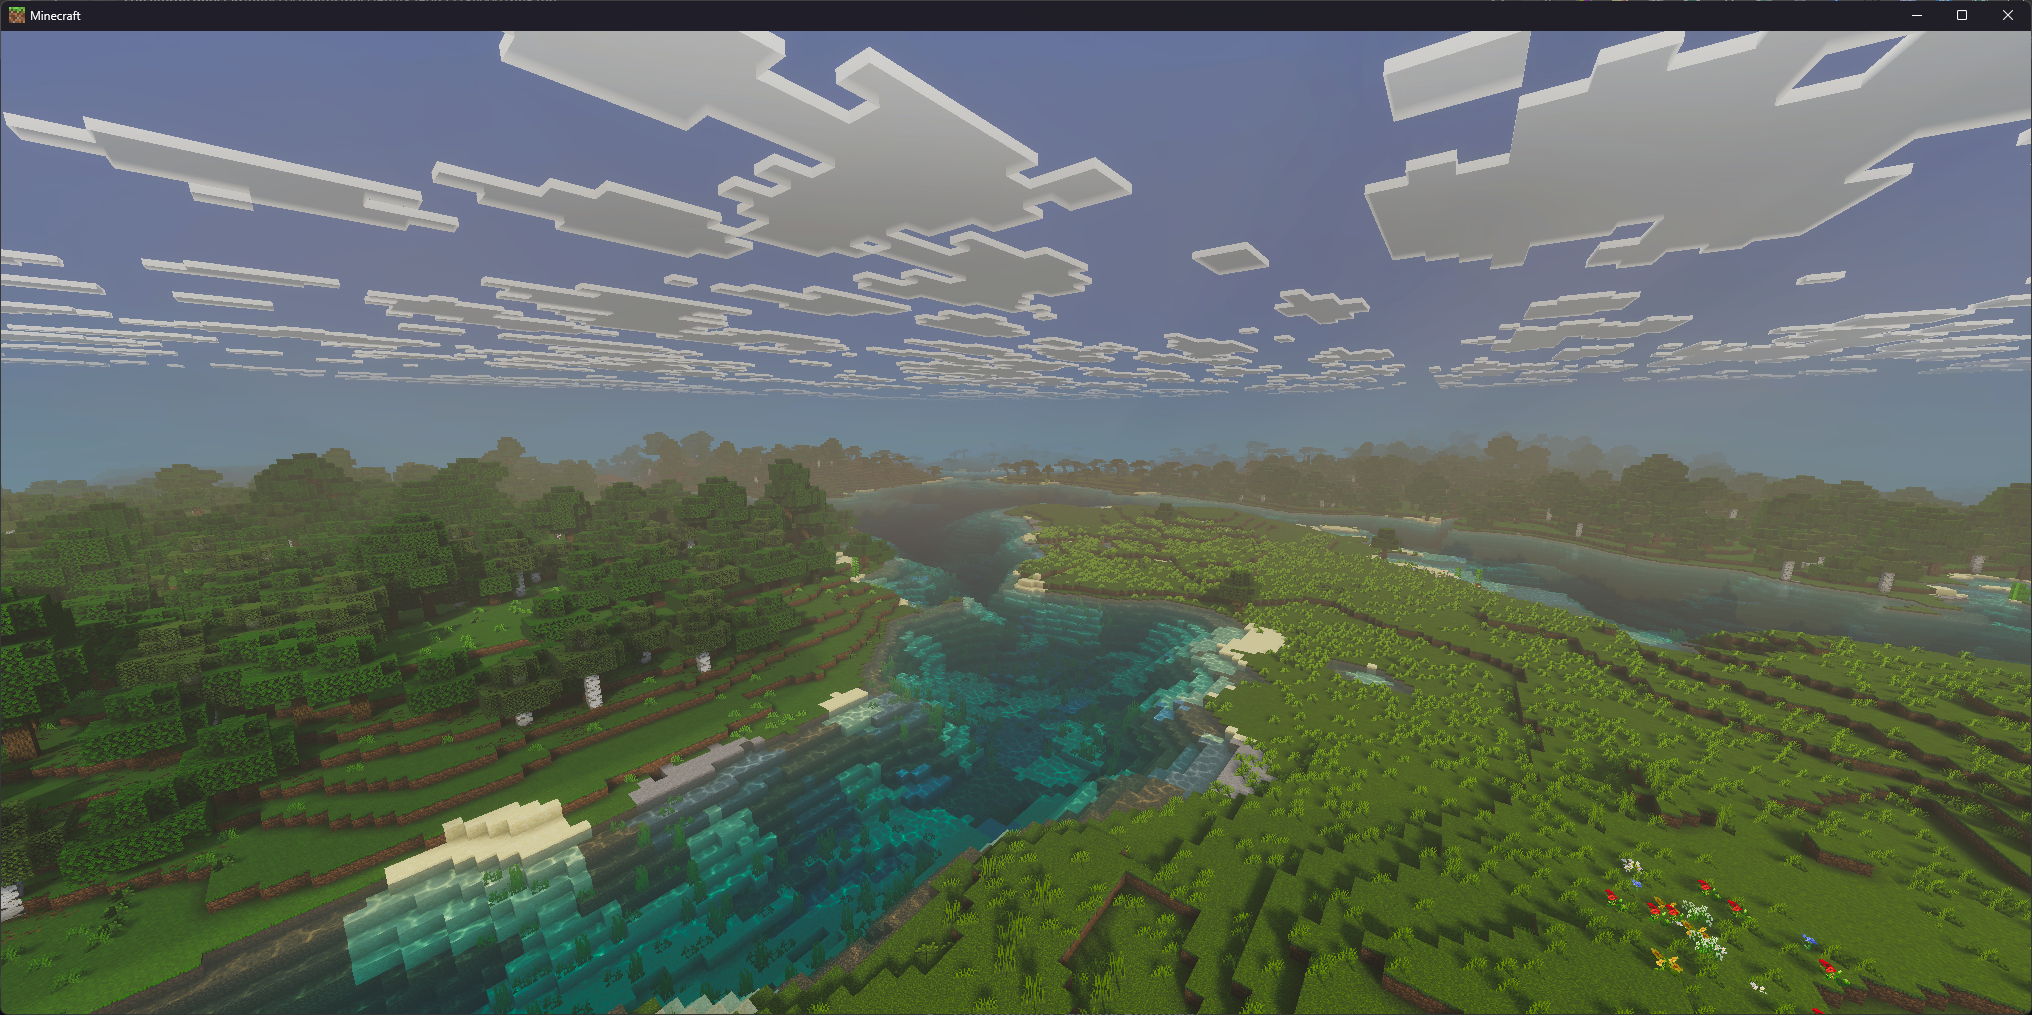
Once in-game, we can check if the mod was installed and activated correctly!
Step 4: Enable Experimental Features (If Required)
Some add-ons rely on experimental gameplay features.
If the add-on does not seem to work, open your World Settings and scroll down to the Experiments section.
Depending on the pack, you may need to enable options such as:
- Holiday Creator Features
- Upcoming Creator Features
- Beta APIs
Not every add-on requires these settings, so enable them only if the add-on documentation mentions them.
Fix: Add-Ons Not Showing in Minecraft
If the add-on is installed but nothing appears in your world, there are a few things worth checking.
First, make sure the pack is actually enabled in the world settings. Many players install packs but forget to activate them.
You should also check that your Minecraft version is up to date, as older packs may stop working after major game updates.
Finally, if the pack failed during import, try downloading the file again and reinstalling it.
Final Thoughts
Add-ons are one of the easiest ways to customize your Minecraft experience. Once you understand how the installation process works, trying out new packs only takes a few seconds.
Platforms like CurseForge host thousands of add-ons created by the community, ranging from small tweaks to complete gameplay overhauls.
If you're new to Bedrock add-ons, installing a few packs is a great way to make the game feel fresh again.