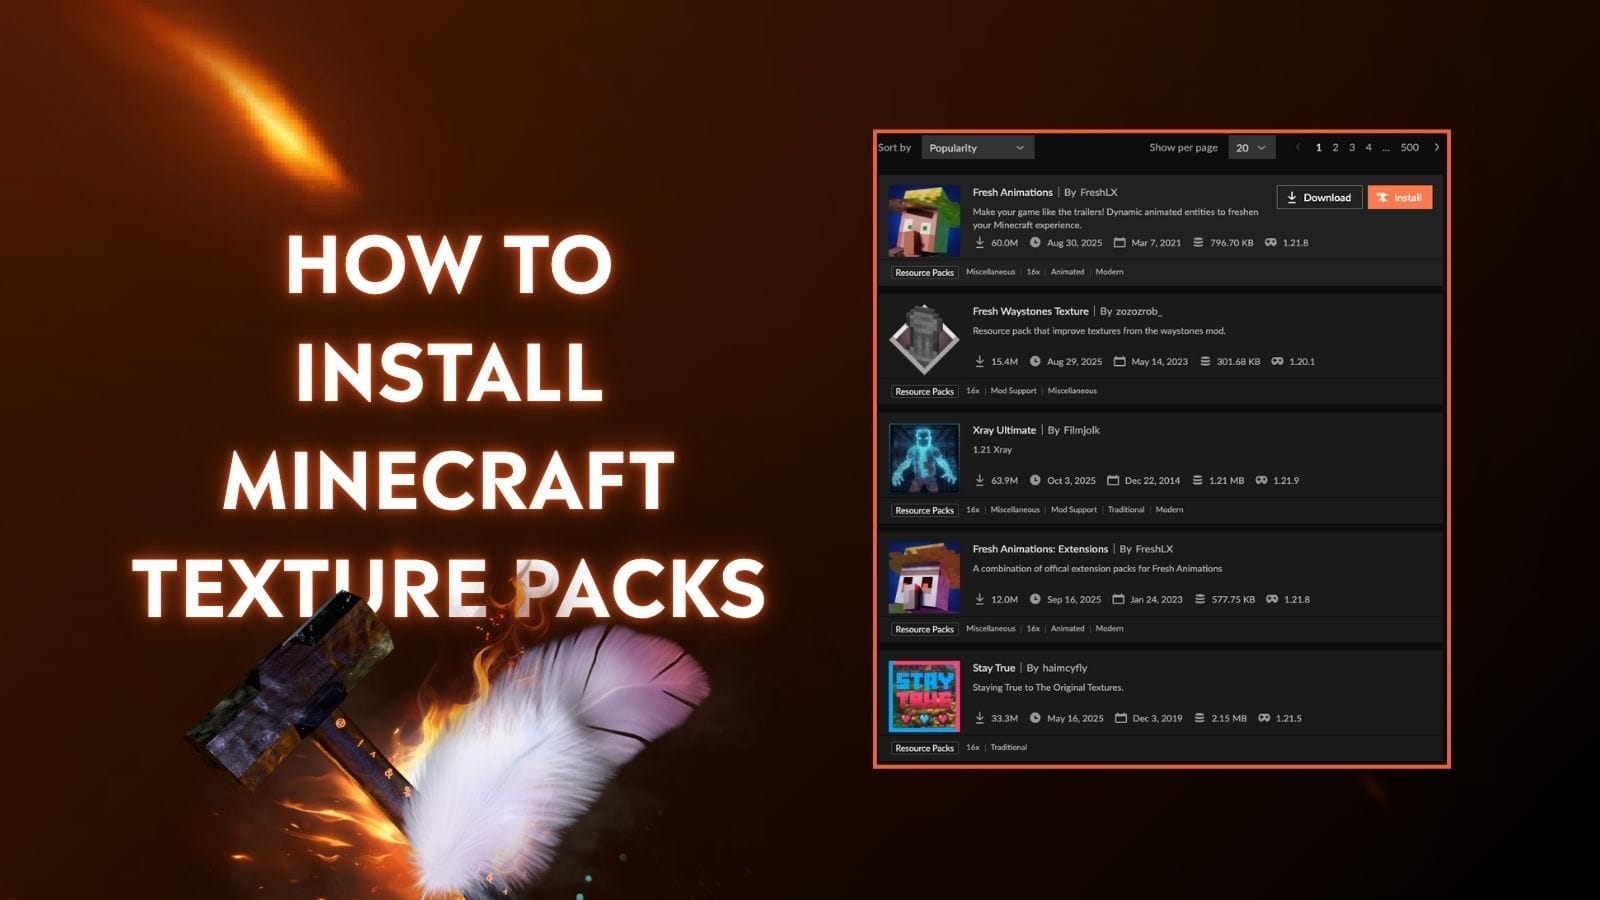
Texture packs (also called resource packs) are one of the easiest ways to completely transform your Minecraft’s appearance, from ultra-realistic stone blocks to pastel-colored mobs and animated skies.
If you're new to Minecraft or just want the easiest way to install texture packs, this guide is for you. We'll walk you through everything using the CurseForge app.
What Are Minecraft Texture Packs?
Texture packs change how things look in Minecraft – from blocks and items to mobs, skies, and menus. Think of it like giving the game a brand-new skin. Whether you want a cute cartoon vibe, a medieval overhaul, or realistic HD textures, there's a pack for it.
These packs are purely visual. They don't change how the game plays – just how it feels.
Why Use a Texture Pack?
- Enhance graphics
- Match aesthetic preferences (realistic, medieval, steampunk, etc.)
- Improve visibility/performance (e.g., PVP packs)
- Personalize your world
Difference Between Texture Packs and Resource Packs
You’ll often hear people use “texture packs” and “resource packs” interchangeably. Technically:
- Texture Packs: the old name (pre-Minecraft 1.6)
- Resource Packs: the modern name, because they can also change:
- Sounds
- Fonts
- UI elements like health bars or menus
That said, most players still say “texture pack” out of habit. Don’t worry, as they’re installed the same way.
Things to Know Before Installing Texture Packs
Before downloading and installing a Minecraft texture pack, you need to know the following:
- Texture Pack Resolutions: 16x (Minecraft’s default resolution), 32x, 64x, 128x+, etc. The higher it is, the more realistic, but also hardware-intensive, the texture pack becomes.
- Texture Pack Compatibility Versions: Choose the one that supports your Minecraft versions. Using the incorrect version might cause your game to crash, or the texture pack won’t load properly.
- Minecraft Version: The version you’re playing (for example, 1.21.5). You should pick a texture pack that is compatible with this version.
- Minecraft Edition: Java or Bedrock Edition. This matters because the installation methods and texture pack availability are different in each Edition.
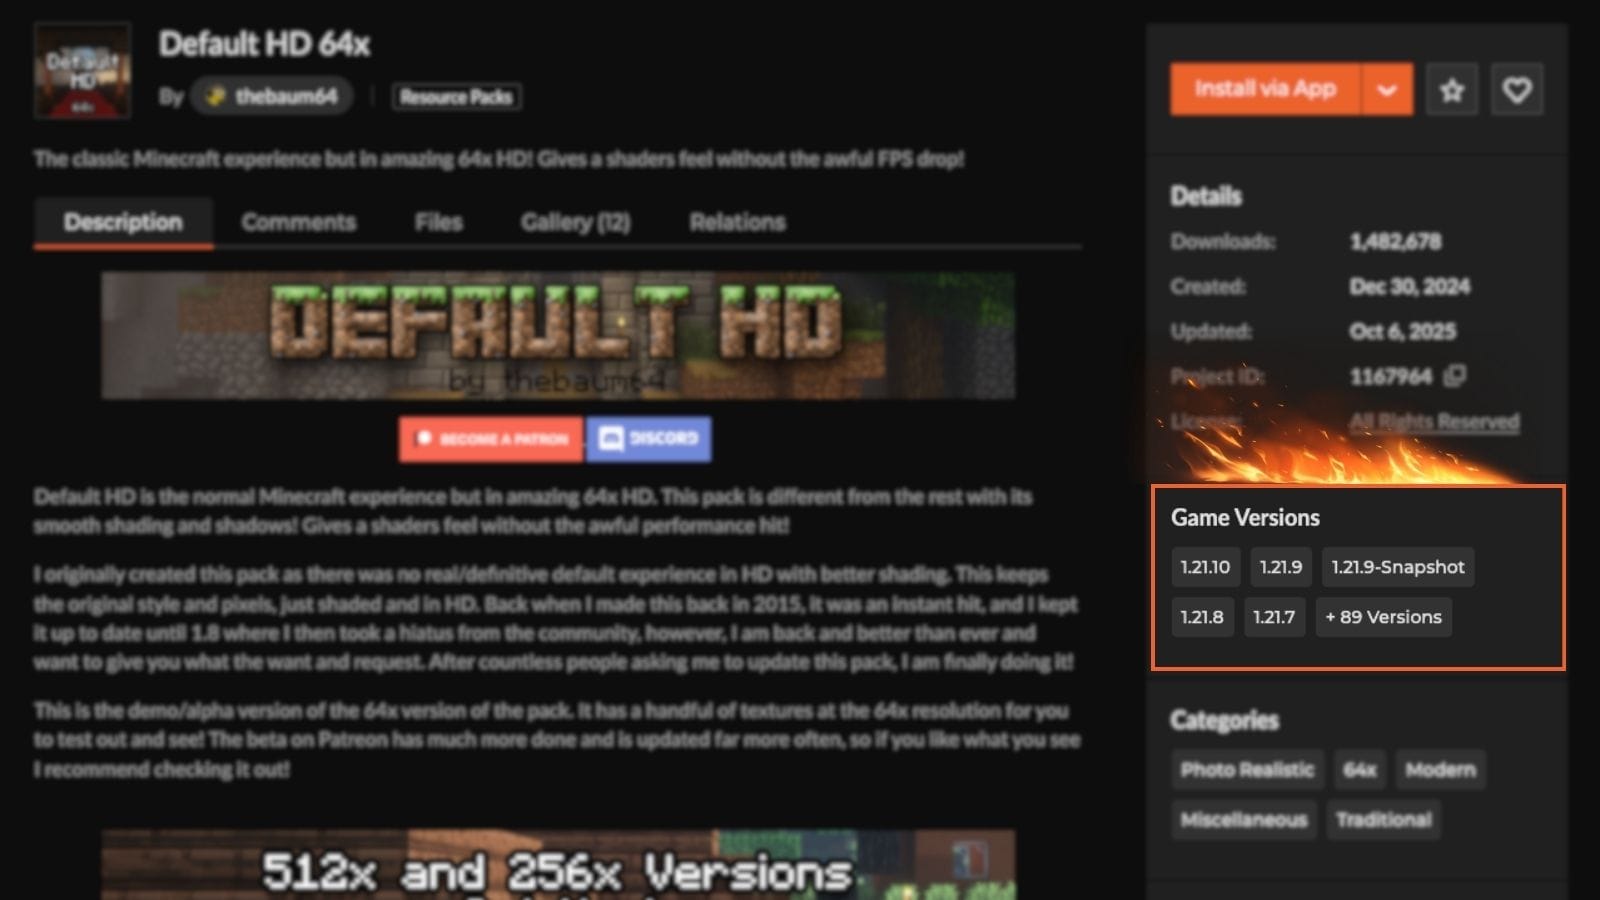
How to Check Texture Pack Resolutions and Compatibility Versions
The game versions and resolutions show directly on the texture pack page.
Let’s say you want to install the Default HD 64x texture pack. The supported versions can be found in the Game Versions section, and the resolution is in the Categories section.
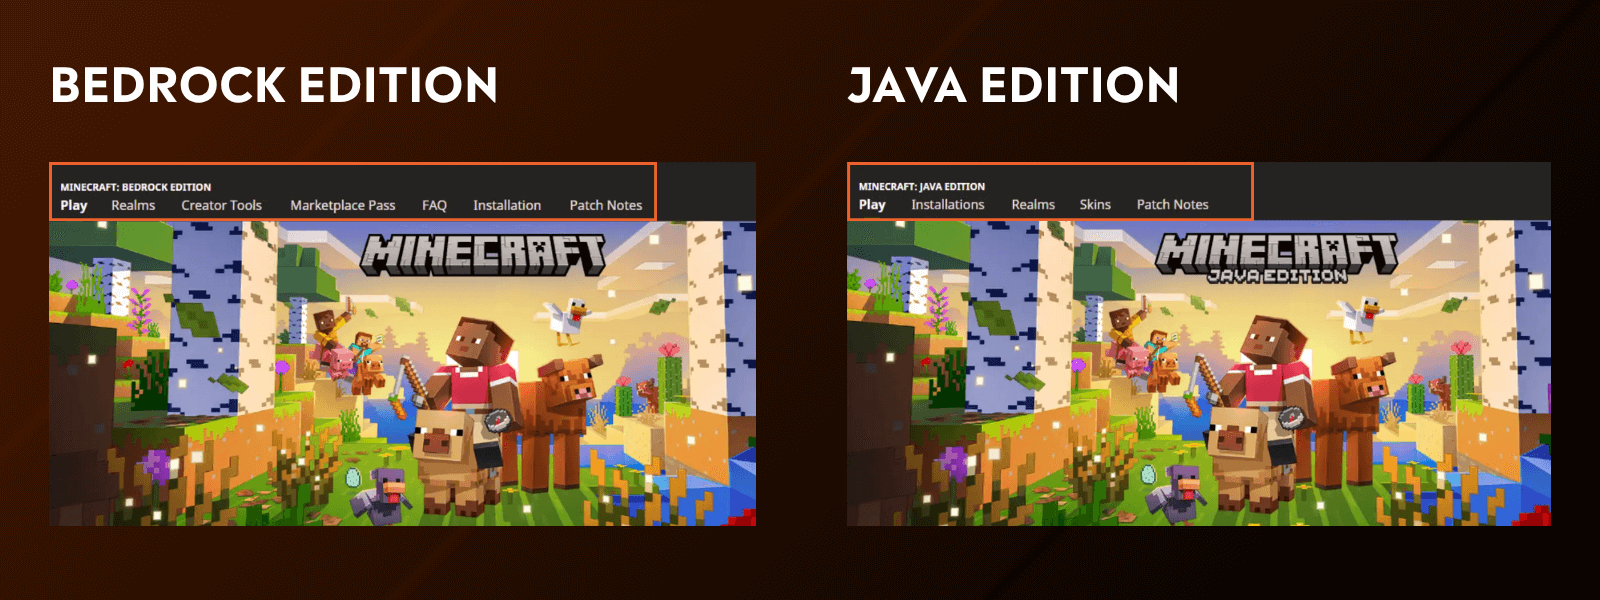
How to Check Minecraft Edition (Java/Bedrock)
Here’s how to determine which Edition you're playing:
- Java Edition: When you launch the game, the title screen will display "Minecraft: Java Edition" beneath the main logo.
- Bedrock Edition: The title screen will simply show "Minecraft" without any subtitle. Also, you see a Marketplace tab on the main menu.
How to Check Minecraft Version
Texture packs are made for specific Minecraft versions, like 1.20, 1.19, etc. If the version doesn't match, the textures might look broken, or the pack won’t work at all. So before you download anything, make sure you know which game version you're using.
| Java Edition With CurseForge | Java Edition Without CurseForge | Bedrock Edition |
|---|---|---|
Tap to view in fullscreen 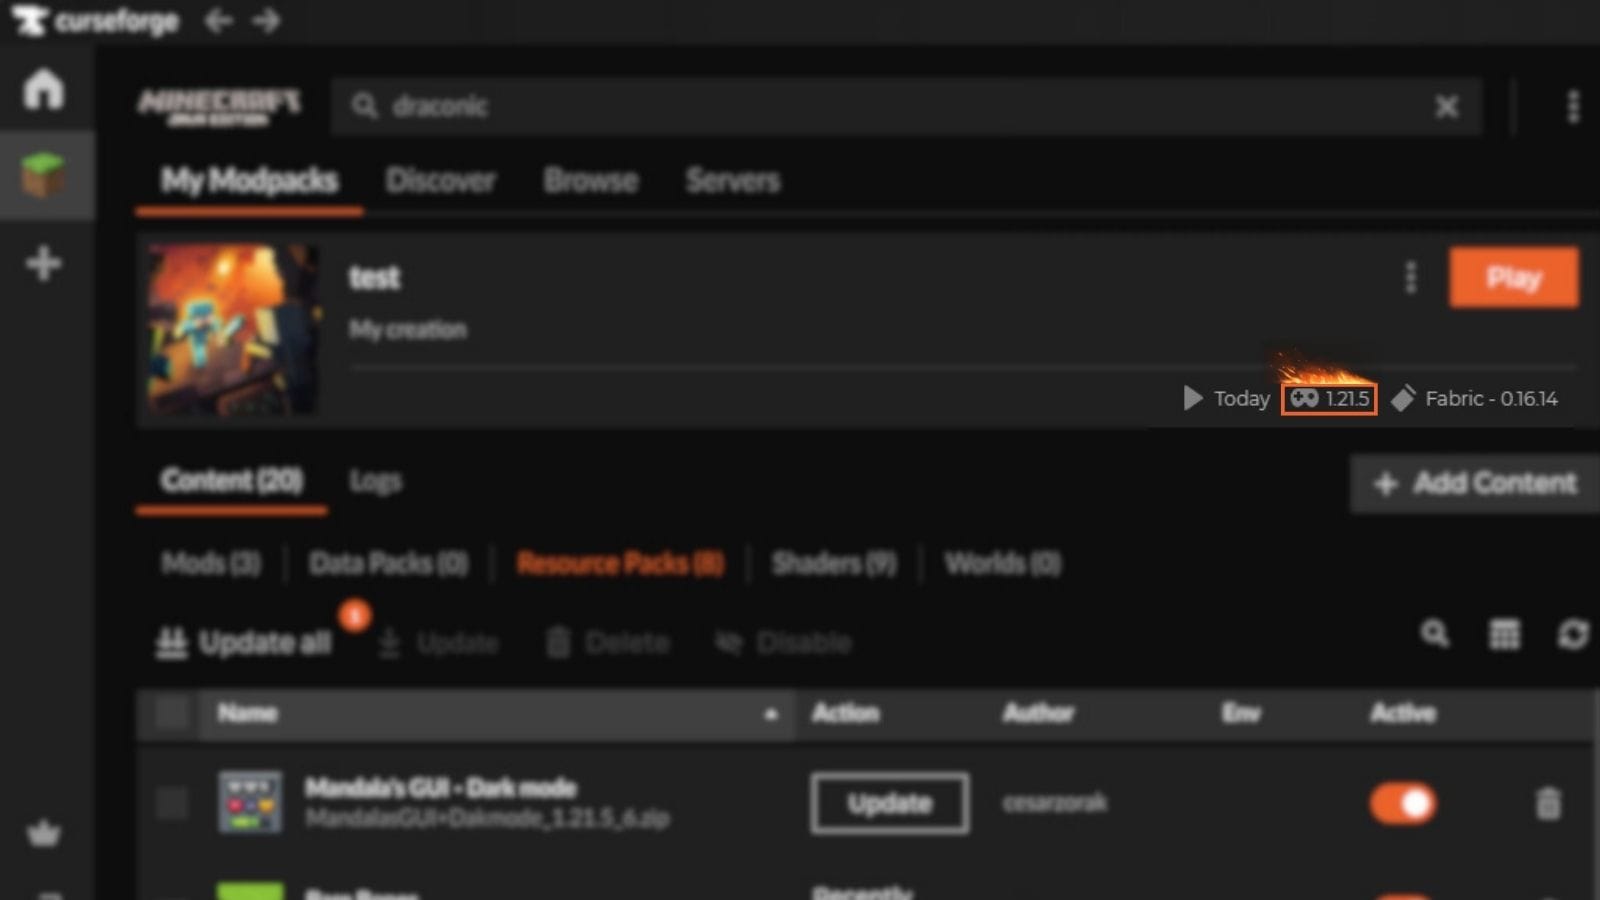 |
Tap to view in fullscreen 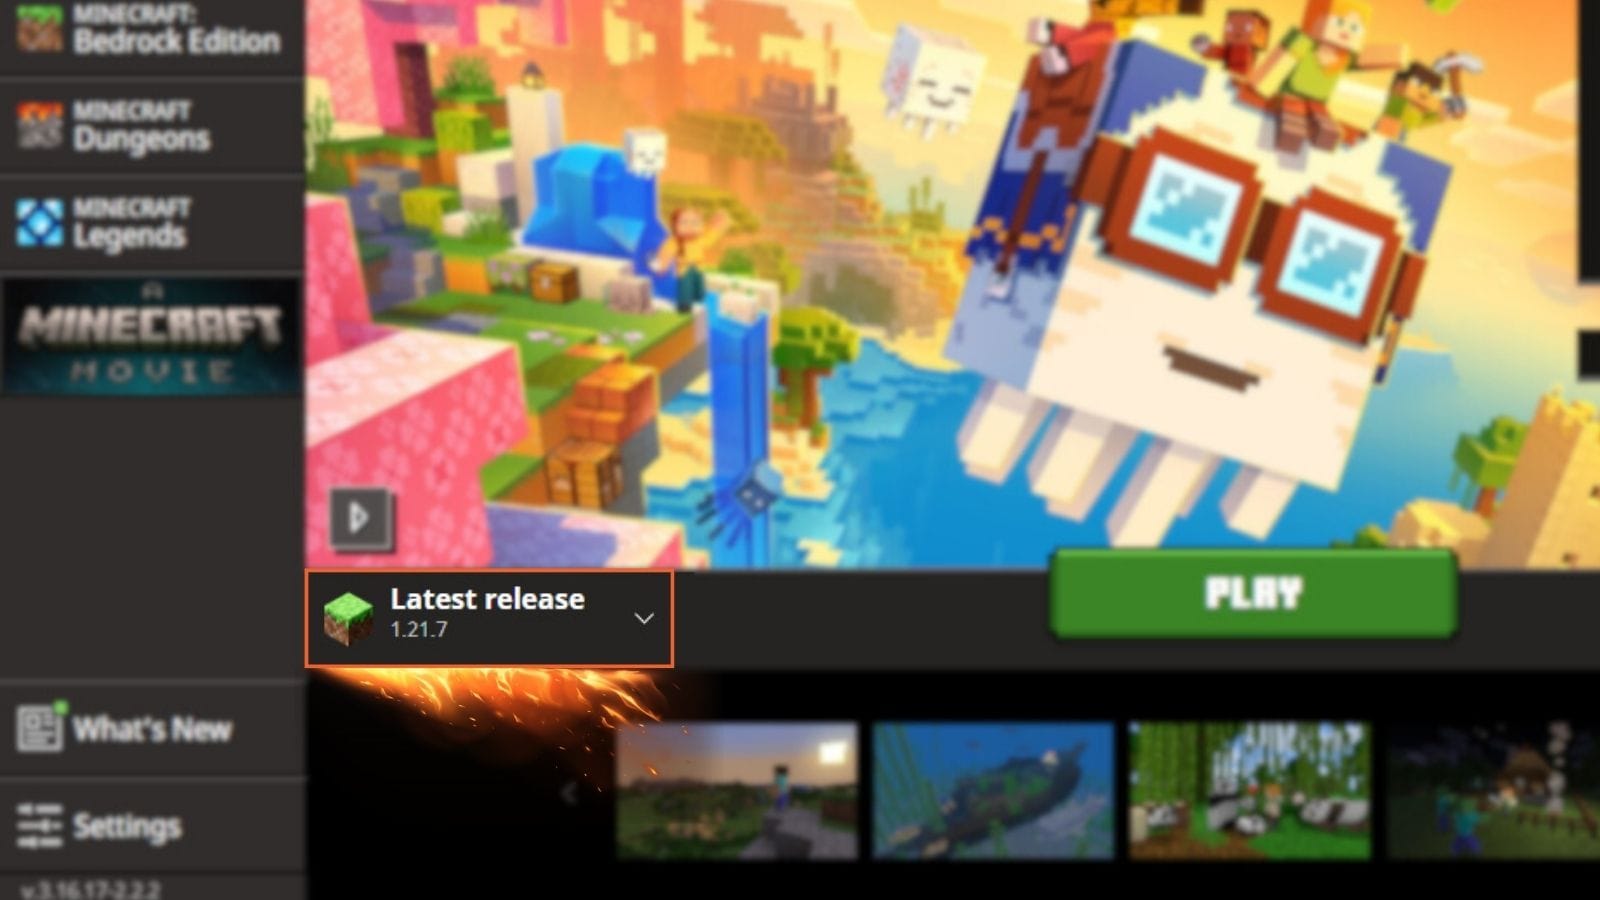 |
Tap to view in fullscreen 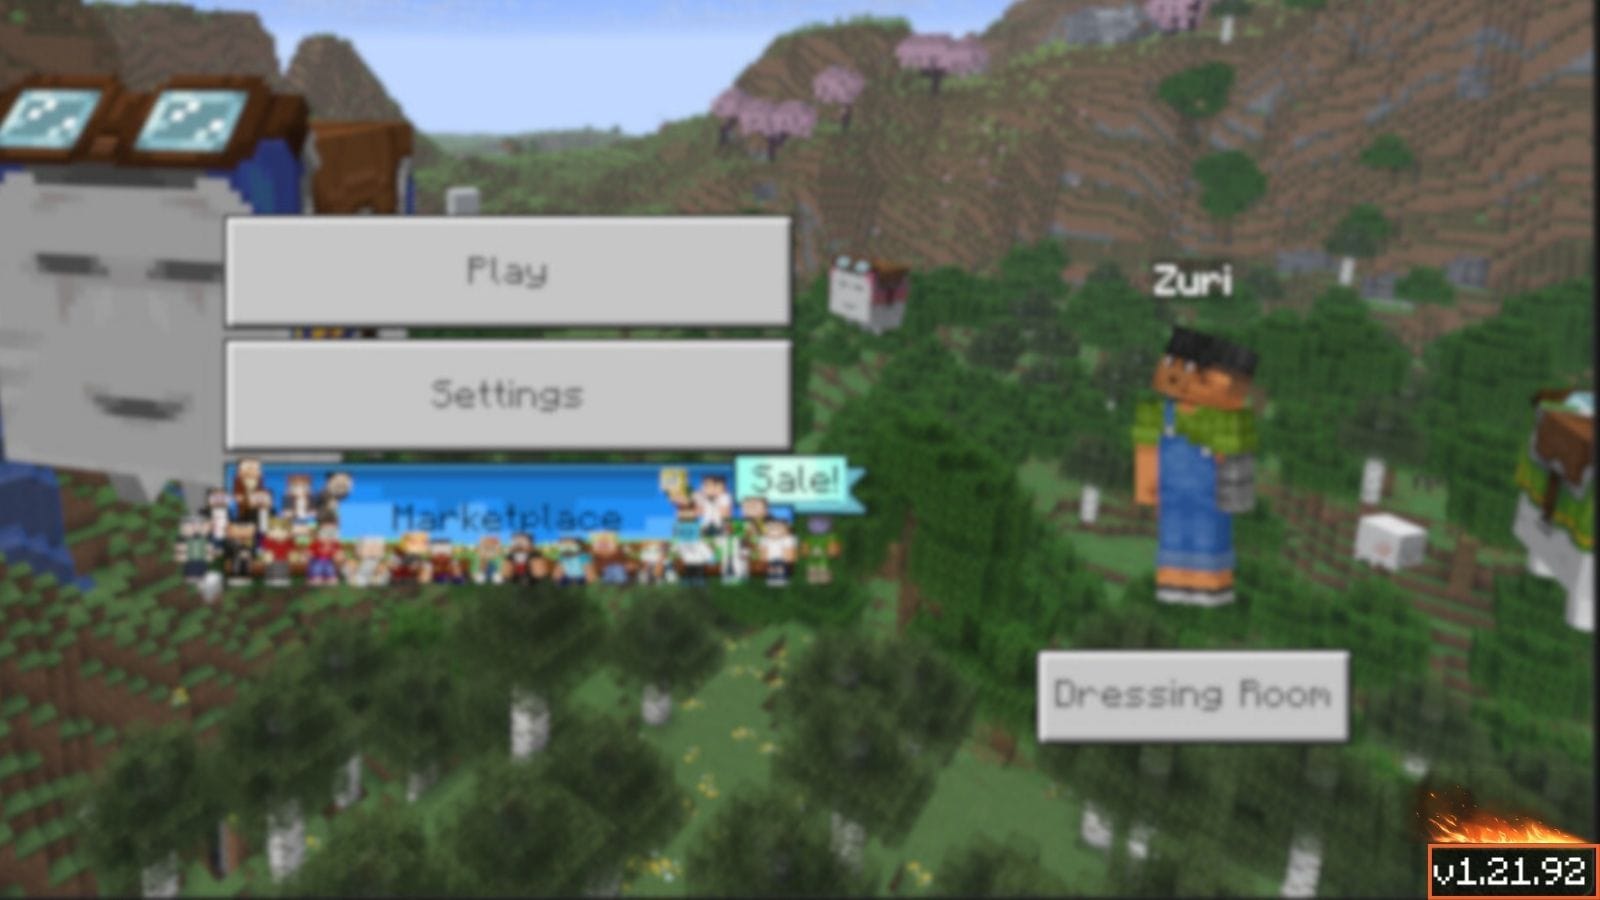 |
Tip: Most texture packs support a range of versions, but it's still good to match the numbers closely.
Now you know which Minecraft Edition and version you’re using. Let’s learn how to install texture packs for each Edition.
How to Install Minecraft Texture Packs For Java Edition
Method 1: Installing Texture Packs with CurseForge
- Download & install the CurseForge App.
- Go to www.curseforge.com
- Download either the standalone or the Overwolf version.
- Run the downloaded installer and complete the setup.
- Launch CurseForge and link your Minecraft installation.
- Go to the “Browse” tab and select “Resource Packs” in the dropdown.
- Search for your favorite texture pack and click “Install”.
- A panel will appear. If you want to install this texture pack to a pre-made modpack or profile, choose the “Select a profile” option and select your desired modpack. Otherwise, choose “Create a new profile”.
- Launch Minecraft through CurseForge and activate the pack.
| If you already have CurseForge installed | If you're new to CurseForge |
|---|---|
Best viewed in fullscreen |
Best viewed in fullscreen |
Method 2: Installing Texture Packs Manually (Video below)
- Find and download a texture pack from the CurseForge resource pack list.
- Make sure the pack version matches your Minecraft version. Also, choose the resolution based on your computer specs. Usually, 16x-64x are safe options for mid-range computers.
- Locate your Minecraft "resourcepacks" folder by typing the following command:
- Press Win + R > type %appdata%\.minecraft\resourcepacks
- Drag and drop the .zip file into the resourcepacks folder.
- Launch Minecraft.
- Go to Settings > Resource Packs > Activate your new pack.
Important Tips
- Don’t unzip the file unless the pack’s creator says to.
- If the pack doesn’t show up, double-check version compatibility.
How to Install Minecraft Texture Packs For Bedrock Edition (Video below)
Method 1: Using the Minecraft Marketplace
This is the official way to get texture packs on Bedrock. You don’t need to download anything manually.
- Open Minecraft Bedrock Edition.
- On the main screen, click Marketplace.
- Click “Textures & More” and browse for texture packs (can be free or paid).
- If you can’t find this button, go to Settings > Global Resources > Expand the Get More Packs tab > Click “View More Packs”.
- Select the pack you want, then click Download or Buy.
- Once it finishes installing, click the “Activate Texture Pack” on the pack page and activate it.
- You can also go to Settings > Global Resources and activate the pack later.
- Or apply it directly in your world settings before playing.
Tip: Marketplace packs are optimized for Bedrock and will always be compatible with your game version.
Method 2: Manual Installation (for .mcpack files)
You can also install free community-made texture packs found outside the Marketplace:
- Download the texture pack file from CurseForge.
- On Windows 10/11: Simply double-click the .mcpack file. Minecraft should automatically launch and begin importing the pack. Wait for the confirmation message: “Import Successful”.
- On Mobile Devices (Android/iOS): Open the .mcpack file using a file manager or directly through the browser. Minecraft will launch and start importing the pack.
- If double-clicking doesn't work or you prefer manual installation:
- Locate the Resource Packs Folder:
- Windows: Navigate to C:\Users\<YourUsername>\AppData\Local\Packages\Microsoft.MinecraftUWP_8wekyb3d8bbwe\LocalState\games\com.mojang\resource_packs
- Android: Use a file manager to go to /games/com.mojang/resource_packs/
- iOS: Due to system restrictions, manual installation is more complex and may require third-party applications or jailbreaking, which is not recommended.
- Move the Pack: Extract the .zip file if necessary, and move the extracted folder into the resource_packs directory.
- Locate the Resource Packs Folder:
- Open Minecraft and go to Settings > Global Resources to activate the pack.
How to Activate Texture Packs In-Game
Once you've placed/installed your texture pack in the correct folder, you still need to activate it in the Minecraft settings. Here’s how to do it in each Edition.
| Java Edition | Bedrock Edition |
|---|---|
|
|
Can You Use Multiple Texture Packs Together?
Yes! Packs at the top have the highest priority. If two packs modify the same texture, the one on top will override the one below.
This lets you layer packs intelligently. For instance, you could use a general HD pack as a base, and place a GUI pack above it to make sure the menus stay as you like.
Below is an example of a Minecraft world loading three resource packs: MandalasGUI, Fresh Animation, and Rustico 32x. In this case, even though Rustico 32x has its own GUI icons, those will be replaced by the MandalasGUI because it stays at the top.
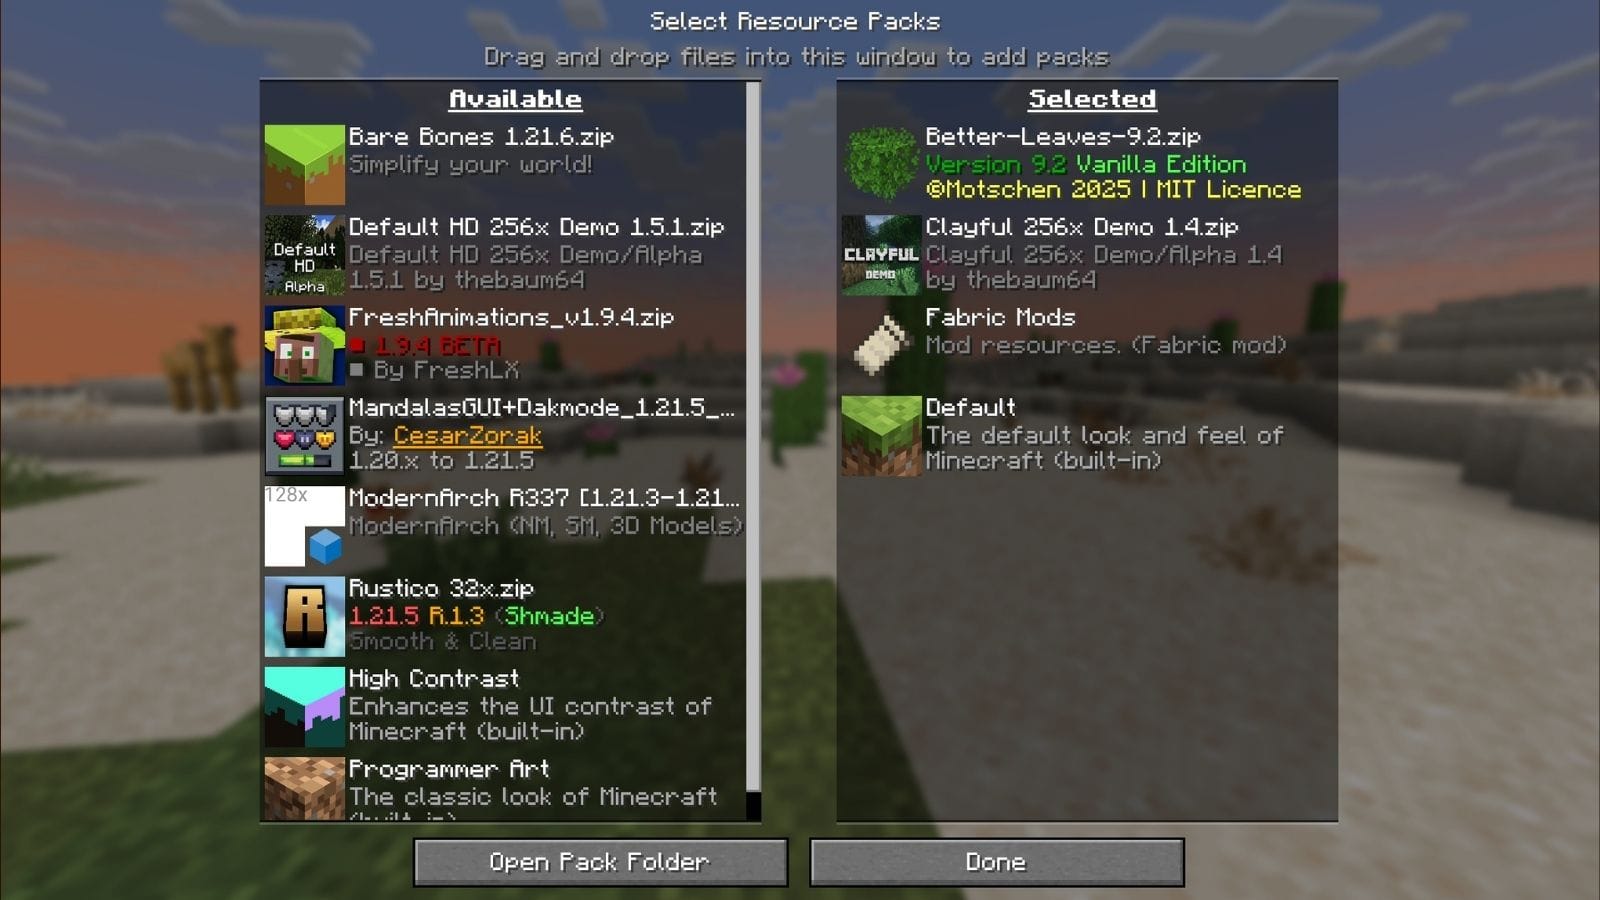
However, it’s a good idea to avoid overloading the game with too many large or high-resolution packs, especially if your computer isn’t very powerful. Some packs may also conflict with each other if they edit the same files, so test them one at a time if something looks off.
OptiFine/Shader Support Texture Packs
Some texture packs go beyond just changing how blocks look – they include special visual effects like:
- Connected textures (glass or bookshelves blending smoothly)
- Custom skies (realistic stars, sunrise/sunset)
- Better lighting and shading
To see these advanced features, you'll need extra mods like:
- OptiFine: The most well-known mod for enabling shaders and extra visual features like connected textures and custom skies in Java Edition, however it is often incompatible with other mods.
- Oculus + Embeddium: Designed for NeoForge or Forge modpacks, this pair boosts performance (Embeddium) and enables shaders (Oculus), offering a modern replacement for OptiFine in many setups.
- Iris + Sodium: A performance-friendly alternative to OptiFine, compatible with the Fabric, NeoForge or Quilt mod loader.
These are only for Java Edition. Bedrock Edition doesn’t support OptiFine, but some Marketplace packs include similar visual upgrades.
How to Tell If a Pack Needs OptiFine
The texture pack’s description will usually say things like:
- "Requires OptiFine".
- "Custom skies only work with OptiFine".
- "Enable connected textures in OptiFine settings".
Also, if it includes folders like /mcpatcher/ or /optifine/, it likely uses OptiFine features. If you don’t use OptiFine or Iris, these special effects just won’t show. The pack will still work in a basic way.
Using Texture Packs with Modpacks
If you're playing a modded version of Minecraft (like those downloaded through CurseForge), using texture packs can be a bit different.
Many modpacks already include built-in texture packs that are carefully designed to match the content and mods they contain. In most cases, it's best to stick with the included visuals to avoid any compatibility issues or visual glitches.
However, if you’d like to enhance the look without changing the core style too much, you can try lightweight or cosmetic-only packs. For example, animation-focused packs like Fresh Animations. These generally don't interfere with modded content and can be layered on top of existing packs safely.
If you want to go further and apply a full texture overhaul, make sure the pack you’re using includes modded texture add-ons for the specific mods in your pack. For instance, if your modpack adds new ores, mobs, or machines, you’ll need a version of the texture pack that also supports those elements. Otherwise, they’ll look out of place.
To find compatible options, go to CurseForge and search using the modpack name or names of specific mods. Many well-known packs (like Faithful, Sphax PureBDcraft, or Unity) offer optional add-ons or community-created support for modded content.
Troubleshooting Texture Pack Installation
Why isn’t my texture pack showing up in the game?
Make sure the pack is placed in the correct folder:
- Java Edition: \AppData\Roaming\.minecraft\resourcepacks
- Bedrock Edition:
- Windows: %LocalAppData%\Packages\Microsoft.MinecraftUWP_...\LocalState\games\com.mojang\resource_packs
- Mobile: com.mojang/resource_packs
Also, ensure the pack is compatible with your Minecraft version and is properly zipped (Java) or in .mcpack format (Bedrock).
I double-clicked a .mcpack file but nothing happened
Try restarting Minecraft and check under Settings > Global Resources. If it still doesn’t appear, move the file manually into the resource_packs folder. Some systems may not associate .mcpack with Minecraft automatically.
The texture pack looks glitchy or broken
This usually happens if the pack was made for a different version of Minecraft. Check the version compatibility on the download page.
I installed the pack but Minecraft still looks the same
Installing isn’t enough; you also need to activate the pack:
- Java Edition: Go to Options > Resource Packs and move the pack to the “Selected” column.
- Bedrock Edition: Go to Settings > Global Resources or the world’s Resource Packs tab, and tap Activate.
My game crashes when loading a texture pack
The pack may be too large or incompatible. Try removing it from the folder and restarting the game. For low-end systems, avoid 256x or 512x resolution packs and stick to 16x or 32x.
| Java Edition With CurseForge | Java Edition Without CurseForge | Bedrock Edition |
|---|---|---|
|
|
|