
Hytale gives you two main ways to mod: Packs and Plugins. If you want to add blocks, items, models, and sounds, start with Packs. You'll use tools like the Asset Editor and Blockbench, and you don't need to write any code.
Plugins are different – they're for people who want to write Java code to add custom commands, events, and deeper gameplay mechanics.
Both, however, perfectly fit into Hytale’s server-side setup – after all, Hytale is meant to be primarily modded server-side, even when you're playing alone.
On CurseForge, Hytale mods mainly fall into three types: Packs, Plugins, and Early Plugins. Hytale’s goal is to let players join modded servers without needing external client mods or separate client packs, though some of the tooling is still rough because the game is in Early Access.
What You Need to Create Hytale Mods
Java JDK (Plugins only)
Building a plugin? You'll need Java 25 or newer. If you're only making Packs, you can skip this entirely.
IDE (Plugins only)
Most people use IntelliJ IDEA Community Edition for plugin development. It's free, handles Gradle projects without issues, and works well with the Hytale plugin template. There are other options if you prefer a different IDE, but IntelliJ is what most expect you to use.
Hytale's Built-in Tools
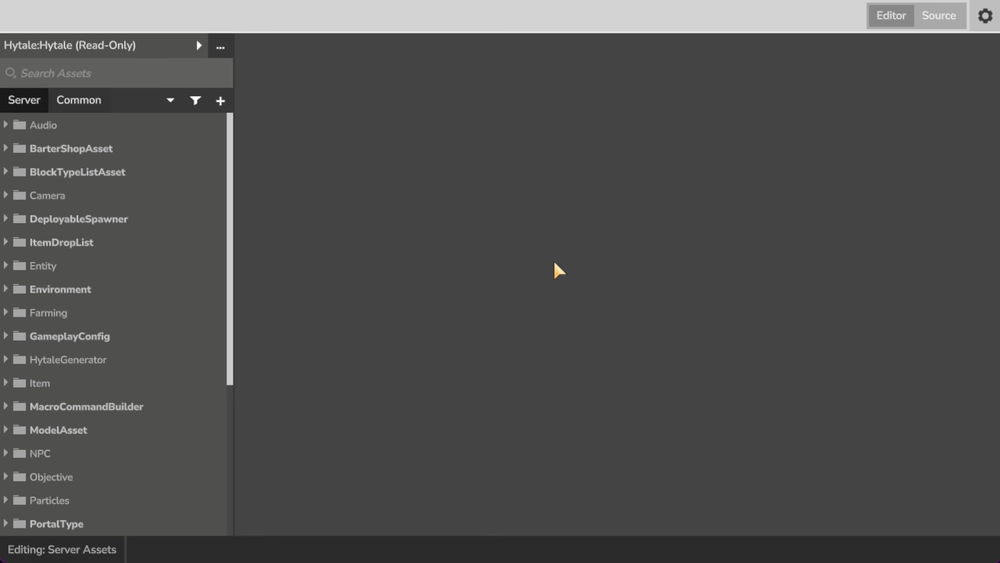
The Asset Editor is built into the game. You'll use it to modify packs and create most types of assets. It's your main tool for working with blocks, items, models, textures, and a lot of other content. Some things like NPCs, world generation, and certain interactions don't work yet, but most asset types are supported.
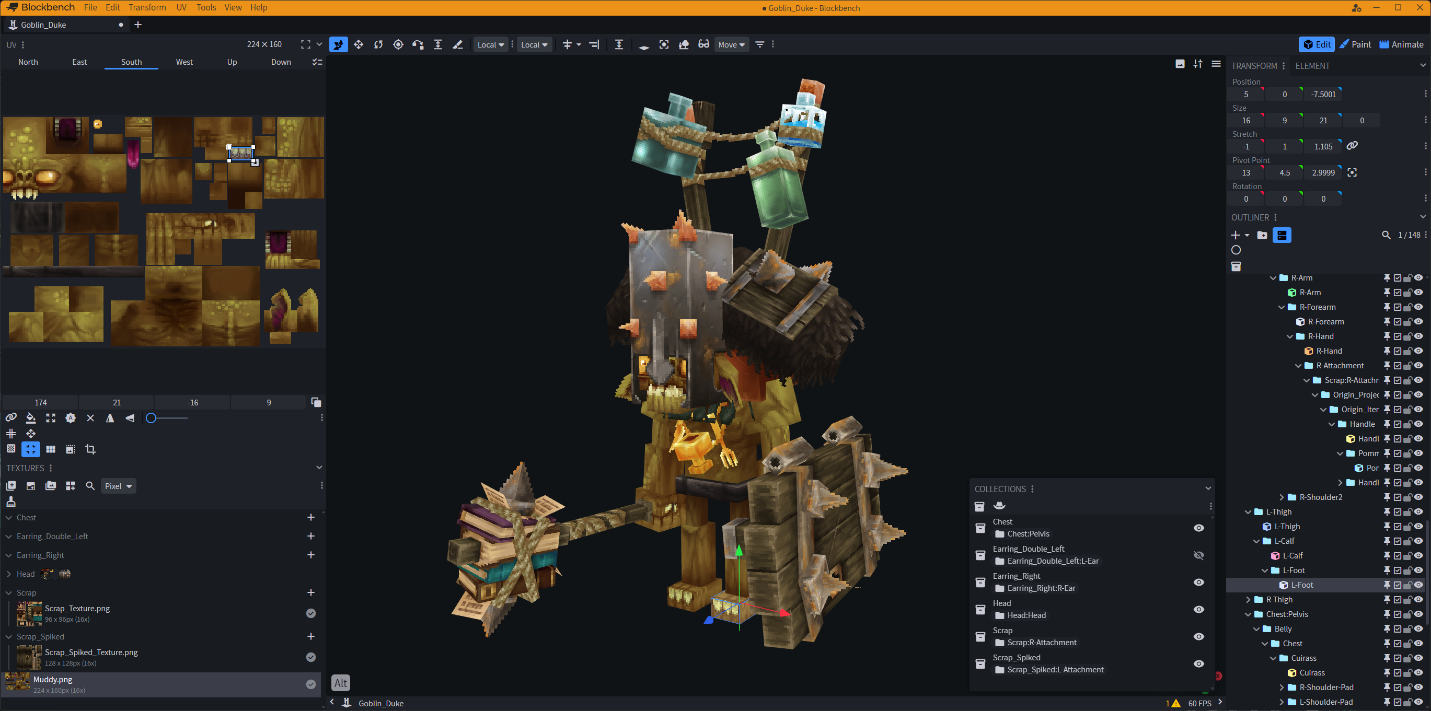
Blockbench with the Hytale plugin is how you make models, textures, and animations. It's a separate software, but it's the official way to create 3D content that works with Hytale. The Hytale plugin for Blockbench makes sure your models export in the right format.
Version Control (Optional)
GitHub helps if you're working with other people or want to track changes over time. While this is not required for solo projects, it’s worth setting up if you're planning anything bigger than a quick test mod. Besides, you can always add it later if you decide you need it.
Creating an Asset Pack
Packs are the easier starting point as no coding skills are required, and you get to work directly with visual tools.
Step 1: Make the Project Folder
Create a folder for your pack in the Hytale packs directory. This is where you’ll develop your pack before packaging or sharing it.
- Windows: "%AppData%\Hytale\UserData\Packs\YourPackName"
- Other platforms: Open the CurseForge app, go to Hytale, click the three dots, and choose "Open Mods Folder". Then navigate to the Hytale "UserData/Packs" folder and create your pack folder there.

Step 2: Add a Manifest File
Inside that folder, create "manifest.json". This file tells Hytale what your pack is and what it needs to run. You'll also need to include your pack's name, version, description, authors, and any dependencies. If your pack needs another mod to work, that goes in the dependencies section.
Step 3: Set Up Folders
Make two folders inside your pack folder: "Common" and "Server".
- Common is where models and textures live. Anything visual goes here.
- Server is where you define how things work in the game – item definitions, block definitions, translations, particles, and other gameplay data.
Step 4: Add Content
Use the Asset Editor or Blockbench to create what you want to add to the game. Visual stuff like models and textures goes in "Common". Gameplay definitions – the files that tell Hytale what your blocks and items do – go in "Server". The Asset Editor can handle a lot of this directly in-game, which makes testing faster.
Step 5: Share Your Creation
While you're developing, keep your pack in the "UserData/Packs" folder. This lets you test it without packaging it every time you make a change. When you're ready to share it with other people or install it like a regular downloadable mod, package the whole folder as a ZIP file and put it in the Mods folder instead.
- Windows: "%AppData%/Hytale/UserData/Mods"
- Other platforms: Use the CurseForge app menu to open the mod folder.
Step 6: Test the Mod
- Launch Hytale.
- Right-click the world you want to test in.
- Enable the pack from the mod list.
- Save your settings, and load into the world.
- Walk around and check if everything shows up the way you expect.
TIP: The Asset Editor works in-game too, so you can open it up and keep tweaking things without restarting every time.
Creating a Plugin
Plugins need Java code, so the setup is a bit more involved. But once you get it working, you have a lot more control over your game mechanics.
Step 1: Clone the Template
There’s an IntelliJ template already set up for Hytale plugins. It includes the basic folder structure and files you need.
- Open a terminal or command prompt and run this command to download the template:
"git clone https://github.com/HytaleModding/plugin-template.git MyFirstMod"
- Run this command to move into the new project folder:
"cd MyFirstMod"
This gives you a ready-made starting point instead of building everything from scratch.
Step 2: Open Project in Your IDE
Open the project in IntelliJ IDEA or whatever Java IDE you're comfortable with. If your IDE handles Gradle, it should detect the project structure and set itself up automatically. If not, you might need to import it as a Gradle project manually.
Step 3: Update the Manifest
Edit "src/main/resources/manifest.json" and change the placeholder information to match your actual plugin. Next, update the name, version, description, and author fields – this is what shows up when people look at your mod in-game or on CurseForge.
Step 4: Write Some Code!
Add your Java code under the "src" directory. If you're new to plugin development, start simple – try adding a basic command or listening for an in-game event. Once you get something small working, you can build on it. Commands and events are good first steps because you can test them quickly.
Step 5: Build Your Mod
When you're ready to test, run the build command: "gradle build" or “gradle build” in the left of the IDE
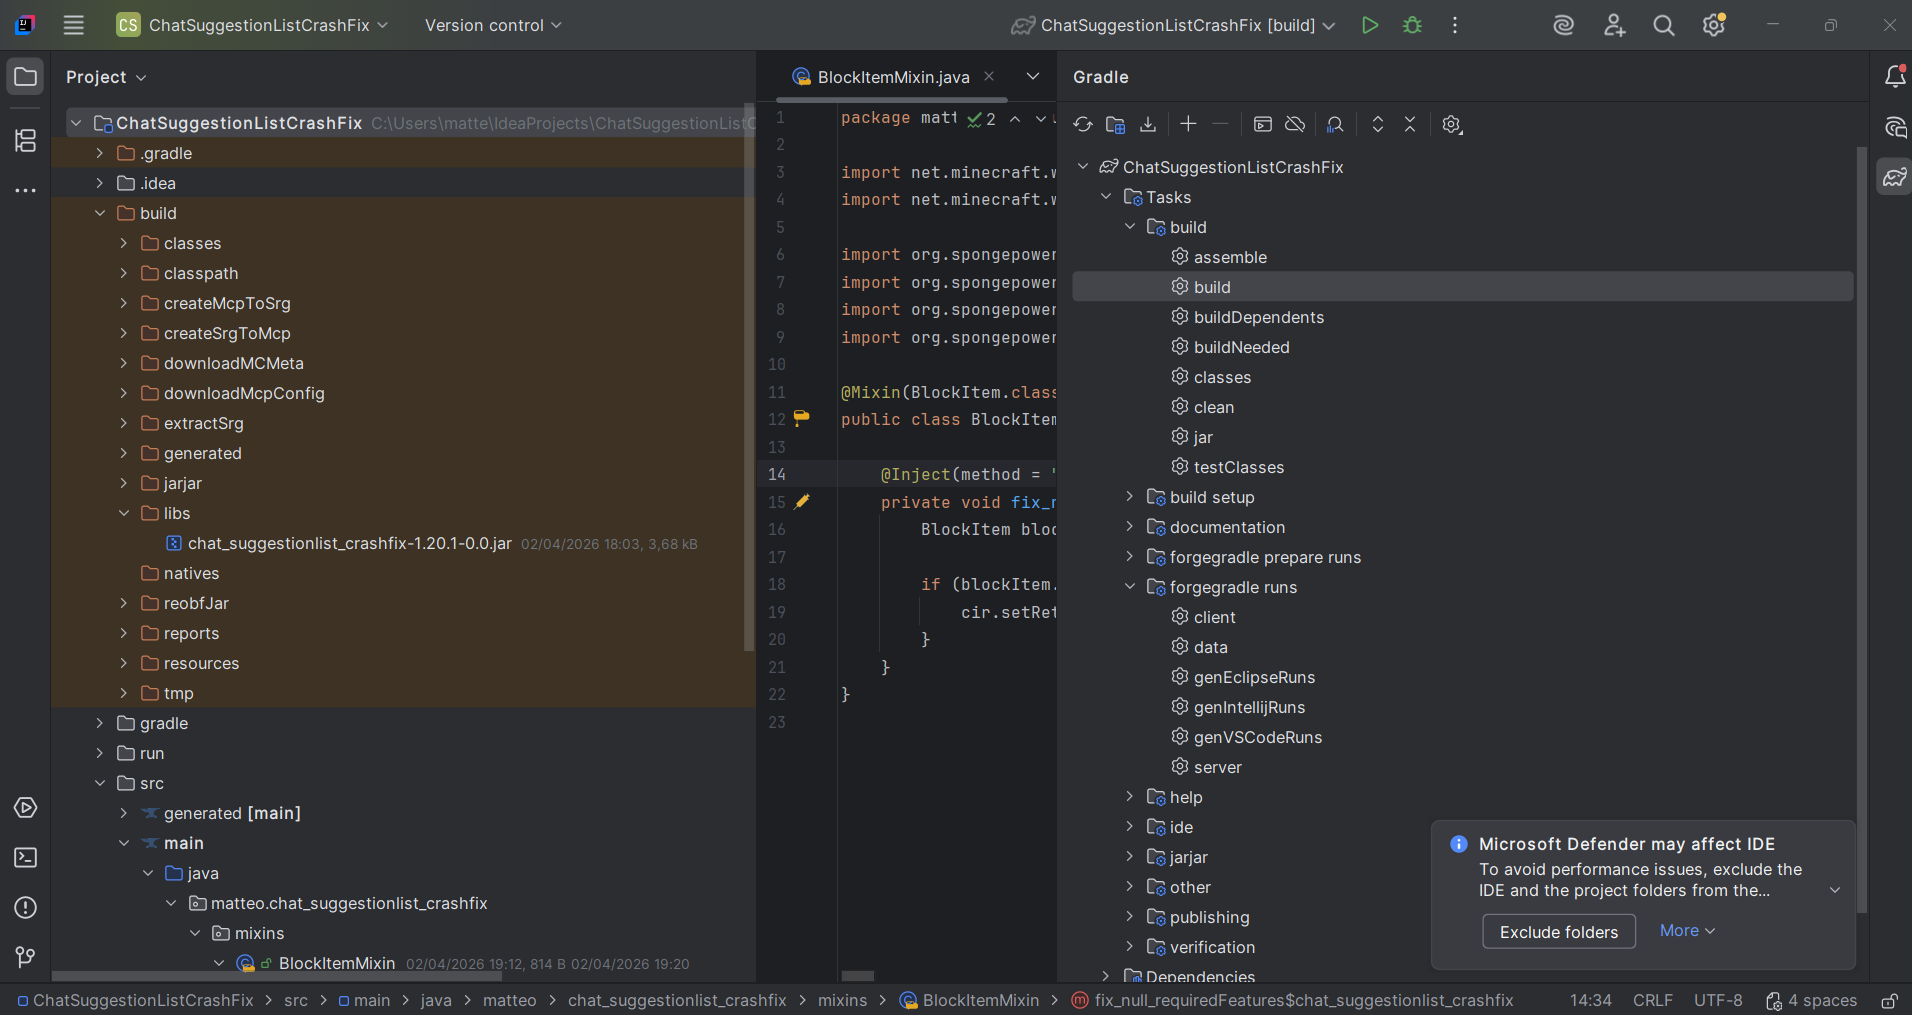
If everything compiles without errors, you’ll get a JAR file in the builds/libs directory. That JAR is what you'll use to install your mod in Hytale.
Step 6: Install and Test
- Copy the JAR file to your Hytale mods folder.
- Windows: "%AppData%\Hytale\UserData\Mods".
- Other platforms: Open the CurseForge app, go to Hytale, and use the menu to open the mod folder.
- Launch Hytale and right-click the world you want to test in.
- Enable the plugin from the mod list and save your settings.
- Load into the world and test whatever functionality you added.
TIP: If something doesn't work, check the logs – they usually tell you what went wrong.
Publishing on CurseForge
Once you've built a mod and tested it enough to know it works, you can publish it so other people can download it.
Step 1: Create a Project
- Open the project form.
On CurseForge, hover over "Create" and click "Start a Project".
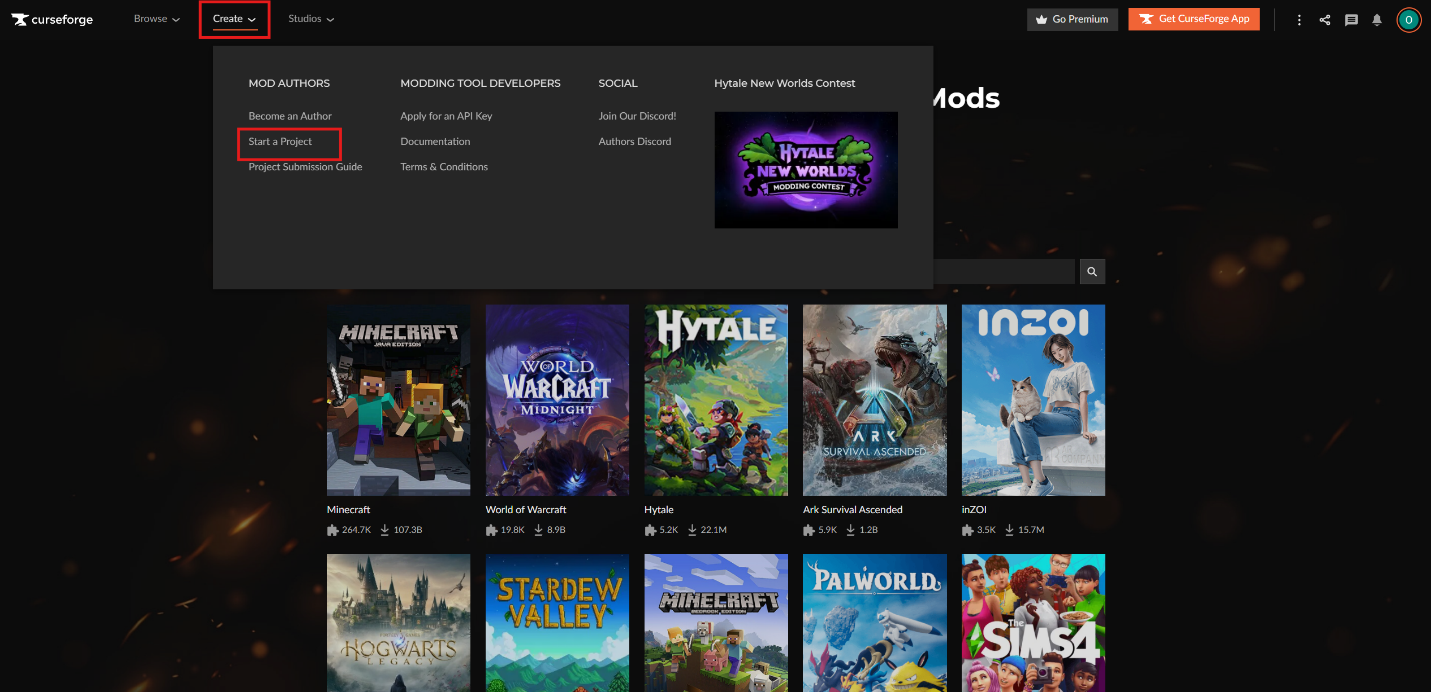
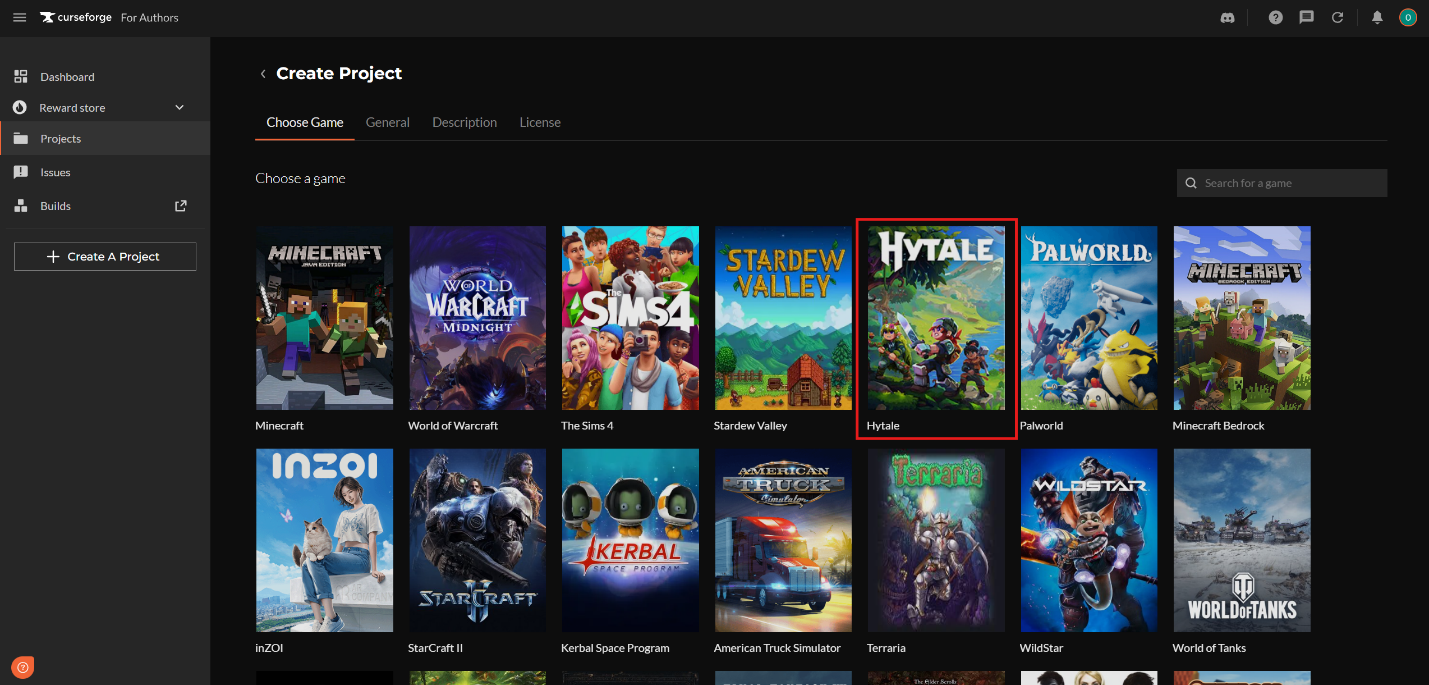
- Choose Hytale.
Select Hytale from the games list.
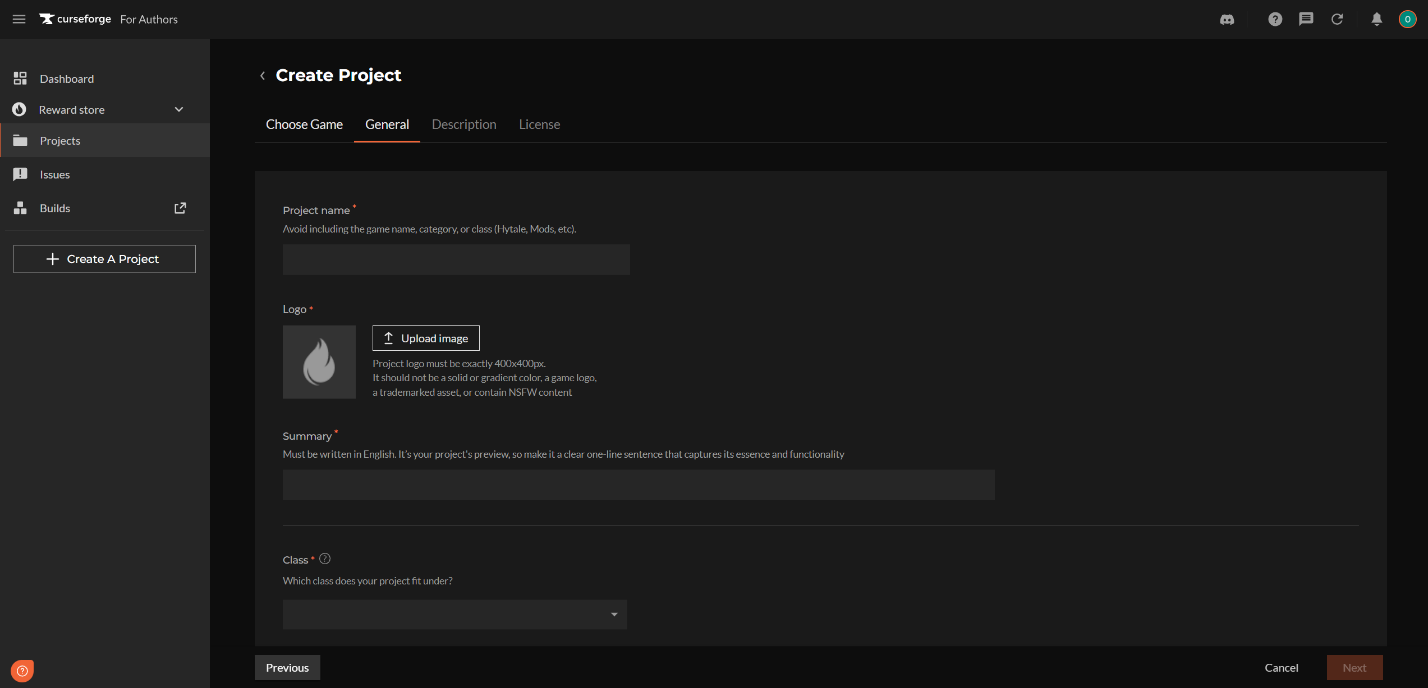
- Fill in the project details.
Enter your project details, then choose the class that fits your project:
- "Mods" for Packs and Plugins.
- "Worlds" for custom worlds.
Step 2: Upload Your Project
Go to the "Files" tab and click "Add File". Then upload your file:
- Plugin: upload the JAR.
- Pack: upload the ZIP.
- World: upload the ZIP.
You can add release notes here too, which helps people know what's in this version.
Step 3: Wait for Approval
After you upload, the file goes through moderation. It gets checked for malware and to make sure it follows the guidelines. Once it's approved, it goes live and real people can download it!
Common Issues and Quick Fixes
My mod doesn’t show in the list
It may help to check whether the file is placed directly in the "Mods" folder rather than inside another folder. It is also worth checking that "manifest.json" is valid, since even a small formatting issue can stop the mod from loading.
My mod shows in the list but doesn’t work
In some cases, the mod may be installed but not enabled for that world yet. Hytale manages mods per world, so it is a good idea to right-click the world, open the mod list, and make sure the mod is enabled there.
Server crashes on startup
The logs are usually the best place to start. For Plugins, it can also help to confirm that Java 25 or newer is being used and that the build finished cleanly.
Gradle build fails
A common cause is an error in your code or if the setup is using the wrong Java version.
Assets don’t appear
It is worth checking the folder structure again. Visual assets usually belong in Common, while gameplay definitions belong in Server. If files were moved during testing, checking the paths in "manifest.json" can help too.
Frequently Asked Questions
How do I add a mod to an existing world?
Right-click the world, choose the mods you want to enable, then click "Save world settings".
The mod is in the right folder, but it still doesn’t show u. What should I check?
It can help to confirm that the file is really a ".jar" or ".zip", that it is placed directly in the "Mods" folder, and that "manifest.json" is valid. Restarting the game and checking the logs can also help.
What if I want to share a world instead of a Pack or Plugin?
Worlds use their own class on CurseForge, so they should be uploaded as ZIP files under "Worlds" rather than "Mods".
Do I need Java for every type of Hytale mod?
No, packs do not need Java – plugins do.