Playing Minecraft Java with friends can be as simple or as hands-on as you want it to be. You can open a world over LAN, subscribe to Realms, run your own dedicated server like Hypixel, use a hosting service, or opt for Essential for a faster private session.
The best choice comes down to how much control you want, how long the world needs to stay available, and how much setup you are willing to handle.
Choosing Your Multiplayer Method
Use the table below to pick the setup that best matches your group, budget, and how much control you want.
| Method | Best for | Cost | Always online | Biggest downside |
|---|---|---|---|---|
| LAN | Same network without mods | Free | No | Only works on the same local network |
| Local dedicated server | Stable and configurable server at home | Free | Yes, if PC stays on | Setup work, and the host PC must stay on |
| Realms for Java | Official Mojang hosting service | $7.99/month | Yes | Subscription cost and limited customization |
| Hosting service | More control without home-network setup | Free or paid, depending on provider | Usually yes, but not all free hosts are 24/7 | Quality, limits, and uptime vary by provider |
| Essential Mod | Essential is like an “improved version of LAN” that allows players outside your network to join | Free | No | The host must stay online |
Multiplayer Method 1: LAN
LAN (Local Area Network) lets you share your existing singleplayer world with anyone on the same home network. This means you don’t have to deal with extra server files, and very little upfront setup is required. All you do is simply load your world, establish a LAN network, and your friends can now join you through the "Multiplayer" menu.
What You Will Need
- A licensed copy of Minecraft Java Edition on every PC.
- Everyone connected to the same local network – either via Wi-Fi or by being wired to the same router.
- Matching Minecraft versions across all players.
Step-by-step Setup for LAN
- Load the singleplayer world you want to share.
- Press "Escape" on your keyboard, and click "Open to LAN".
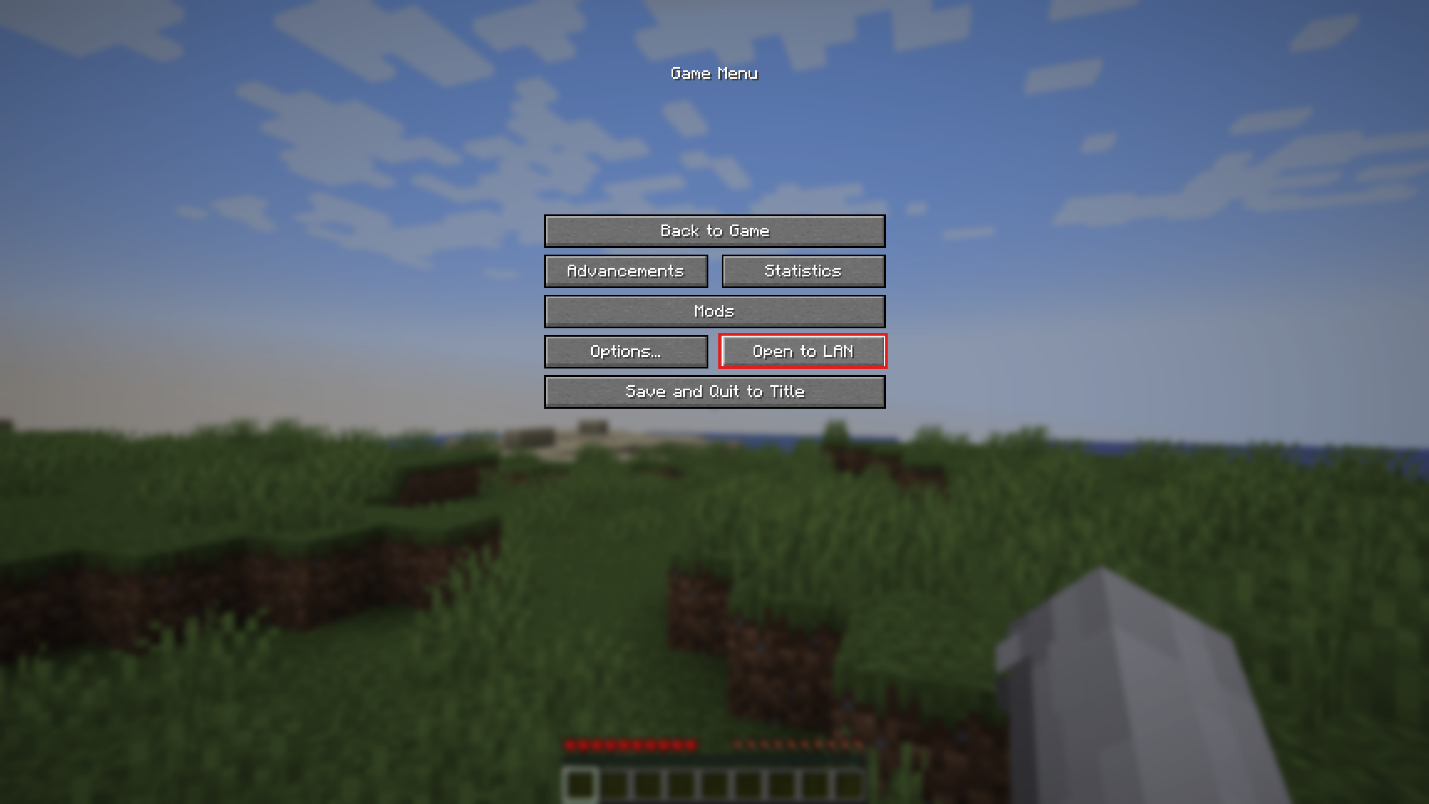
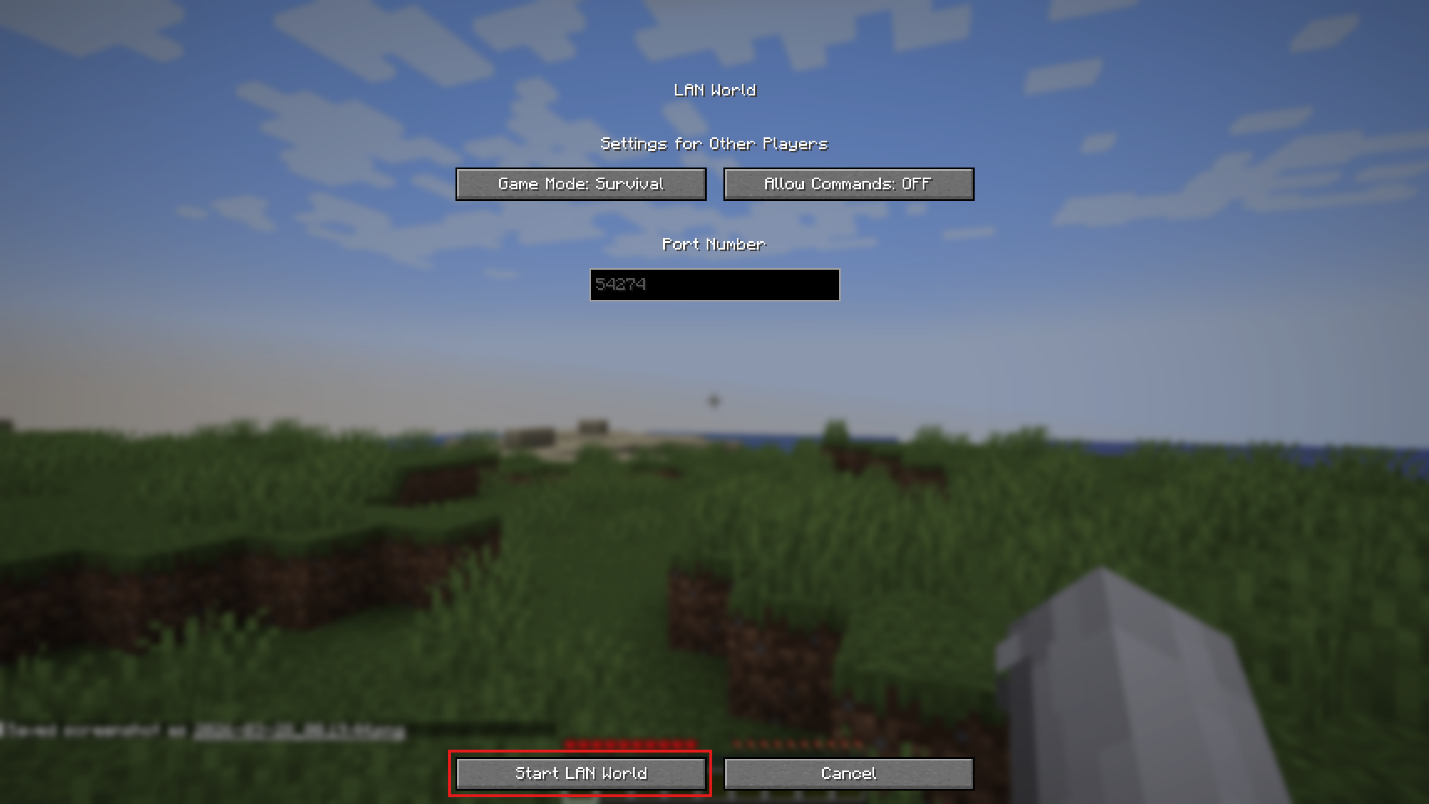
- Choose the game mode and whether to allow commands, then click "Start LAN World". A port number will appear in your chat.
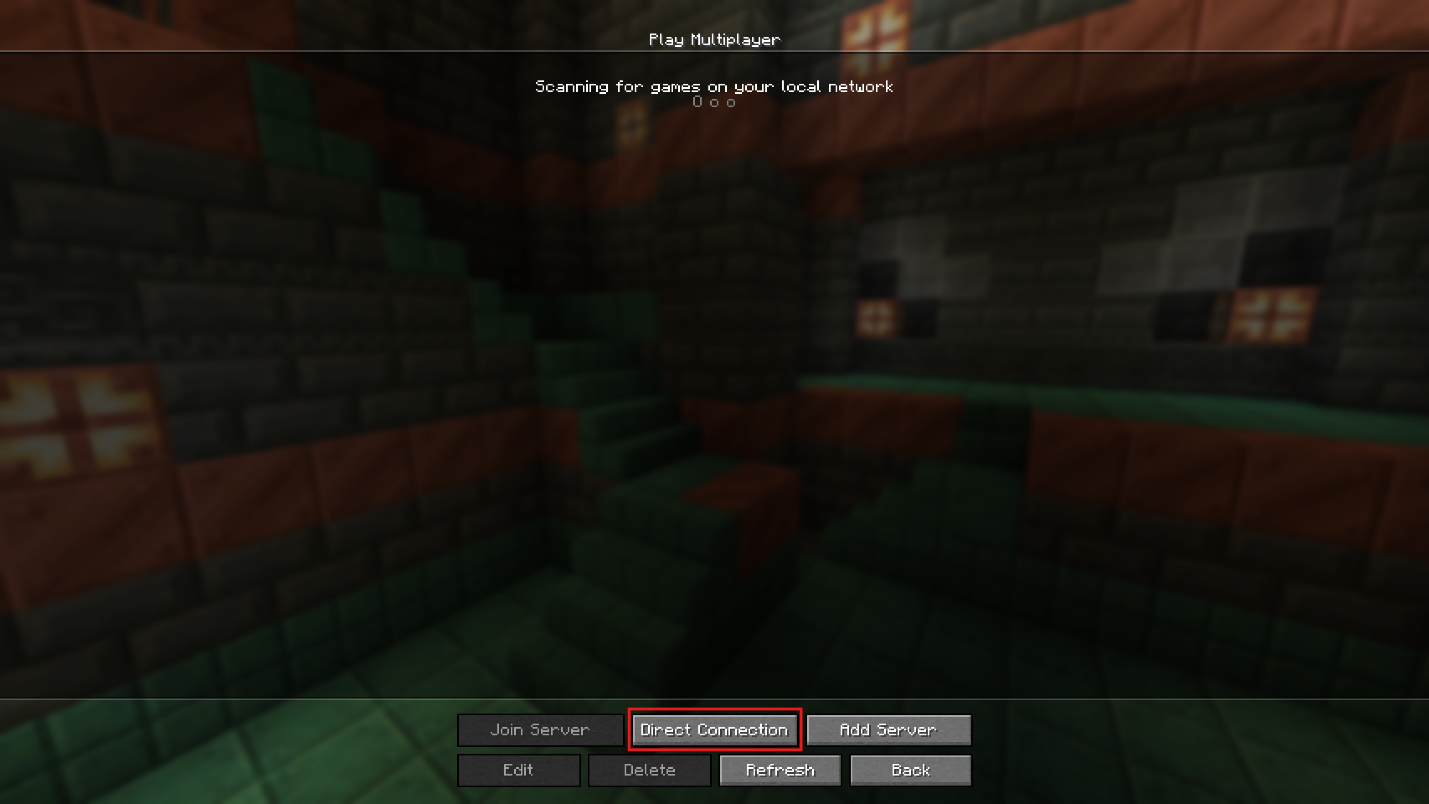
- Your friends open Minecraft, click "Multiplayer", and the world should appear automatically under "Local Games". If it does not show up, they can use Direct Connection and enter your local IP address followed by a colon and the port number, here’s a theoretical example: "192.168.1.23:54374".
How to Find Your Local IP Address?
- Windows: open Command Prompt, type "ipconfig", and look for IPv4 Address.
- macOS: open "System Settings" → "Network", select your active connection, and check the IP address there.
- Linux: open a terminal and run "ip addr", then look for the IP on your active network interface.
Multiplayer Method 2: Self-hosted Server Files
Meeting the Java Requirements
No matter if you are playing vanilla or modded Minecraft, you will need to pick the right Java version so that everything works as intended.
Below is the recommended Java release you should run depending on your Minecraft version:
- Java 8 for 1.16.5 and older.
- Java 16 for 1.17.X.
- Java 17 for 1.18 up to 1.20.4.
- Java 21 for 1.20.5 up to 1.21.1.
- Java 25 for 26.1+.
In theory, Java 16 could be replaced with Java 17, and Java 17 – with Java 21. However, doing so is not recommended, so make sure to get the suggested Java release for your specific game version to ensure best compatibility. You can download most Java versions from the Adoptium website which is an official Java distributor, then simply find and run their .msi executable file.
A Few Notes on Port Forwarding
By default, Minecraft’s dedicated servers are only visible locally and not joinable by people outside of your home network. The recommended but rather complicated way to make a server accessible world-wide is to portforward the 25565 port of your router.
If you’re having trouble setting up your port forwarding settings, there are alternative tools that you can try.
One such tool is Universalator, which is a script that automatically sets up a dedicated server for you. It supports a technology called “UPNP” that requests your router to port forward the 25565 port automatically, allowing other people to join.
Important: the UPNP technology used by Universalator may not work with all routers.
Playit.gg is another option. It’s a free software that creates a cloud between you and your players. The players can connect to the cloud with a custom IP address and then get redirected to your server. The caveat is that Playit.gg is not exactly 100% stable and may disconnect your friends every few minutes, so it’s best to keep this as a back-up plan.
How to Host a Dedicated Vanilla Server
Running a local dedicated server gives you the most control. You run the official Minecraft Java server software on your own machine, and players connect to it. This is the best fit if you want a stable and free server with complete control.
Steps to Setting Up Your Vanilla Server
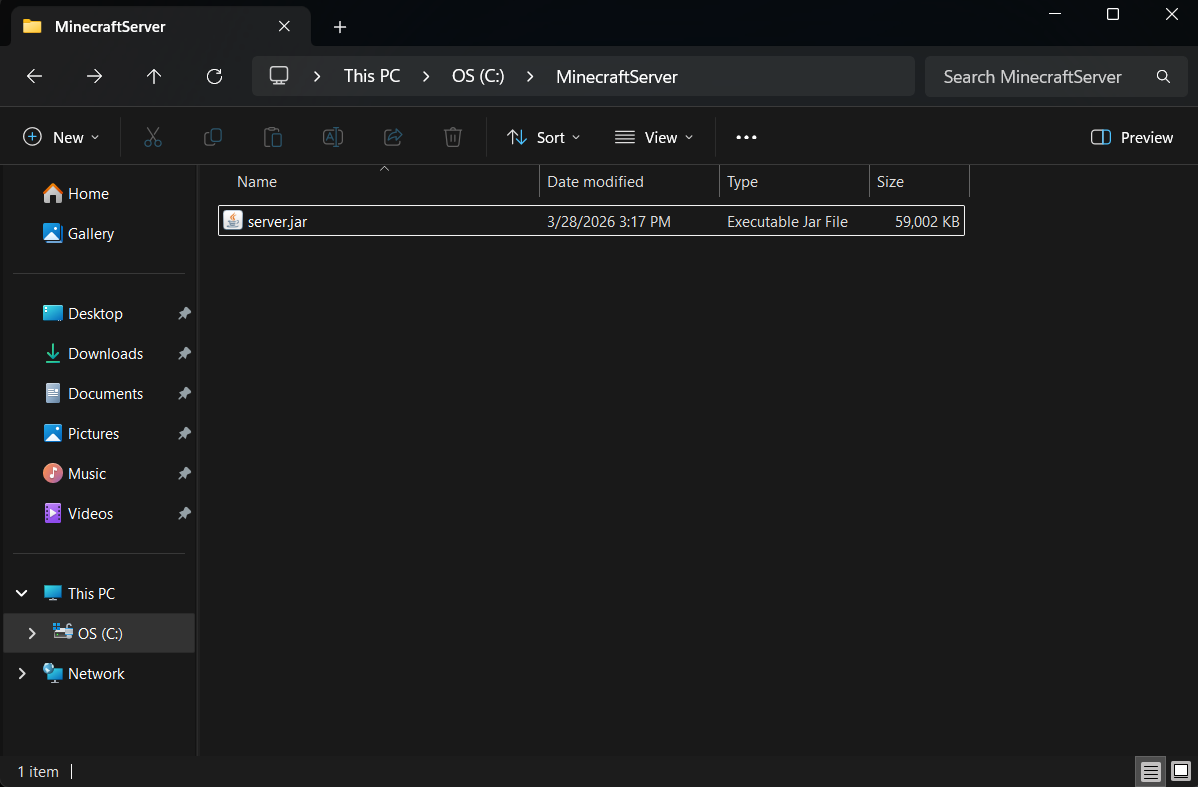
- Create a folder for your server files, such as "C:\MinecraftServer" on Windows.
- Download the official Minecraft Java server .jar file from Minecraft.net and place it in the same folder.
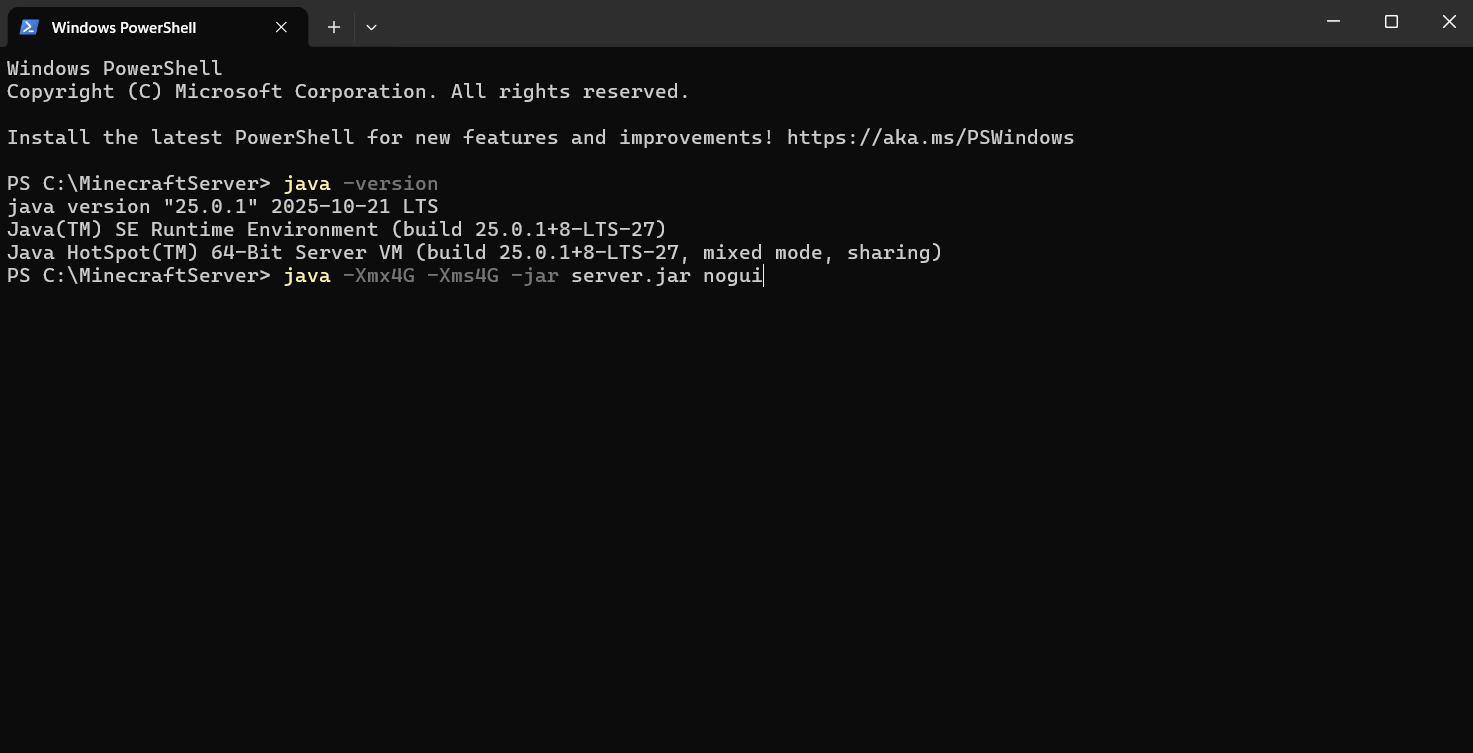
- On Windows, open Command Prompt, PowerShell, or Terminal and check that Java works by running: "java -version". If it says Java is not recognized, finish installing Java and reopen the terminal before continuing.

- Open the terminal in the server folder and run: "java -Xmx4G -Xms4G -jar server.jar nogui".
- Check the steps listed under the “Your Server Is Set Up – Now What?” section!
How to Host a Modded Minecraft Server
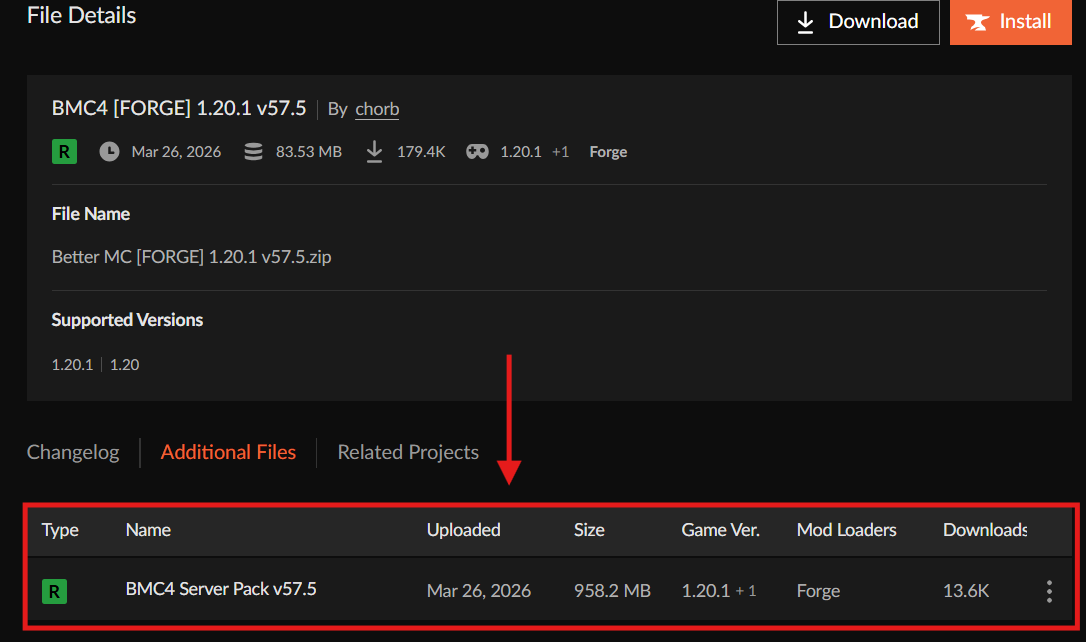
If you are trying to play a popular modpack, try the server pack of this modpack if there is one. You can download it by going inside the modpack page in CurseForge → "Files" → click the version you wish to run → "Additional Files". If you do not see any server pack there, then the authors of the modpack did not create one.
- Create a folder for your server like "C:\MinecraftServer".
- Unzip the server pack inside your MinecraftServer folder.
- Run the start file and jump to the “Your Server Is Set Up – Now What?” segment.
If instead you want to create your own server without using any server packs, make sure to use Universalator or the official server installer for your modloader. If choosing the latter, download from these links: NeoForge, Forge, Fabric.
Setting Up a Server with NeoForge and Forge
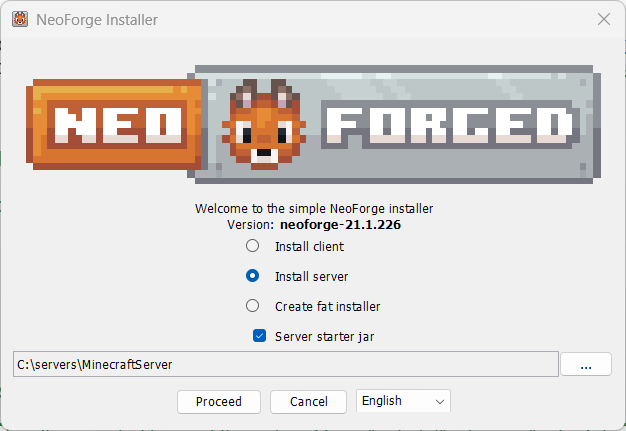
- Select your Minecraft version and click “Installer”.
- Run the file you downloaded.
- Select "Install server" and navigate to your "C:\MinecraftServer" location, then jump to the “Your Server Is Set Up – Now What?” part of the article.
Important: On NeoForge, make sure to check the "Server starter jar" option as well!
- Once the installation is complete, launch the "run" or "start" file inside your "MinecraftServer" folder.
- Jump to the “Your Server Is Set Up – Now What?” part of the article.
Setting Up a Server with Fabric
- Select your Minecraft version and click "Executable Server (.jar)".
- Move the Fabric server file inside your "C:\MinecraftServer" folder.
- Run your Fabric server file to start the server.
Your Server Is Set Up – Now What? (Vanilla & Modded)
One note before you go ahead and launch your server: if using mods, make sure to download and place them inside the "mods" folder. Client-side mods are generally not needed in this mod folder and can prevent the server from working.
Now onto the server launching steps:
- Start your Minecraft server.
- The first launch will generate files and then stop.
- Open "eula.txt" and change "eula=false" to "eula=true".
- Save the file.
- Start the server again and keep the server window open – closing the window will close the server.
- Open your game or modpack and click "Multiplayer".
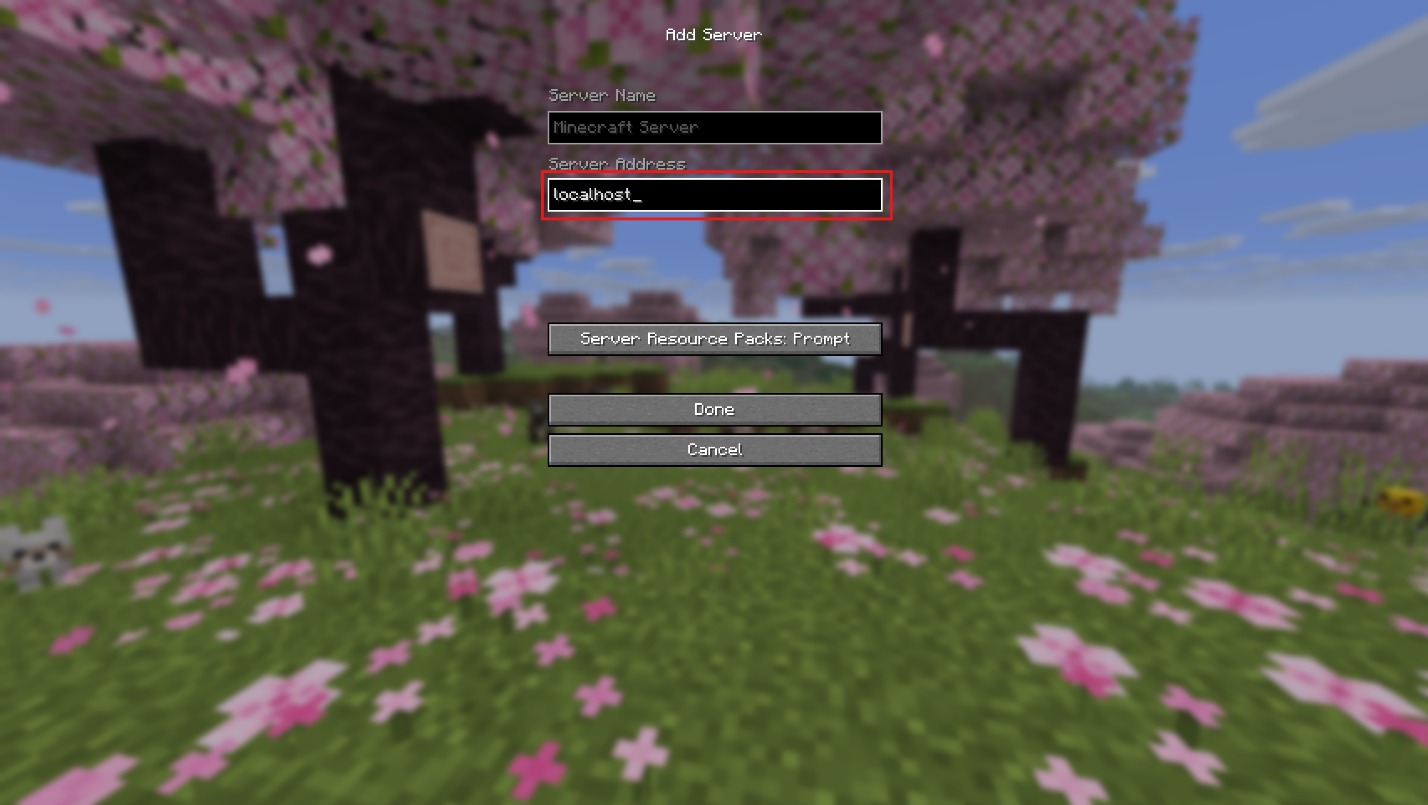
- If you are joining from the same computer, click "Add Server" and enter: "localhost".
- If you port forwarded, people outside your home network will join with your Public IPv4 with :25565 at the end, for example: “82.129.80.111:25565”.
- If you are joining from another computer on the same home network, click "Add Server" and enter the host computer’s local IP address with :25565 at the end, for example: “192.168.1.23:54374”.
Key Settings to Check Before You Run Your Server
- "online-mode=true"
- "white-list=true"
"online-mode=true" verifies that players are using a valid account, which prevents hackers from joining. "white-list=true" limits access to the players you approve of.
Multiplayer Method 3: Realms for Java
Realms is Mojang's own hosted server service. You pay a monthly subscription and get an always-online server that Mojang runs for you – no server files to manage, no networking to configure, just pure fun. It is the cleanest path to an always-available world if you do not want to deal with the technical side of things.
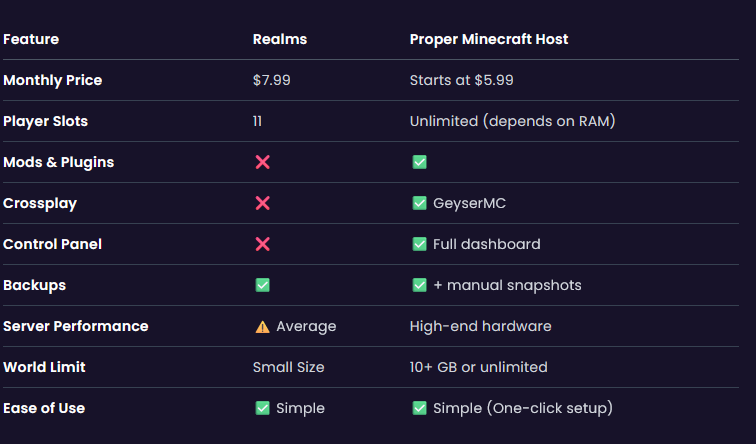
Unfortunately, there are a lot of downsides to Realms. For the full picture, take a look at the below screenshot to see the comparisons with some other hosting providers.
Important: A Realm cannot be modded. You can join with client-side mods, but cannot use modded features that add new blocks, entities, dimensions or anything else that needs to access the world side of things.
Also Important: Realms only supports the most recent Minecraft versions. Realms will not allow you to choose a version that is not within the newest releases.
Step-by-step Setup for Realms
- Subscribe to Realms for Java through Minecraft.net or from within the game.
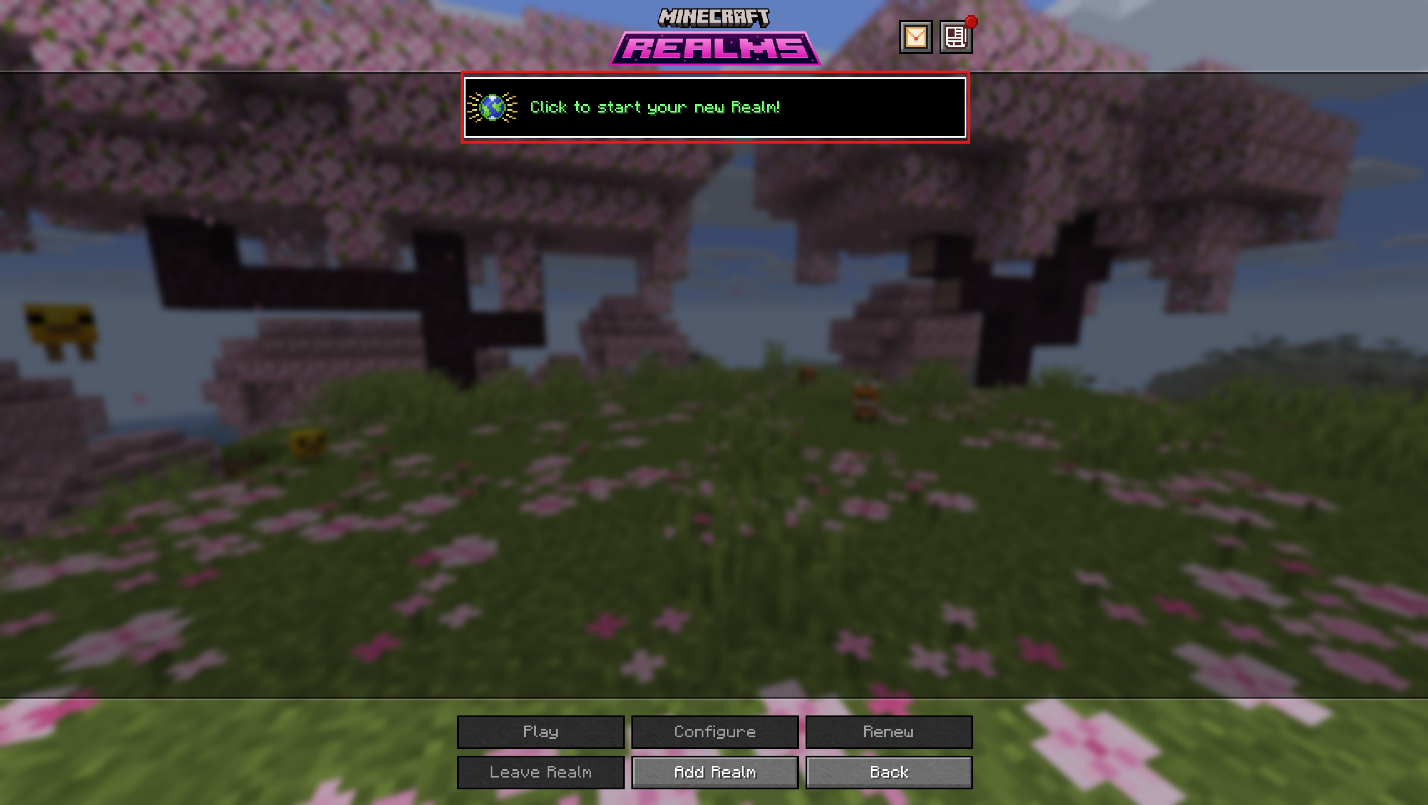
- From the main menu, open Minecraft Realms and click "Click to Start Your New Realm".
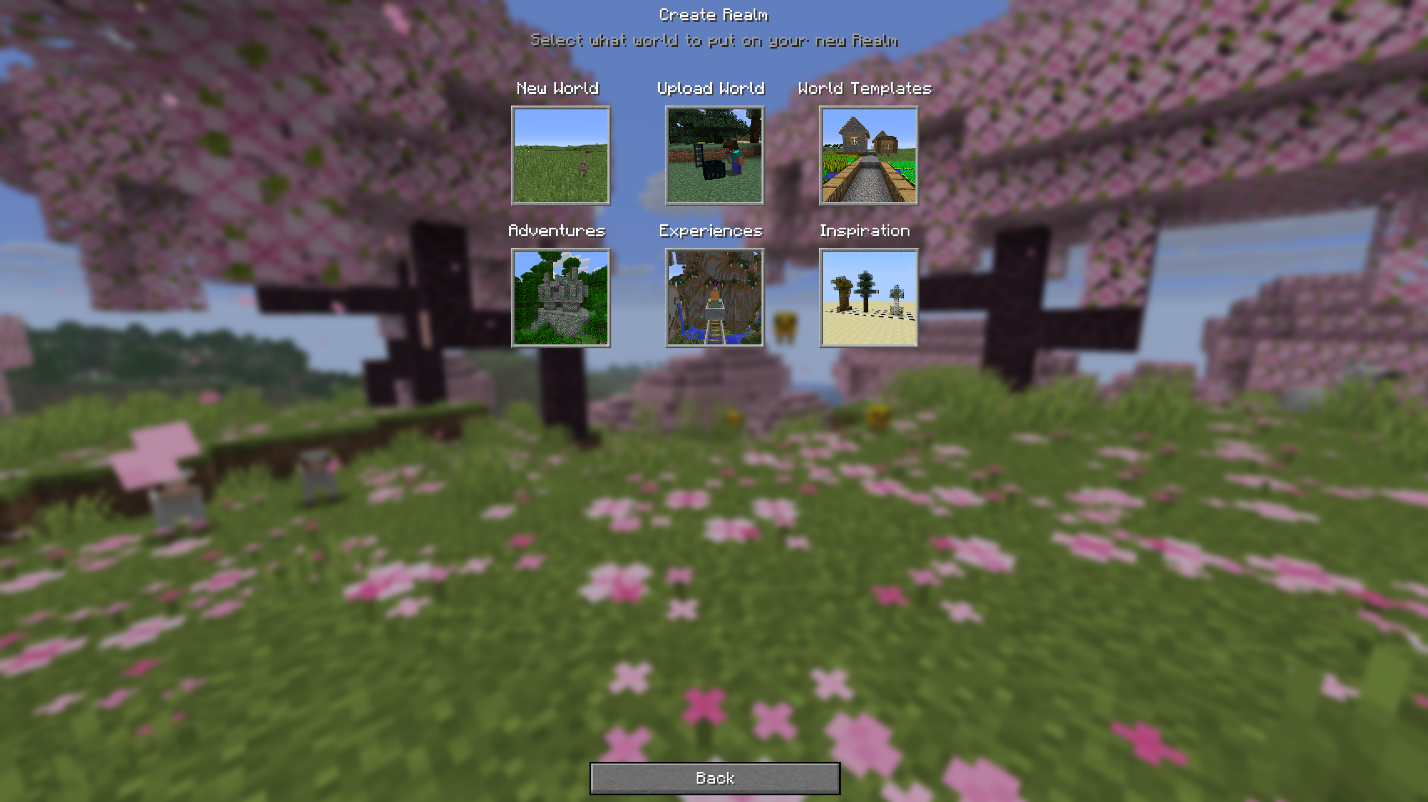
- On the "Create Realm" screen, choose what you want to put on the Realm:
- Select "New World" if you want to start fresh.
- Select "Upload World" if you want to move an existing singleplayer world to Realms.
- Select "World Templates" or another available category if you want to start from pre-made content.
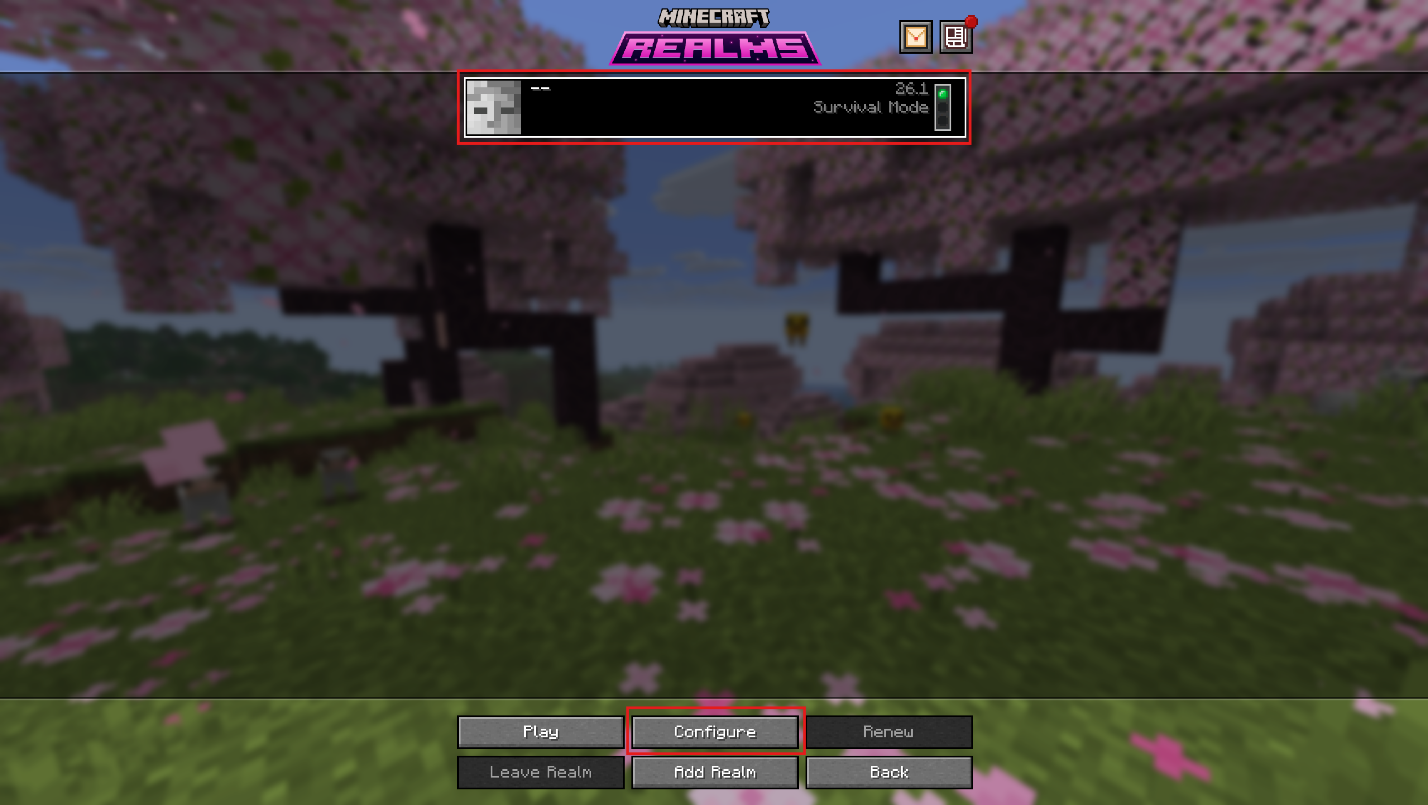
- After you finish setting up, disconnect from the Realm and go back to the "Minecraft Realms" screen, then select your Realm and click "Configure".
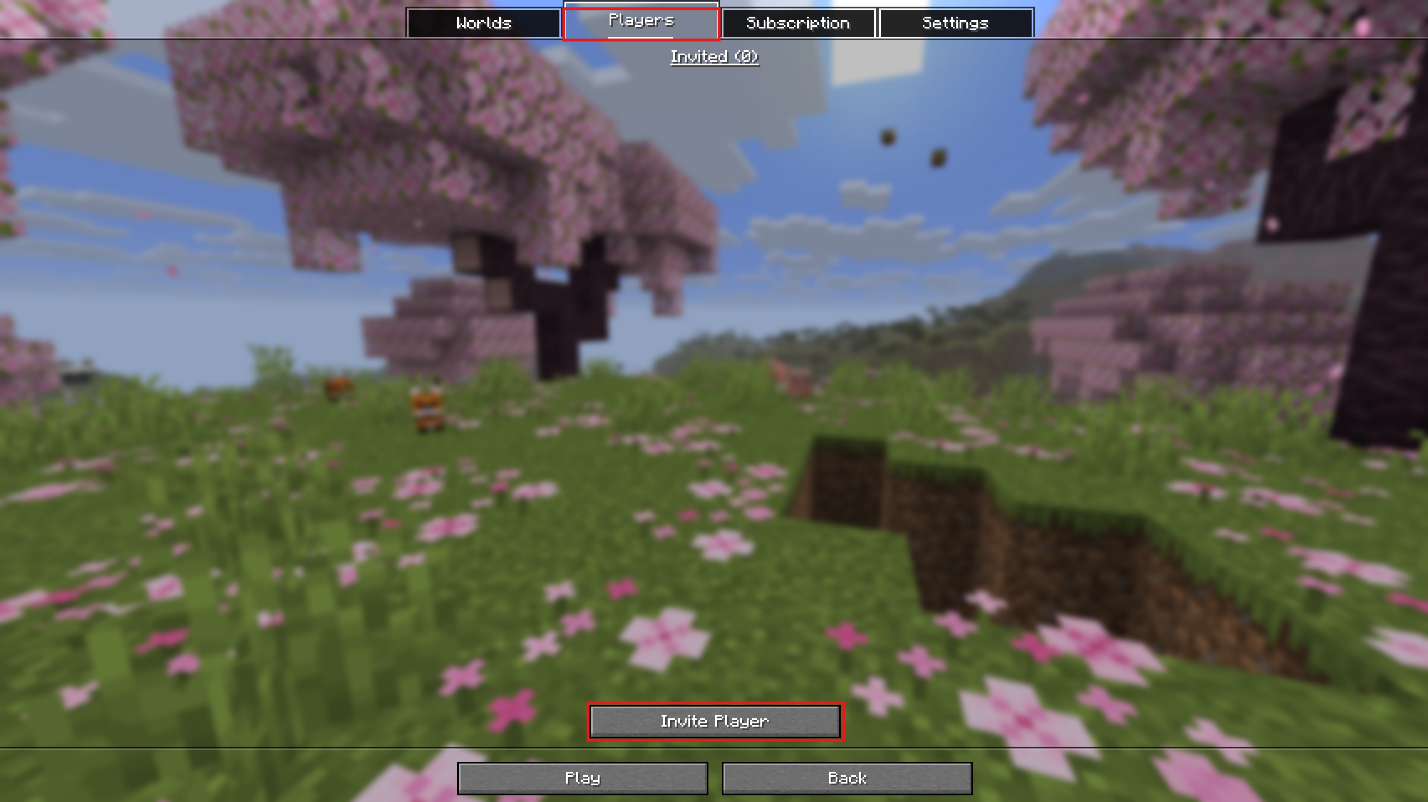
- Open the "Players" tab and click "Invite Player".
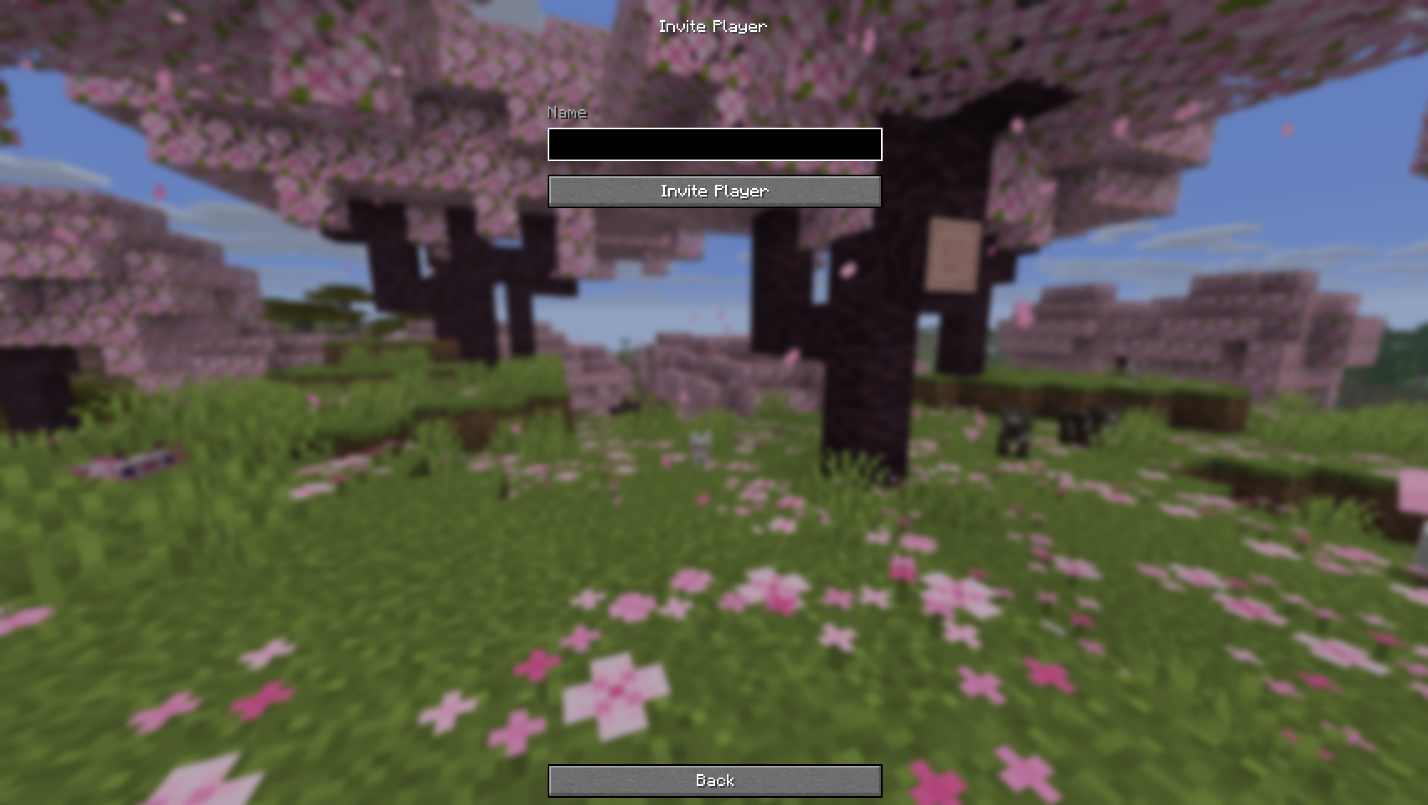
- Type their name and then click "Invite Player".
Multiplayer Method 4: Hosting Services
Hosting services are companies that configure your server on their own computers. Some services are free but offer low-quality hardware, while others are paid but offer high-quality hardware. Aternos is free but will not be enough if there are a lot of active players or enabled mods. On the other hand, while paid, Kinetic Hosting offers the most modern hardware available.
Step-by-step Setup for Hosting Services
- Pick a hosting plan that matches your player count and Minecraft version.
- Create the server in the host’s control panel and choose the correct server software and version.
- Start the server once so it can generate its needed files and settings.
- If you want to continue playing from an existing world, stop the server and upload your save through the host’s file manager, then set the server to use that world folder if the panel requires it.
- Start the server again and connect using the address that the host has provided.
Multiplayer Method 5: Essential Mod
LAN is fine for vanilla Minecraft, but can get increasingly buggy over time when playing modded versions. Essential is like an upgraded LAN that allows players outside your network to join while also attempting to fix some problems native to LAN.
The mod also includes a shop where you can pay for cosmetics, and “social” features like an in-game group chat – even if your friend is not in the same world as you are!
Step-by-step Setup for Essential Mod
- Install Essential from its CurseForge page for the Minecraft version and mod loader (supports Fabric, Forge, and NeoForge) you want to use.
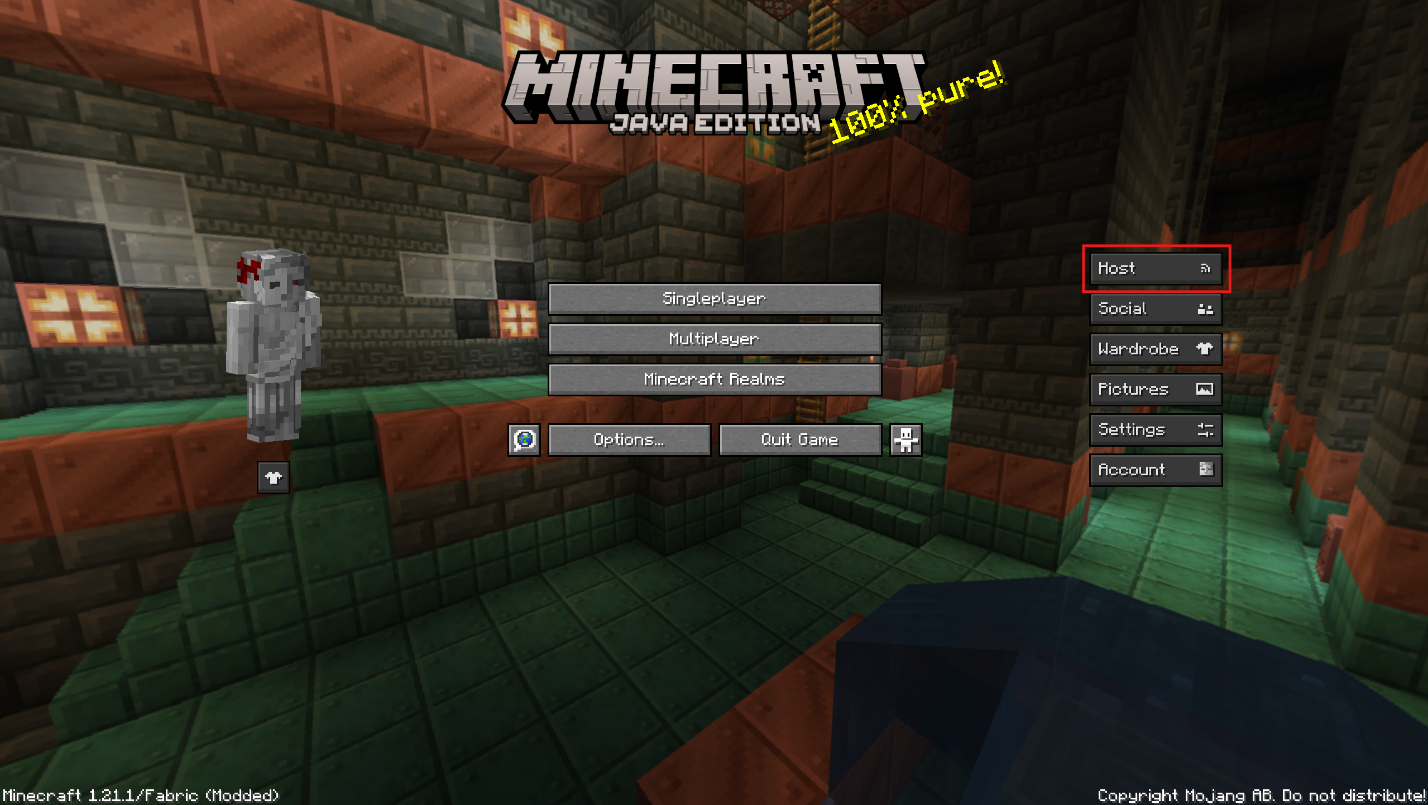
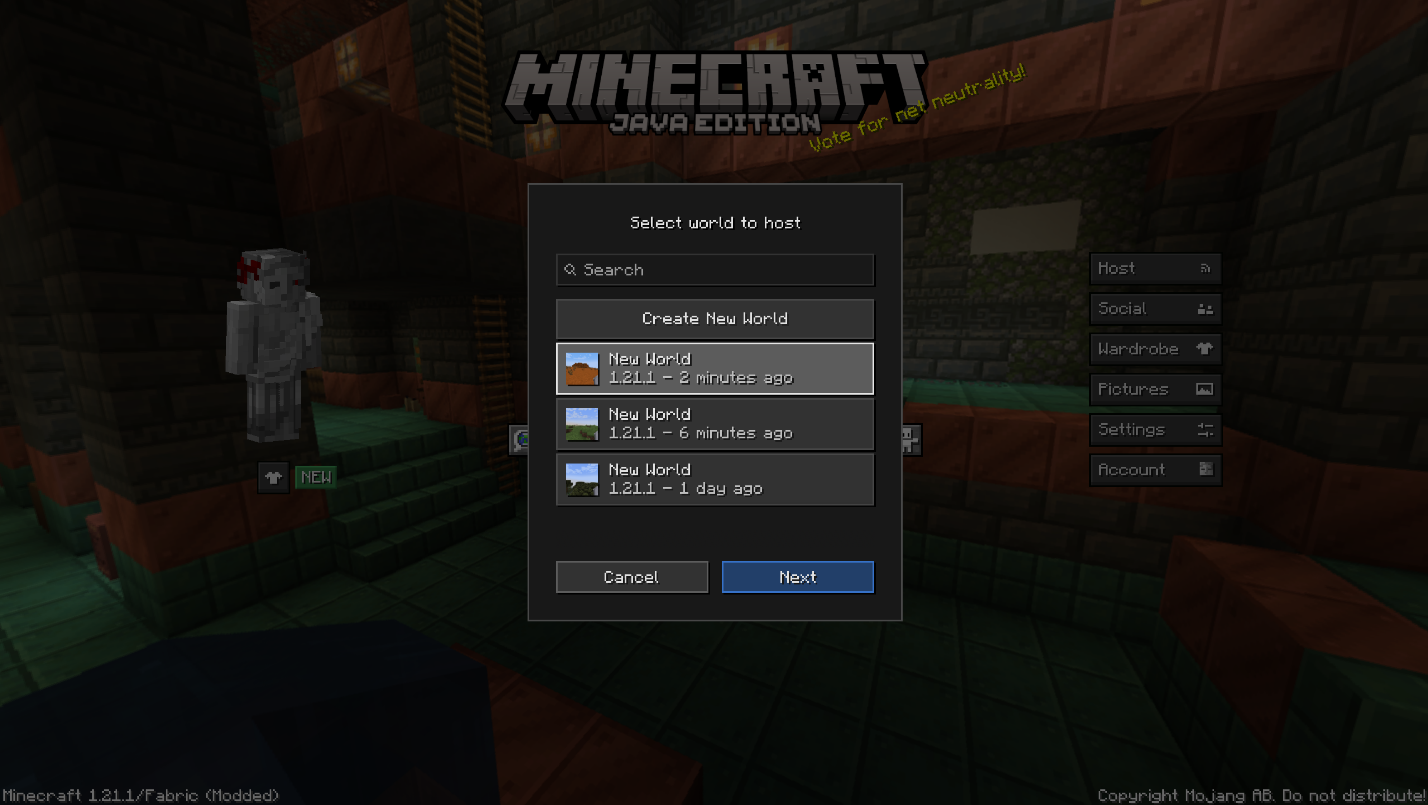
- Launch Minecraft and press "Host" from the main menu.
- Select the world you want to host, or create a new world if you do not want to use an existing save.
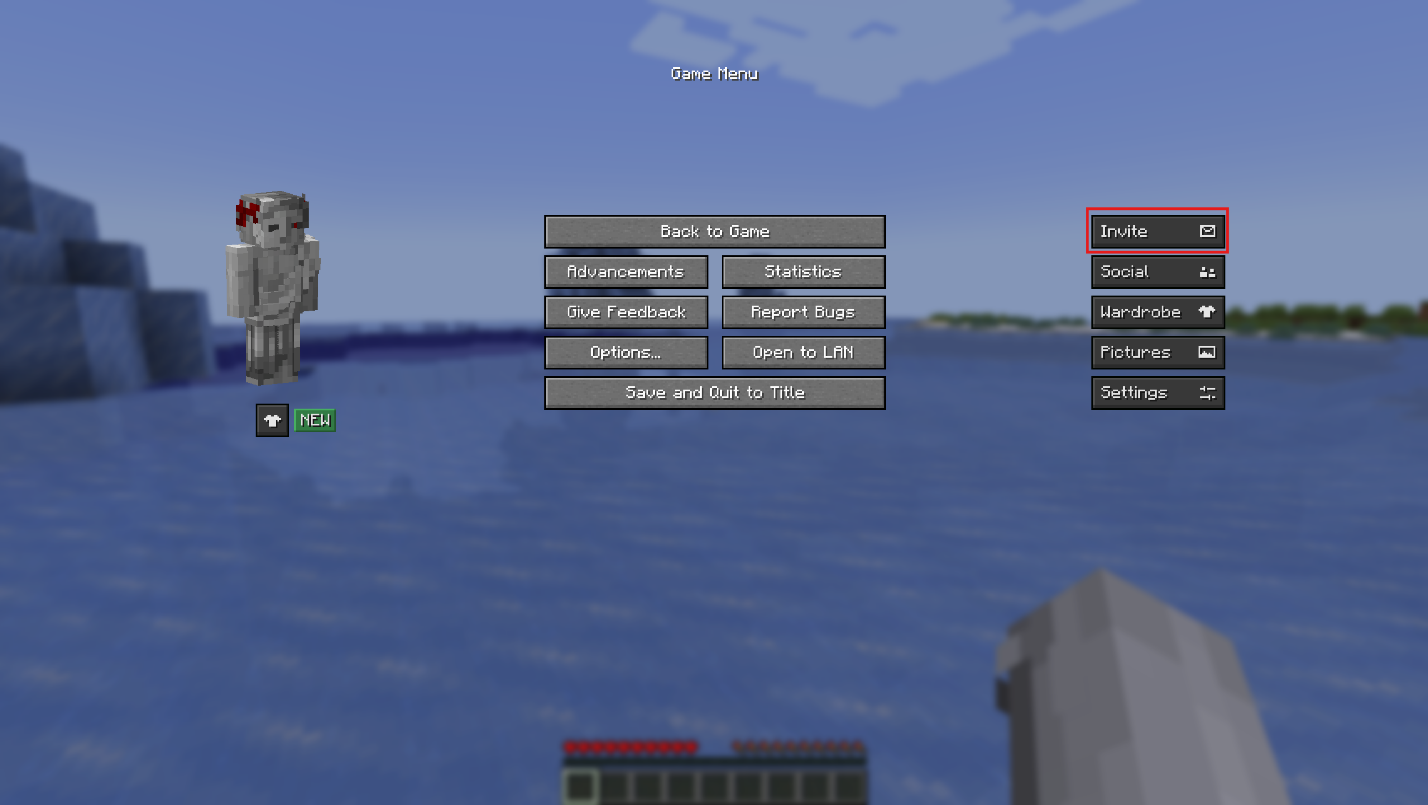
- Once the world is created, open the game menu and click "Invite".
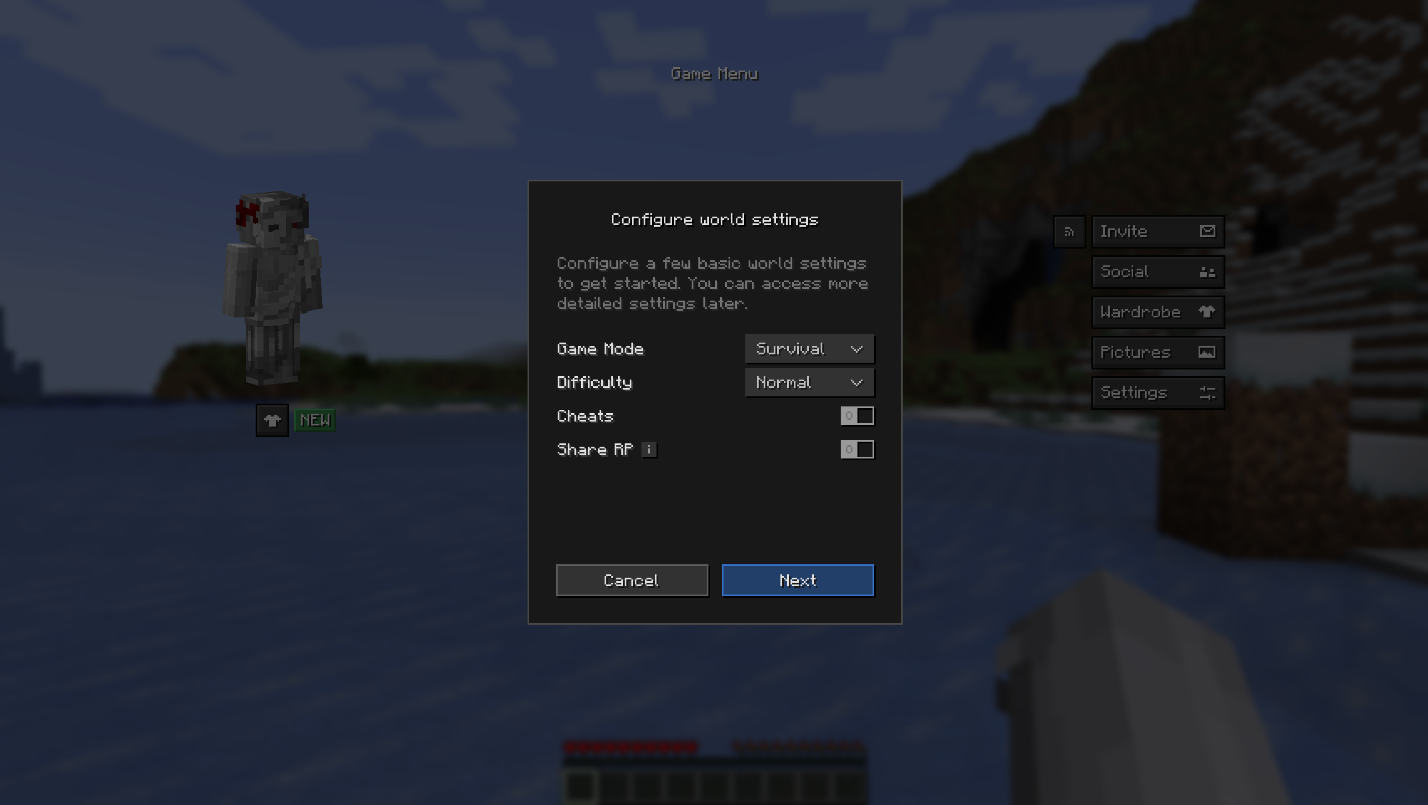
- In the "Configure world" settings, choose your basic settings and click "Next".
- Invite the friends you want to play with and hit "Done".
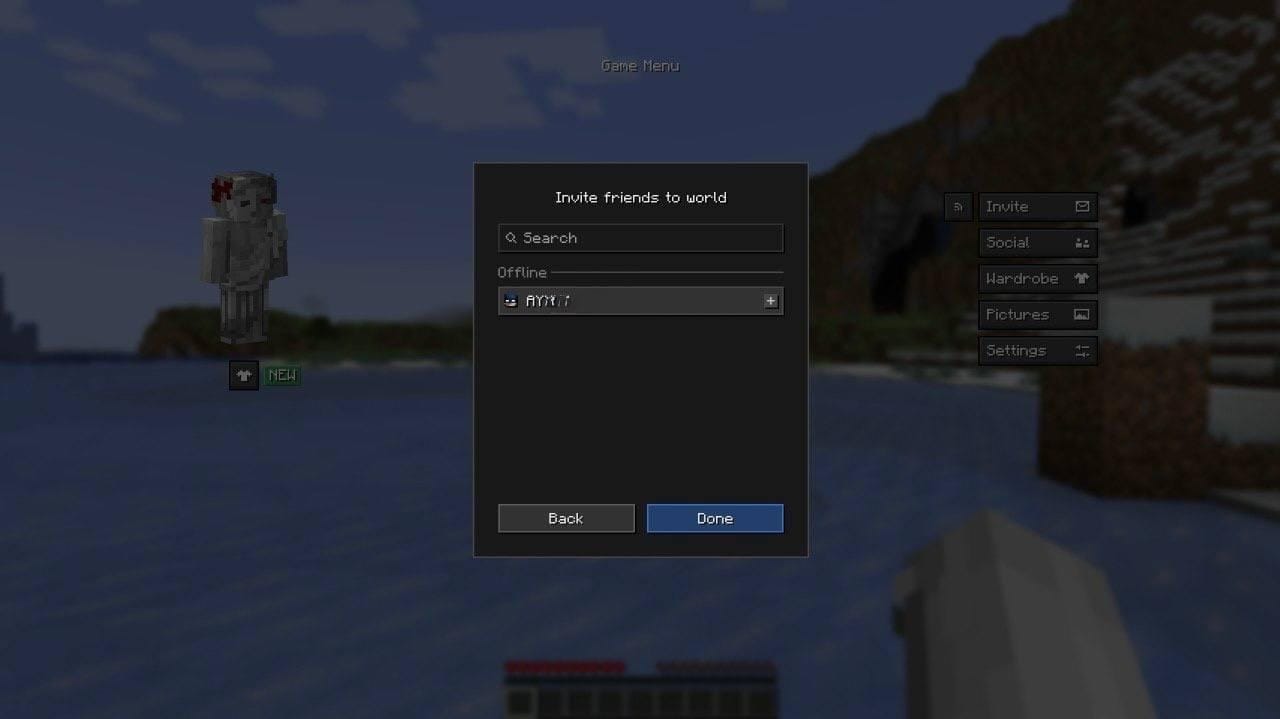
- Your friends can join from the "Invite", from the "Social" menu, or from the "Friends" tab in the "Multiplayer" menu.
Common Issues and Quick Fixes
A friend cannot see or join the world
The most common cause is a version mismatch. Everyone needs to be on the same Minecraft Java version as the world, server, Realm, or Essential setup they are trying to join.
LAN option does not appear under Local Games
Make sure everyone is on the same local network and not a guest Wi-Fi or isolated network. If the world still does not show up, use Direct Connection and enter the host’s local IP address plus the LAN port shown in chat. If Direct Connection still fails, make sure Java is allowed through your firewall on private networks.
The dedicated server stops right after the first launch
That is normal the first time. Open "eula.txt", change "eula=false" to "eula=true", save it, and start the server again.
My friend cannot join on Bedrock Edition
Sadly, Java and Bedrock Editions of the game do not support cross-play by design. However, there is a software called GeyserMC that can handle crossplay.
I just canceled Realms and want my world back
You have 18 months after the subscription expires to download your worlds. If you resubscribe within that window, you regain access to the Realm in the state it was last left.
The hosted server loads a brand-new world instead of my old one
This could mean three things: the world folder is in the wrong place, it’s nested one folder too deep, or is set to the wrong world name in the host panel. Check that "level.dat" is directly inside the world folder and that the server is pointing to that exact folder name.
The server is lagging or mobs seem frozen
If running a local dedicated server, make sure to lower view-distance first because it will shrink the amount of world data the server needs to send to each player. If performance is still rough, lower "simulation-distance" to reduce entity ticking load. On Linux, make sure "use-native-transport=true" stays enabled in "server.properties" since that setting is meant to improve packet handling and is enabled by default in modern server configs.
Players are getting kicked with authentication errors
If "online-mode" is set to true, the server checks each player against the Minecraft account system. Make sure the player is fully logged into a legitimate Minecraft Java account before joining.
Essential invites are not showing up
The workaround is to have everyone close and restart the game, then the host should open the world and send invites again after all players are fully back in.
Essential modded multiplayer is not working
Essential can host modded worlds, but only if every player has the exact same mods and versions installed.