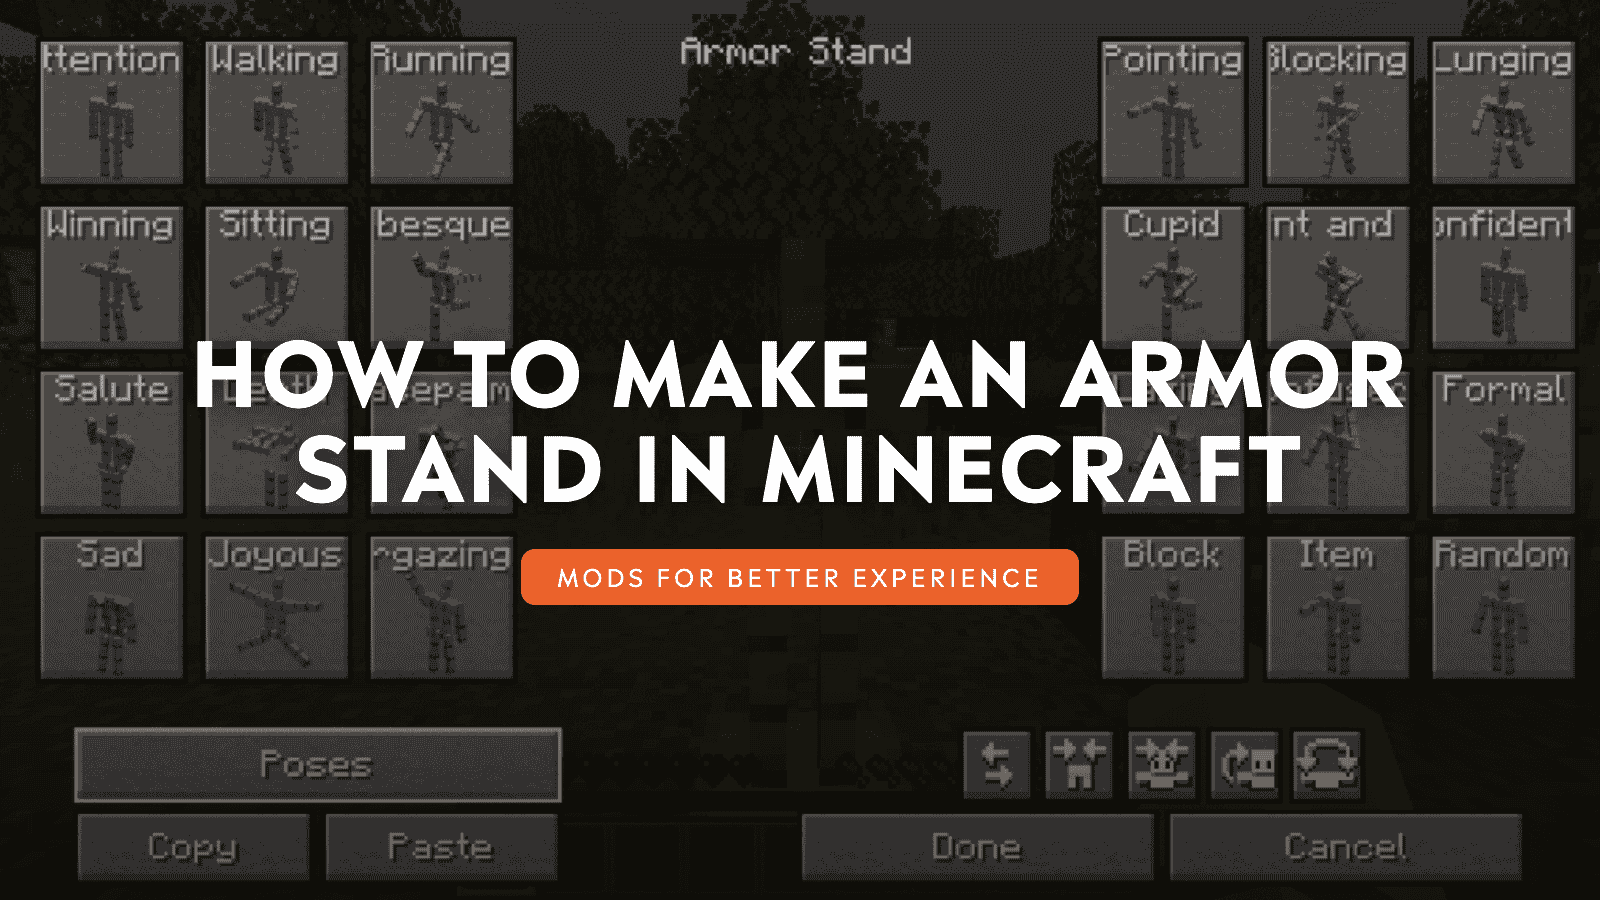
Armor stands are one of the most versatile decorative items in Minecraft. They can display armor, mob heads, carved pumpkins, and Elytra, and with the right setup, they can also hold weapons or be posed for custom builds. The crafting recipe is simple, but most players do not realize how much you can customize them until they start using commands, Bedrock Edition poses, or mods.
In this guide, we’ll walk you through everything you need to know to make the most out of your armorstands alongside useful mods to elevate your experience even further.
How to Craft an Armor Stand
Materials you will need:
- 6 sticks
- 1 smooth stone slab
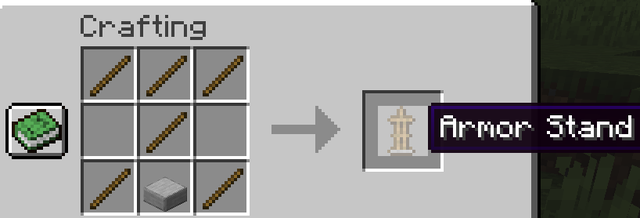
Place 3 sticks across the top row, 1 stick in the center slot, 1 stick in the bottom-left slot, 1 smooth stone slab in the bottom-center slot, and 1 stick in the bottom-right slot. This gives you one armor stand. Smooth stone slabs are made by smelting cobblestone into stone, smelting the stone again into smooth stone, then crafting the smooth stone into slabs.
Sticks come from planks. You'll need a crafting table for this recipe since it doesn't fit in the 2x2 inventory grid.
Tip: Armor stands also generate naturally in taiga village armories, usually with a piece of armor already equipped, so finding a village can save you the crafting step.
How to Use an Armor Stand
Place the armor stand on a flat surface and interact with it while holding an armor piece, carved pumpkin, mob head, or Elytra to equip that item in the matching slot. Interacting with an equipped slot while your hand is empty removes the item and returns it to your inventory.
On Java Edition, armor stands can't have their hand slots filled through normal right-clicking and require commands or mods instead. On Bedrock Edition, interacting with a stand while holding a non-wearable item places it in the stand's hand slot.
Rotating and Adjusting an Armor Stand
Armor stands can be placed in different orientations, similar to signs or banners. The simplest way to control the direction is to face the way you want the stand to look before placing it.
For precise rotation control in Java Edition, use the "/data" command:
"/data merge entity @e[type=armor_stand,sort=nearest,limit=1] {Rotation:[90.0f, 0.0f]}"
Next, replace 90.0f with any rotation angle in degrees. 0 is south, 90 is west, 180 is north, 270 is east.
Adding Arms to an Armor Stand
Vanilla armor stands don't have visible arms by default. You can add them via the command:
"/summon armor_stand ~ ~ ~ {ShowArms:1b}"
This summons a new armor stand at your location with the arms visible. To add arms to an existing stand, use:
"/data merge entity @e[type=armor_stand,sort=nearest,limit=1] {ShowArms:1b}"
With the arms visible, the stand can hold items in its hands when placed via commands or mods.
Armor Stand Posing Options
On Bedrock Edition, sneaking and interacting with an armor stand cycles through 13 built-in poses. On Java Edition, there's no built-in pose button – you need either commands or mods to access this feature.
Using commands, each limb's rotation is set through NBT data, which is Minecraft’s way of storing extra information about blocks, items, and entities. For armor stands, that data can include limb rotation, visibility, arms, base plate, equipment, and other properties. The limbs are Head, Body, LeftArm, RightArm, LeftLeg, and RightLeg. Each takes three values ("x", "y", "z" rotation is expressed in degrees):
"/data merge entity @e[type=armor_stand,sort=nearest,limit=1] {Pose:{RightArm:[90.0f, 0.0f, 0.0f]}}"
This raises the right arm forward. Experimenting with values lets you create custom poses, though it can get tedious for complex positions. That's the main reason pose editor mods exist.
Removing the Baseplate or Disabling Gravity
Two more useful NBT toggles for armor stands exist for Java:
- Remove the baseplate (the flat disc at the bottom): "/data merge entity @e[type=armor_stand,sort=nearest,limit=1] {NoBasePlate:1b}"
- Disable gravity (useful for floating displays): "/data merge entity @e[type=armor_stand,sort=nearest,limit=1] {NoGravity:1b}"
Key Java vs Bedrock Edition Differences
The crafting recipe is identical on both editions. The main differences have to do with how the player interacts with an armor stand and chooses poses.
- Bedrock Edition lets you place items in hand slots directly and has built-in pose presets accessed by sneaking in front of an armor stand.
- Java Edition requires commands or mods for both of those things. Armor stands are entities, which means they can be pushed by pistons, moved by flowing water, pulled with fishing rods, pushed by players, and affected by explosions.
Mods That Make Armor Stands More Functional
Armor stands are useful on their own, but mods can make them much easier to customize. Some add pose-editing menus so you can adjust armor stands without commands, while others add mannequin-style displays or target dummies that can wear armor, hold gear, and fit naturally into training rooms or decorative builds.
MmmMmmMmmMmm (Target Dummy)
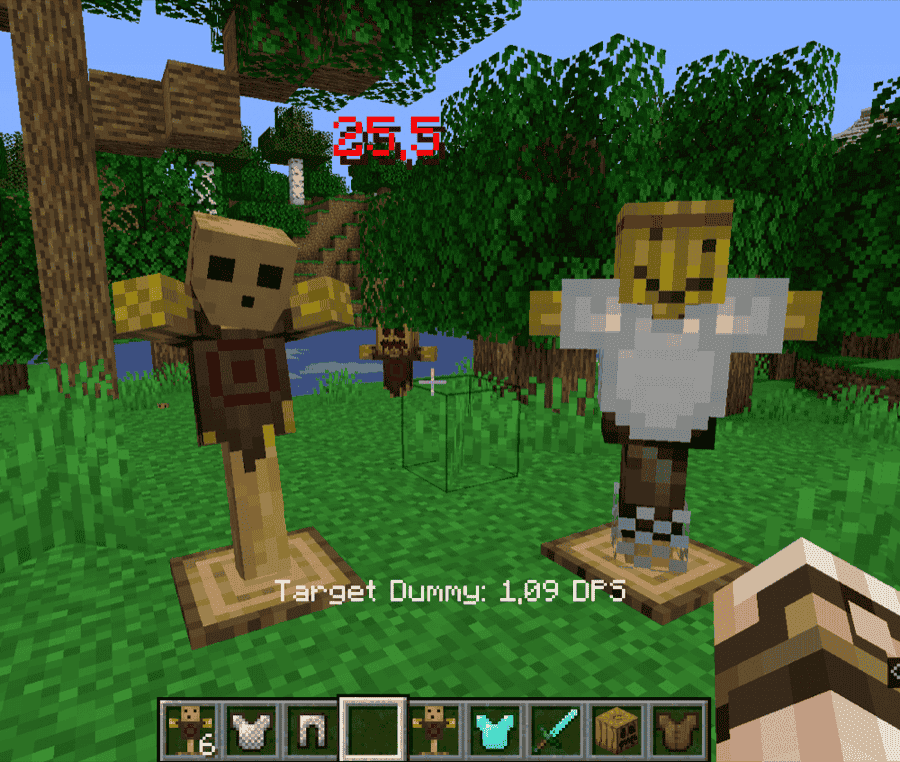
“MmmMmmMmmMmm” adds a target dummy that shows damage numbers when attacked and can be equipped with armor, shields, and other gear. It is useful for training rooms, weapon-testing areas, and decorative builds where you want something more interactive than a regular armor stand.
The dummy is placed by right-clicking a block, and it can face 16 different directions depending on where you look when placing it. You can equip and unequip items by interacting with the matching body part, remove the dummy by shift-left-clicking it with an empty hand, and place a target block underneath it to read damage through a redstone output signal. It can also act like a scarecrow when equipped with a pumpkin or jack o'lantern.
Armor Poser
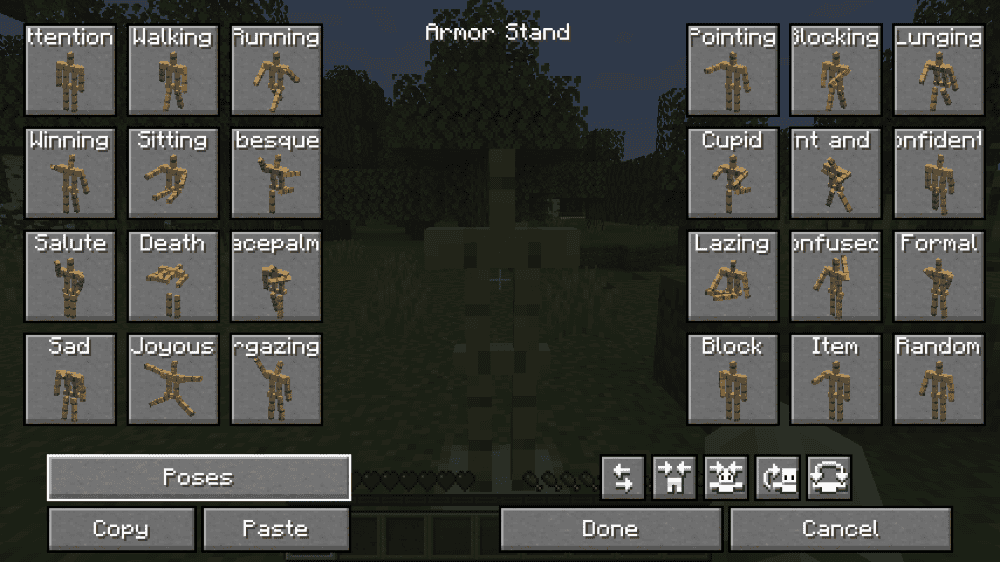
“Armor Poser” adds a GUI for armor stands, making it much easier to adjust poses without typing commands. Shift-clicking an armor stand opens a menu where you can set its pose and change useful properties, such as giving the stand visible arms or hiding the baseplate.
The mod also lets you move items into and out of the armor stand’s hand slots through the interface. That makes it a practical choice for players who want detailed armor displays, statues, shop scenes, NPC-style builds, or decorative poses without editing NBT data manually.
Mannequins
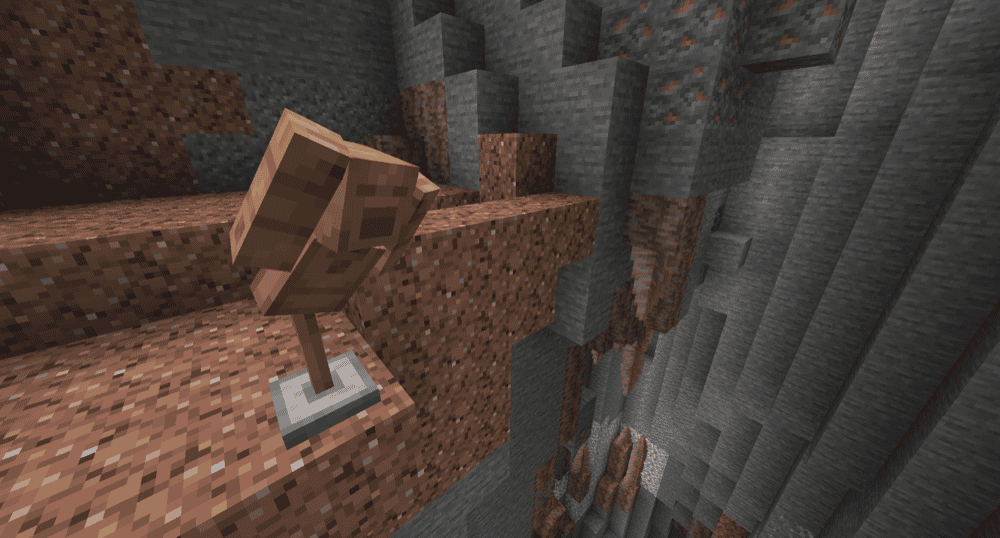
“Mannequins” adds two armor-display options: the Mannequin and the Statue. The Mannequin works like a more customizable wooden display figure that can be posed, equipped with a helmet, chestplate, and held items, and adjusted through a GUI with "X", "Y", and "Z" rotation sliders for different body parts.
The Statue is the more static option, made for stone-style displays that stay frozen in place. Both fit decorative armor rooms, training halls, and build showcases better than a plain armor stand when you want a fuller character-like display. Mannequins can also be given different faces by sneak-right-clicking with an axe, while Statues use a pickaxe for the same kind of face cycling.
How to Install Minecraft Mods
You can install the above mods automatically using the CurseForge app or manually by placing the mod files within your game's mods folder. Both methods allow you to easily add custom features and enhancements into your Minecraft experience.
If you want to learn more, you can read our detailed guide on how to install Minecraft mods.
Common Issues and Quick Fixes
The crafting recipe isn't working
Check that you have a smooth stone slab, not a regular stone slab or a cobblestone slab. The recipe specifically requires smooth stone slabs, which come from smelting regular stone into smooth stone and then crafting slabs from that smooth stone. Additionally, confirm you're using a crafting table as the recipe doesn't fit in the 2x2 inventory grid.
The armor stand won't equip items in the hand slots
On Java Edition, hand slots can't be filled through normal right-click interaction on a vanilla armor stand. You need either commands or a mod like “Armor Poser” to place items in the hands. On Bedrock Edition, interacting with the stand while holding a non-wearable item places it in the hand slot directly.
The /data command says "no entity found"
The selector "@e[type=armor_stand,sort=nearest,limit=1]" finds the armor stand that is closest to you. If the command returns nothing, either there's no armor stand nearby or you're running the command from a location where the stand isn't loaded. To fix this, simply move closer to the stand and try again.
The armor stand keeps falling or moving
Armor stands on Java Edition are affected by gravity and physics. If you want one to stay in a specific floating position, use "/data merge entity @e[type=armor_stand,sort=nearest,limit=1] {NoGravity:1b}" to disable gravity for that stand. Stands can also be pushed by other entities walking into them, so placing them in enclosed spaces helps if movement is a problem.
My game crashes after installing armor stand mods
A crash right after installing a mod usually means one of three things: the mod file is for the wrong Minecraft version, it was made for a different loader, or a required dependency is missing. Check that the file matches your setup, whether you are using Forge, Fabric, or NeoForge.
If you added several mods at once, remove the new files from the mods folder one by one and relaunch the game after each change. When the game starts normally again, the last mod you removed is probably the culprit. Next, check that mod’s CurseForge page for the correct version, loader, and dependencies.