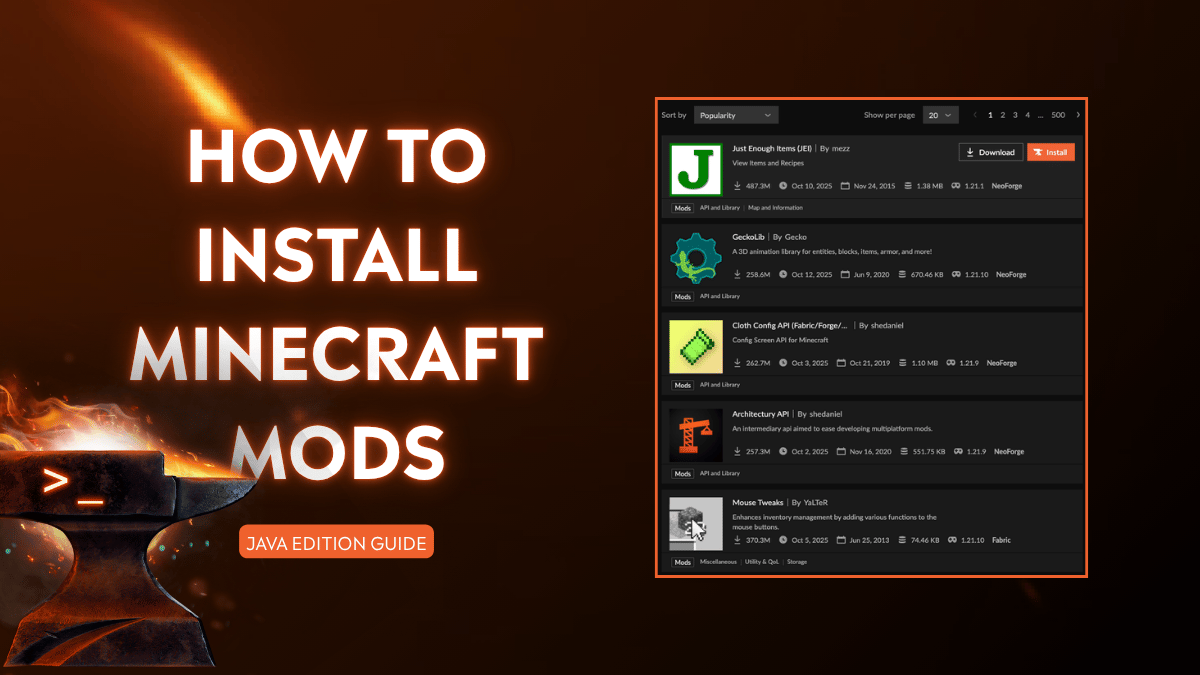
Mods are one of the best ways to make Minecraft feel new again. They add everything from furniture and magic systems to brand-new biomes and dimensions.
If you’re looking to enhance your game, installing mods is the way to go.
So You Found a Cool Mod, What Now?
Maybe you saw a cool mod in a YouTube video. Maybe someone mentioned something called “Create” or “Applied Energistics 2” and now you want it too.
That’s great! But before you start clicking random download links, there are a few things you need to know:
- Mods only work on the Java Edition of Minecraft – and so does the CurseForge app.
- You’ll also need a mod loader (more on this soon), and you’ll have to make sure your Minecraft version matches the version the mod was built for.
Don’t worry! This guide will walk you through everything.
Finding the Mod You Want
Go to the CurseForge mod list and search for the mod you want. When you find it, click on it and carefully check:
- The Minecraft version it supports (e.g. “Minecraft 1.20.1”).
- Which mod loader it requires (Forge, Fabric, NeoForge, or Quilt).
- Any dependencies (some mods need other mods to run, like Cloth Config API or GeckoLib).
Important: Don’t skip this step as you can’t just install any mod on any version. Instead, mods must match your Minecraft version and loader exactly.
For example, let’s say you want to install the “Waystones” mod.
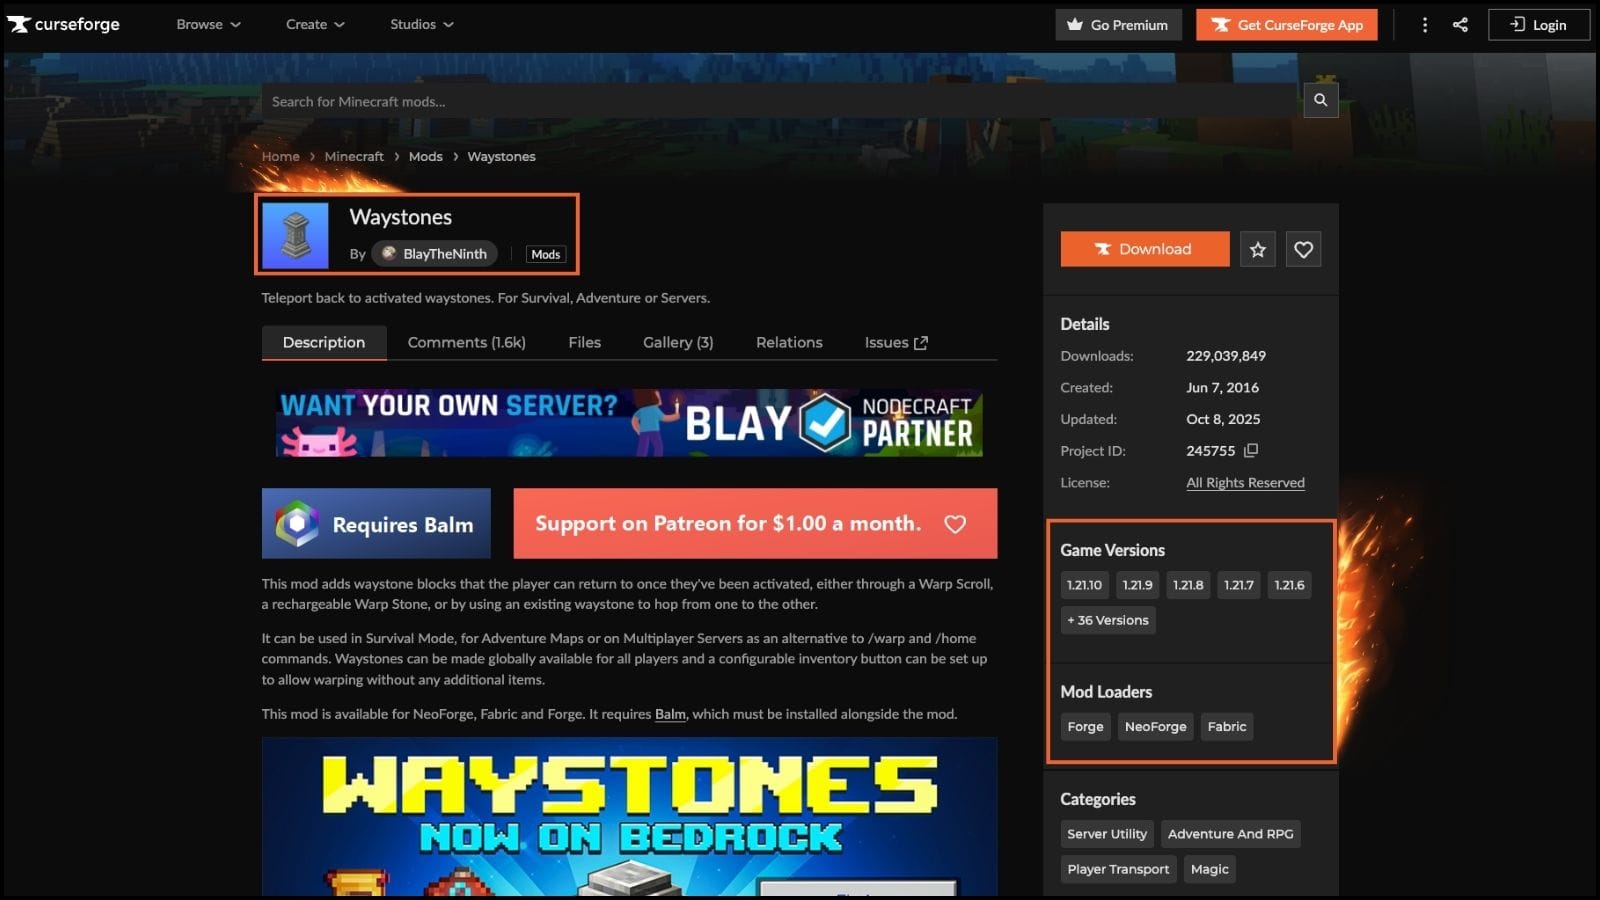
The Minecraft version it supports and the mod loader it requires are in the right column.
To find a mod’s dependencies, simply go to the "Relations" tab or read the mod’s description. If it says something is required, you must install it.
Understanding Mod Loaders and Which One to Use
Unfortunately, mods don’t just work on vanilla Minecraft. You’ll also need a mod loader to run them.
Typically, you must select a mod loader that supports your chosen mod. However, if you want to install everything from scratch, including a mod loader and some cool mods with it, here’s a quick guide to help you decide which mod loader you should use.
Comparison of Minecraft Mod Loaders
| Mod Loader | Description | Common Use | Supported Minecraft Version |
|---|---|---|---|
| Forge | Most popular, widely supported | Large modpacks, adventure mods | 1.1 - current |
| Fabric | Lightweight, fast updates | Performance & small mods | 1.14 - current |
| NeoForge | A modern fork of Forge | Some newer modpacks | 1.20.2 - current |
| Quilt | A fork of Fabric, less common | Experimental mods and tools | 1.14.4 - current |
Match Your Minecraft Setup to the Mod
Once you know the Minecraft version and mod loader your mod uses, that’s what you’ll build your modded profile around.
You have two options:
Option 1: Use the CurseForge launcher to handle it all for you
We recommend this option, as the CurseForge app is mod-friendly and sets up modded profiles automatically.
Option 2: Do it manually (advanced)
You’ll download the mod loader installer (like Forge or Fabric) and set it up yourself. We’ll cover that later in this guide.
Note: You might not be able to use the latest version of Minecraft. While many popular mods support recent versions, some mods are only compatible with specific ones, like 1.16.5 or 1.20.1. To use those, you’ll need to install and play on the version the mod supports
How to Install Mods Using the CurseForge App
If you want the easiest, safest way to use mods, go with the CurseForge app. It’s free and handles all the setup for you.
| If you already have CurseForge installed | If you don't have CurseForge |
|---|---|
|
|
How to Install Mods Without the CurseForge App
If you prefer full control or want to install mods without extra software, you can do it manually. This method is a bit more technical, but it’s straightforward once you understand the steps. One major downside to managing the .minecraft folder is being unable to have multiple packs installed at the same time.
What you’ll need:
- The correct mod loader (Forge, Fabric, NeoForge, or Quilt)
- The Minecraft version supported by your mod
Here’s how to install mods manually.
Step 1: Install the Correct Mod Loader
| Forge | Fabric | NeoForge | Quilt |
|---|---|---|---|
|
|
|
|
Step 2: Locate Your .minecraft Mods Folder
Locating the Folder on Windows
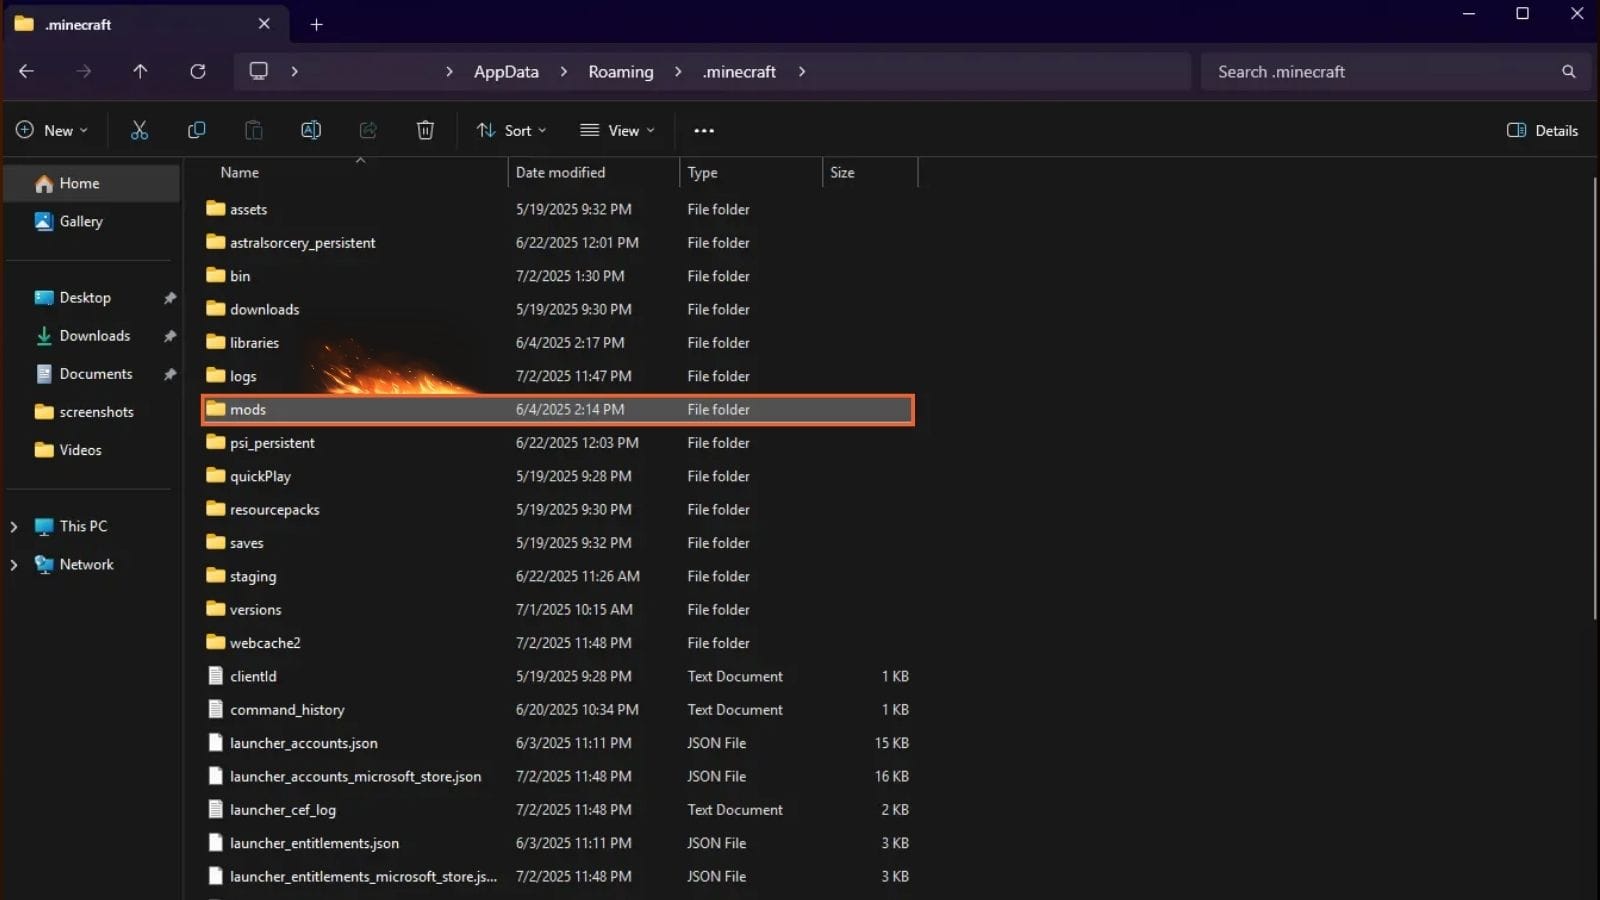
- Press Win + R, type: %appdata%\.minecraft
- Press Enter and Look for the mods folder.
- If it doesn’t exist, create a new folder called “mods”.
Locating the folder on macOS
- Open Finder and go to: "~/Library/Application Support/minecraft".
- Create or open the mods folder.
You will then need to place the mod .jar files (including Fabric API or Quilted Fabric API) into the mods folder. If you’re installing Fabric or Quilt, simply drag Fabric API.jar or Quilted Fabric API.jar into this folder to complete the mod loader installation step.
Step 3: Download & Add Mods
- Go to CurseForge and find your chosen mod.
- Download the .jar files of your chosen mods.
- Place them into the mods folder mentioned in the previous step.
If you want to download more mods, make sure to filter them by your Minecraft version and mod loader (Forge, Fabric, etc.)
Note: Some mods require dependencies (e.g., Fabric API, GeckoLib). So, make sure to download them too, and put them in the mods folder.
Step 4: Launch Minecraft
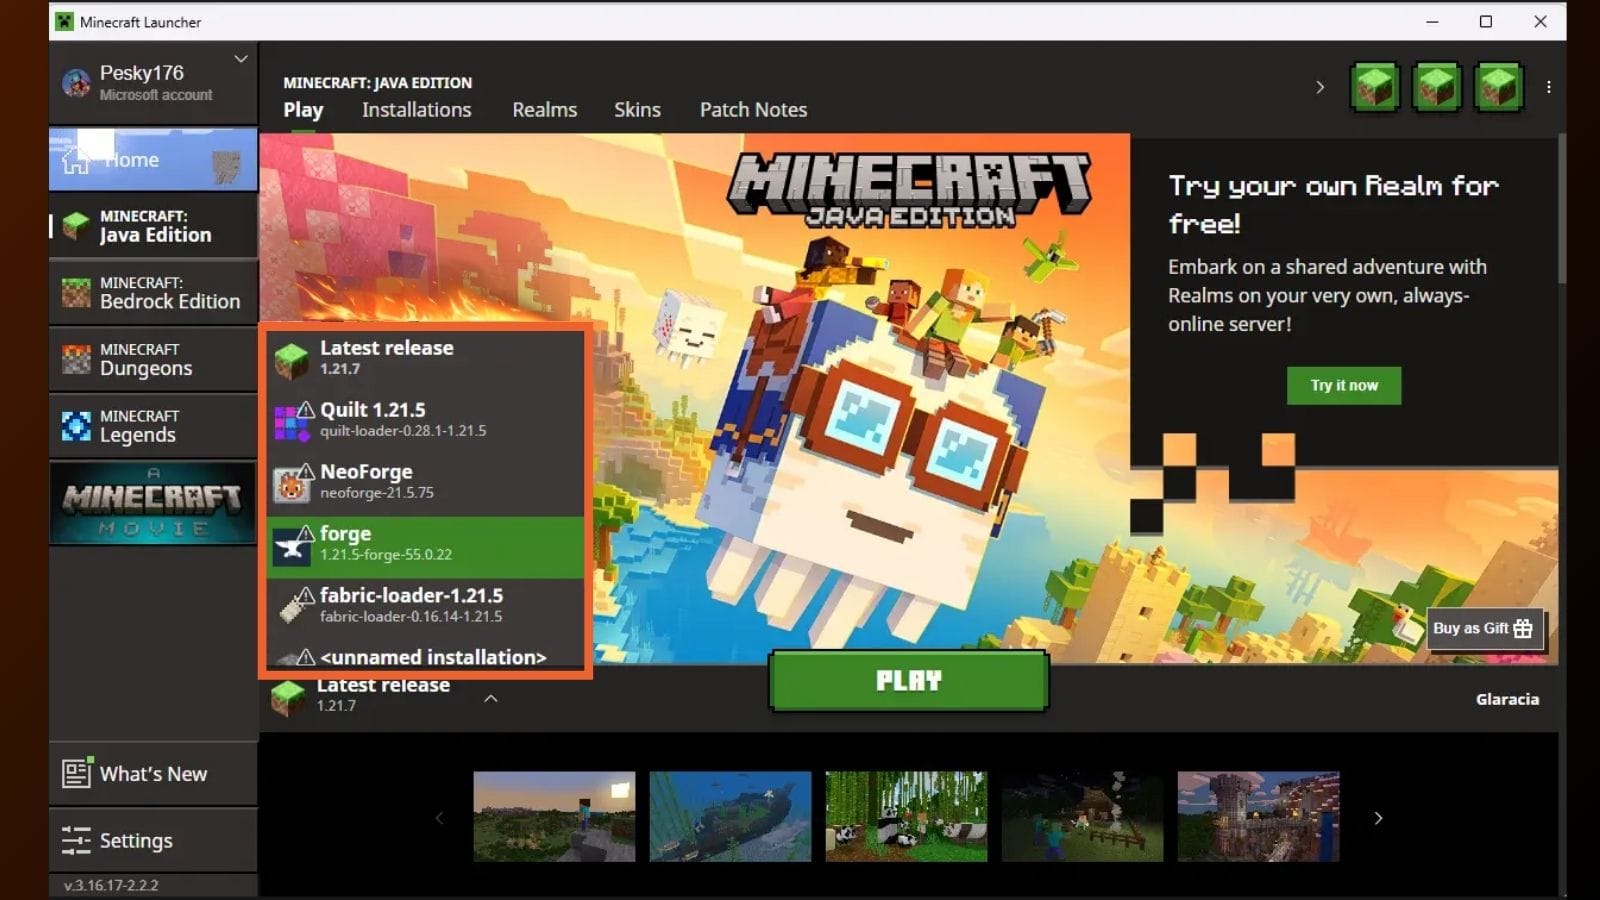
- Open the Minecraft Launcher.
- In the dropdown menu, select the profile created by the mod loader installer (Forge, Fabric, etc.).
- Click "Play".
- If everything is installed correctly, you’ll see a “Mods” button in the main menu.
How to Manage Multiple Mod Profiles For the Manual Installation Method
If you want to switch between different mod packs, e.g., play a magic modpack on Forge 1.16.5 one day, and a tech modpack on Fabric 1.20.1 the next, you’ll need to manage different mod folders.
If you’re using CurseForge, it automatically creates separate folders for each modpack so you can play different setups without conflict.
But for manual installs, you’ll need to manage folders yourself. Although you have multiple profiles for different Mod Loaders, you only have one .minecraft folder with one mods folder.
In this case, you can:
- Create multiple .minecraft copies with different mods and launchers. This method is tedious, error-prone, and not ideal long-term.
- Other tools can manage multiple Minecraft profiles. But unlike CurseForge, they don't have built-in access to the full CurseForge mod library, so you’ll often have to download mods manually.
Common Issues & Quick Fixes
Game crashes immediately upon launch
This often happens due to mod loader or Java version mismatches, or required dependencies that are missing. For instance, Forge needs specific builds, and Fabric mods may depend on the Fabric API. It can also be a driver issue, so we recommend that you update your graphics drivers first.
Mod conflicts are another common cause. To fix this, make sure to check your crash log in ".minecraft\logs\latest.log", verify versions, and temporarily remove mods to identify conflicts.
My mods don’t show up in-game
If you don’t see any mods when launching Minecraft, that means they couldn’t load. This usually means:
- The mods folder is missing or is in the wrong directory.
- The mod loader profile (Forge/Fabric/NeoForge/Quilt) isn't selected in your launcher.
- Case mismatch or installation directory issues on Windows/Mac.
Double-check your setup and verify that you're launching the correct profile.
I’m getting a “Missing dependencies” error or “Mixin” crashes
Many mods require other libraries like Fabric API, Quilt Standard Libraries (QSL), GeckoLib, or Cloth Config. If these aren’t present, the game will crash with Mixin or dependency errors.
I’m running into an "Out of Memory: Java heap space" error
If Minecraft crashes with an "OutOfMemoryError: Java heap space", you’ve likely allocated too little memory, especially if you have large modpacks installed. To fix this, make sure to increase the amount of RAM the game can use from the CurseForge profile settings. If you've already increased the available RAM, also check for memory-hungry mods or use optimization mods like Sodium/Lithium.
I’ve encountered a JNI Error
This error shows up when your Java installation is corrupted or mismatched. The solution is to reinstall or update Java (Java 17+), clear environment variables, and try again. Additionally, ensure your system is pointing to the correct Java version in your launcher settings.