
Mushrooms are one of the trickier crops in vanilla Minecraft. They don't follow the same rules as wheat or carrots – you can't just plant them in sunlight and wait. Light level, block type, and spacing all matter. If any of those conditions are off, a mushroom will either pop off the block or just refuse to spread.
This guide covers how mushroom growth works, what you actually need to farm them reliably, and the different ways to set up a farm depending on how much effort you want to put in.
What You Will Need
Before planting anything, make sure you have:
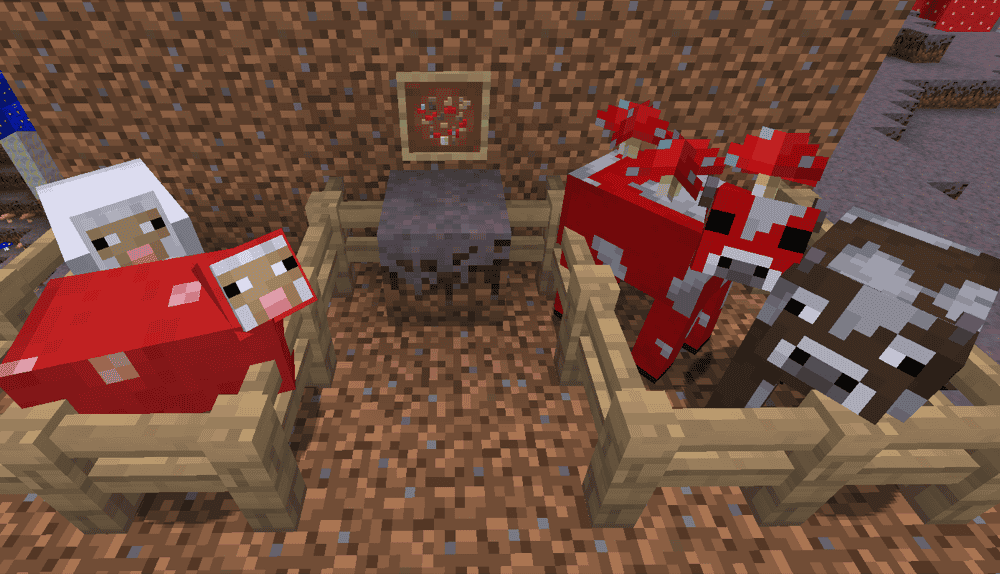
- Red or brown mushrooms: found in caves, dark forest biomes, mushroom fields, or by shearing a mooshroom with shears.
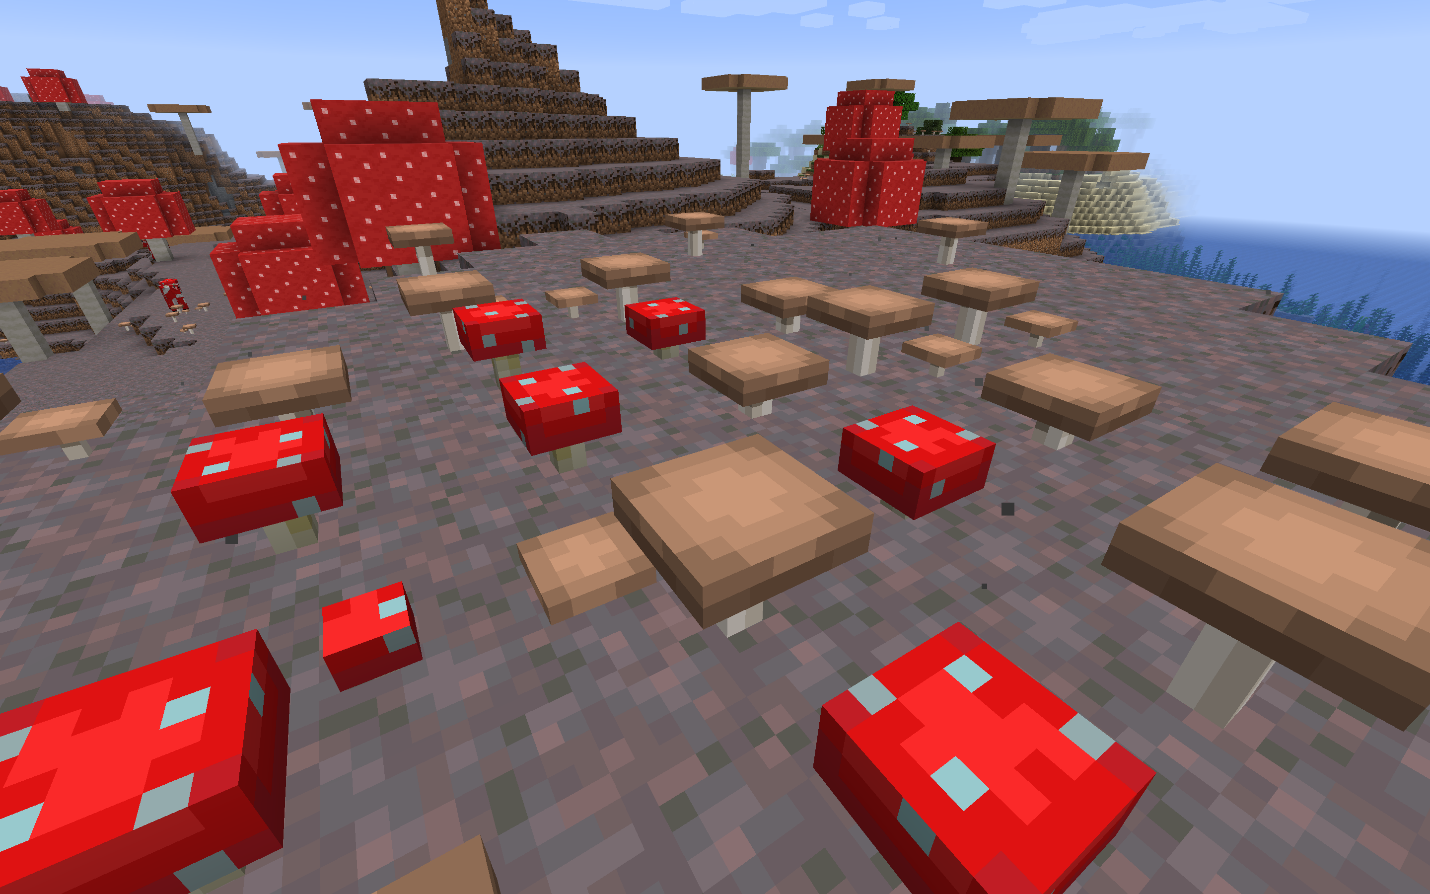
- A valid planting block: mushrooms can be placed on any full top surface at light level 12 or below. For easy farming, dirt, grass, coarse dirt, podzol, mycelium, and nylium are the most useful options. Mycelium, podzol, and nylium are special because mushrooms can stay planted and spread on them at any light level, including full sunlight.
- Low light: on standard blocks like dirt and grass, the upper light level limit at which the mushroom can grow is 12 and below. Soul torches, which emit light level 10, are a practical choice for lit farms since they keep light low enough for mushrooms while preventing mob spawns and providing light for vision.
- Space: small mushrooms spread slowly over time into adjacent blocks. For huge mushrooms via bone meal, you need at least 7x7 blocks of floor space and 8 blocks of clearance above.
How Mushroom Growth Actually Works
Small mushrooms don't grow on a timer like crops. They spread through random ticks – Random Tick is a game event that fires on a small number of blocks every few seconds, separate from the main game clock, or global TPS. On each random tick that lands on a mushroom, there's roughly a 4% chance a mushroom attempts to spread to a nearby empty block. If the target block is valid (solid surface, low light, space above), a new mushroom will appear there. If not, nothing happens.
There's also a hard growth cap at play: if 5 or more mushrooms of the same type already exist within a 9x9x3 area, spreading stops entirely. This prevents a single mushroom from eventually filling out a room, but it also means dense planting slows everything down.
Bone meal skips the normal spreading process. Using bone meal on a planted mushroom can grow it into a huge mushroom right away, but it is not guaranteed to work on the first try. You also need enough room: a huge mushroom needs a 7x7x8 space and the correct planting block. If the mushroom is blocked or planted on the wrong block for huge growth, the bone meal can be wasted. A successful huge mushroom harvest usually gives you around 20 mushrooms, which makes this one of the fastest vanilla farming methods.
Mushroom Block and Light Requirements in Detail
Light level is the main thing that trips players up. On dirt, grass, or coarse dirt, the mushroom itself – not just the area around it – needs light level 12 or below. Sunlight far exceeds this, so outdoor mushroom plantations on normal blocks don’t make progress during the day.
Mycelium, podzol, and nylium blocks bypass this entirely. Mushrooms planted on these blocks can survive and spread at any light level. This is what makes the Mushroom Fields biome so useful for farming – the entire ground is mycelium, so you can grow mushrooms in the open air without any light management.
Podzol can be obtained in the overworld by bonemealing a 2x2 spruce sapling arrangement. The mega spruce tree that grows will then convert the surrounding dirt to podzol. Mycelium can be spread from existing mycelium blocks using tools with the Silk Touch enchantment, or found in mushroom field biomes. In the Nether, both crimson and warped nylium work the same way.
Popular Mushroom Farming Methods
Dark Room Farm
Probably the simplest setup of them all. Dig a room at least 2 blocks high, place soul torches far enough apart so that each mushroom spot stays at light level 12 or below, and plant mushrooms with gaps between them. They'll spread gradually over time.
This approach is slow and the yield is low – spread is capped, so you won't end up with hundreds of mushrooms from a small room. It's a decent early-game option when you just need a steady trickle for mushroom stew, but it's not efficient enough for bulk production.
Bone Meal Huge Mushroom Farm
Clear a 7x7x8 space underground or under a dome, place a valid block in the center, plant a mushroom, and apply bone meal until it grows into a huge mushroom. A successful huge mushroom harvest usually gives you around 20 mushrooms, so once the setup is working, this is one of the fastest vanilla farming methods.
The math works well here if you have bone meal coming in from a composter or skeleton farm. Mushrooms are compostable too, so extra harvests can help feed your bone meal supply over time. They do not convert efficiently enough to create a clean 1-to-1 loop, but they can still offset part of the cost of huge mushroom farming. This is the highest-yield method available in vanilla, especially once automated with a dispenser full of bone meal and a water flush system to collect drops.
Piston Farm
This method is a step up in complexity but much more hands-off once built. To execute it:
- Set up platforms of dirt or podzol with mushrooms planted across them, with sticky pistons at the edges connected to redstone.
- Next, trigger the pistons to push mushrooms off the platform into a water channel that funnels items into a hopper and chest.
- While the mushrooms are growing and spreading between harvests, the platform will fill back up. Activate the pistons again for the next harvest.
With a daylight sensor or a timer, this can run automatically. A piston farm can produce a steady passive supply of mushrooms with far less manual harvesting once it is set up.
What Mushrooms Are Used For
Mushrooms have a few specific uses worth knowing:
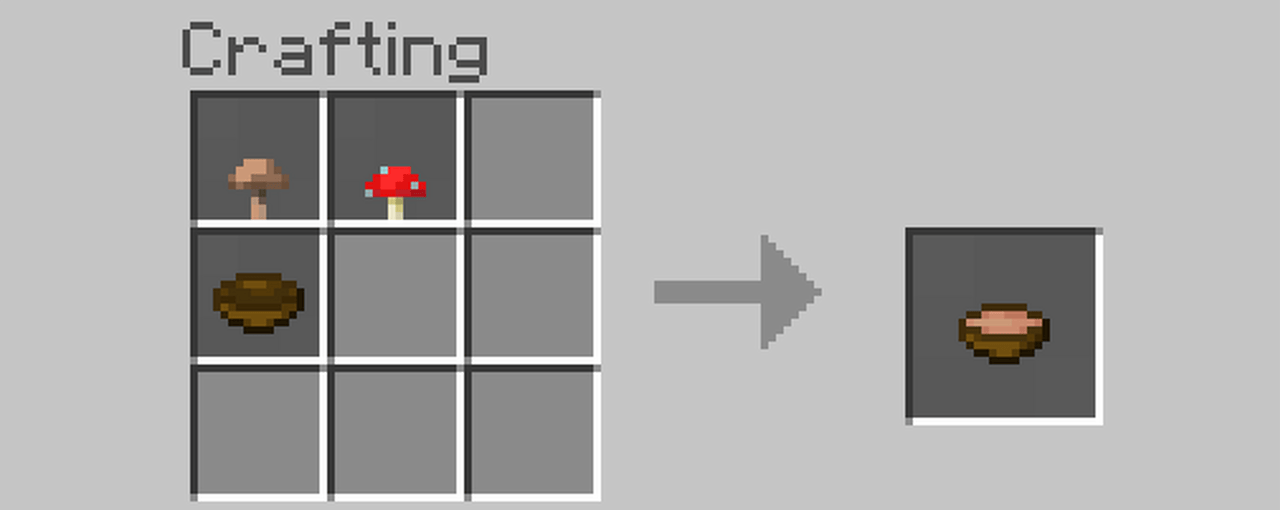
- Mushroom Stew is made by crafting one red mushroom, one brown mushroom, and a bowl together. The stew will then restore 6 hunger points on use. You can also right-click a mooshroom cow with an empty bowl to refill the stew directly without spending mushrooms.
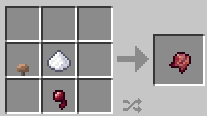
- Fermented Spider Eye requires a brown mushroom, a spider eye, and sugar. It's a brewing ingredient used for several potions like Weakness, Slowness, Harming, and Invisibility.
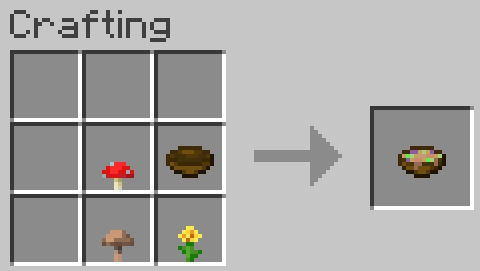
- Suspicious Stew can be crafted by adding a flower to the stew recipe, giving it a random potion effect depending on which flower you use. Note that using different flowers will produce different effects.
- Composting mushrooms gives you a roughly 65% chance of adding one layer to the composter per mushroom. That makes excess mushrooms a useful way to supplement your bone meal supply over time, even if the return is not efficient enough to fully sustain huge mushroom farming by itself.
Mods That Work Well with Mushrooms
These mods expand mushrooms in different ways – from new wood sets and farming uses to mushroom-themed villagers, items, and structures. They work well as follow-up options if you want to do more with mushrooms than what vanilla Minecraft offers.
Extended Mushrooms
Extended Mushrooms changes mushroom behavior and adds more mushroom-related blocks, items, and recipes to Minecraft. It also includes new mushrooms such as Glowshroom, Honey Fungus, Poisonous Mushroom, and Slime Fungus, along with the Baashroom, which is a mushroom sheep variant. The mod even adds Mushroom Spores, Fairy Ring crafting, and mega mushrooms that can grow from a 2x2 mushroom setup.
Huge mushrooms also become more useful after harvest. Mushroom Stem blocks can drop themselves and be used as a wood type, while red and brown mushroom blocks can drop mushrooms by chance or be collected directly with shears or Silk Touch. The mod also adds a few extra mushroom-based items and recipes, including Grilled Mushroom, Mushroom Bread, and Glowstone Crumbs from Glowshroom caps.
Enhanced Mushrooms
Enhanced Mushrooms turns giant mushrooms into new wood types and adds a few changes around mushroom farming and building. The mod adds two mushroom wood sets, replaces normal giant mushroom stems with its own versions, and changes vanilla mushroom block drops to make them more renewable and more useful for farming.
It also includes compatibility features with a few other mods, especially around decorative blocks and food-related mods. The overall focus is not on completely changing how mushrooms work, but on making mushroom fields easier to live in and making giant mushrooms more useful for building.
Mushroom Villager Trader

Mushroom Villager Trader adds a new villager profession called the Mushroom Trader, along with a giant mushroom house structure that can generate in dark forests and mushroom fields. The mod also adds trader blocks that let you assign the profession through a workstation, so the new villager is not limited to natural structure spawns.
The mod also adds custom trades, mushroom-themed armor, tools, a new weapon, and three food items with effects. Its main focus is on offering mushroom-themed worlds and builds a villager, structure, and item set that fit the same theme.
How to Install Minecraft Mods
You can install the above mods automatically using the CurseForge app or manually by placing the mod files within your game's mods folder. Both methods allow you to easily add custom features and enhancements into your vanilla Minecraft experience.
If you want to learn more, you can read our detailed guide on how to install Minecraft mods.
Common Issues and Quick Fixes
Mushrooms keep popping off immediately upon placement
If this happens, the light level is too high. Check what's directly illuminating that spot – either a torch is too close, a gap in the ceiling is letting sunlight in, or lava is flowing nearby. Either move the light source further away, switch to soul torches, or use podzol or mycelium as your planting block, which removes the light restriction entirely.
Bone meal isn't growing a huge mushroom
First, check the space. A huge mushroom needs a clear 7x7x8 area, so even one badly placed block can stop it from growing. Then, check the block underneath. Huge mushrooms need a valid surface such as dirt, grass, coarse dirt, podzol, mycelium, or nylium. Keep in mind that bone meal growth is also chance-based, so even with the correct setup, you may need more than one attempt before the mushroom can grow.
Mushrooms stopped spreading even though there's enough space
You've hit the 5-mushroom cap for that 9x9x3 area. Once 5 mushrooms of the same type are present in that zone, no more can spread out. Either harvest some of them to bring the count back down, or move your planting spots further apart so each mushroom has its own uncrowded zone to spread into.
Mobs are spawning in the mushroom farm
This means the light level is between 1 and 7 somewhere in the farm. Mushrooms need light level 12 or below, but hostile mobs spawn at level 7 and below – it’s the gap between those two thresholds where you have to be careful. Soul torches at level 10 cover both: low enough for mushrooms, high enough to prevent mob spawns. Check for any dark pockets, especially corners and areas under platforms.
Mushrooms won't plant on the surface outside
Sunlight exceeds light level 12 during the day, so mushrooms on standard dirt or grass blocks outdoors will immediately pop off. For outdoor farming in daylight, you need podzol, mycelium, or nylium as the planting surface. Alternatively, plant them under a roof with controlled lighting or only plant at night.
Game crashes after adding a mod
Check the mod’s CurseForge page and make sure the file matches your Minecraft version, mod loader, and any required dependencies. A wrong game version, the wrong loader, or a missing library is one of the most common reasons a new mod crashes on launch.