A good tool in Minecraft can stick with you for a long time – especially once it has the right enchantments. But sooner or later, that durability bar starts getting low, and fixing it the wrong way can cost you more than a few XP levels.
Some repair methods are quick and cheap, while others are better for enchanted gear you actually care about. This guide breaks down when to use each repair option, what happens to your enchantments, and how mods can change the repair loop completely.
Before You Repair: Picking the Right Method
Below are a few points to keep in mind before you start fixing your trusty tools:
- If you want to keep your enchantments: use an anvil with the right repair material, or get Mending on the tool.
- If you don't care about enchantments: use the crafting grid or a grindstone.
- If you are upgrading diamond to netherite: use a smithing table – this isn't a repair action per se, but it preserves the tool's durability, enchantments, and custom name.
Repairing Tools With an Anvil
An anvil repairs tools while keeping their enchantments intact. To use an anvil, place the damaged tool in the left slot and the appropriate repair material in the right slot. Each unit of material restores up to 25% of the tool's maximum durability, so badly damaged tools might need two or three pieces of the appropriate material to fully repair.
Repair Materials by Tool Type
- Wooden tools: wooden planks.
- Stone tools: cobblestone, cobbled deepslate, or blackstone in Java Edition.
- Iron tools and chainmail armor: iron ingots.
- Gold tools: gold ingots.
- Diamond tools: diamonds.
- Netherite tools: netherite ingots.
- Maces: breeze rods.
- Leather armor: leather.
- Turtle shells: scutes.
- Elytra: phantom membranes.
- Shields: wooden planks.
Important: The anvil charges XP levels for each repair. That cost goes up every time you use the anvil on the same item – this is the prior-work penalty.
Repair an item too many times and the anvil eventually shows "Too Expensive!" and refuses to work. When that happens, Mending is the best way to keep the same enchanted tool going. Otherwise, you can grindstone it and re-enchant from scratch, or craft a replacement.
Tip: You can also make repairs by combining two identical items on the anvil. Simply place the damaged item on the left plus a throwaway copy on the right – the result gets the combined remaining durability plus a 12% bonus, and if the throwaway has compatible enchantments, these will also merge.
Repairing Tools With the Crafting Grid
This is the cheapest repair method from the list but also the one that destroys enchantments. To use it, put two damaged copies of the same tool anywhere in the crafting grid – the output is one repaired tool with the combined durability plus a 5% bonus.
However, if you go this route, you lose all normal enchantments, any custom name, and any prior-work history. Curse enchantments can stay on the repaired item, so the result is usually a clean unenchanted tool unless one of the inputs had a curse.
Tip: We recommend using this method only when the tool has no enchantments worth keeping, or when you've already stripped them with a grindstone first.
Repairing Tools With a Grindstone
A grindstone works like a crafting grid repair but handles enchantments more gracefully. To perform it, combine two tools of the same type in the grindstone.
This will repair the item, remove all non-curse enchantments, refund some XP from the stripped enchantments, reset the prior-work penalty, and keep any custom name you previously had. Any Curse of Binding and Curse of Vanishing will stay on the item, however, as the grindstone can't remove curses.
Tip: This is the right tool for resetting an item's repair history. If a tool has gotten so expensive to anvil-repair that it shows "Too Expensive!" but you don't care about its current enchantments, grindstone it to wipe the history, then re-enchant from scratch.
Repairing Tools With the Mending Enchantment
Mending is a treasure enchantment – it won't appear at the enchanting table and has to come from fishing, loot chests, or librarian villager trades. Once a tool has Mending, any XP orbs you collect during normal play repair the item instead of filling your XP bar.
This is the long-term solution to the repair problem. A tool with Mending and Unbreaking III barely needs any attention as long as you keep collecting XP and do not let it hit 0 durability. Mending uses XP orbs to restore durability, while with Unbreaking III you have a chance of not spending durability per swing, making the tool last much longer between repairs.
You can get Unbreaking III from the enchanting table, enchanted books, loot, or librarian villager trades. If you find Unbreaking or Mending on a book, apply it to the tool with an anvil.
Repairing Tools With the Smithing Table
The smithing table upgrades diamond gear to netherite using a smithing template and a netherite ingot. This is not a durability repair – it does not restore the tool to full durability. What it does do is preserve the tool's existing durability, enchantments, and custom name during the upgrade.
Mods That Change How Repair Works
The Vanilla Minecraft repair methods are generally reliable, but still ask of you to manage materials, XP costs, enchantments, and durability before a favorite tool inevitably breaks. Mods can make that loop easier, stricter, or completely different depending on how you like to play.
Some options add safer repair shortcuts, some stop tools from breaking by accident, and others turn tools into long-term gear projects with modules, upgrades, or permanent durability solutions.
Forbidden and Arcanus
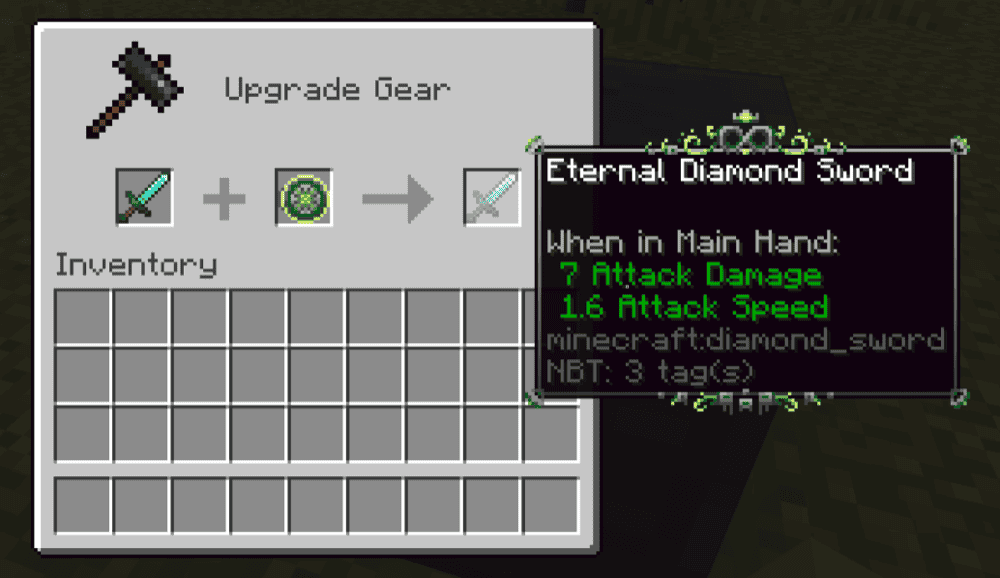
“Forbidden and Arcanus” is a magic and RPG-themed mod with rituals, trinkets, tools, weapons, armor, and item modifiers. For tool repairs, the main draw is the Eternal Stella – an item used to apply the Eternal modifier through the smithing table. The Eternal modifier removes durability from an item, making it a late-game way to stop worrying about repairs on a favorite tool, weapon, or armor piece.
The Eternal Stella is not an early-game shortcut, however. It is tied to the mod's progression and requires rare materials, including a Stellarite Piece, so it works better as a reward for players who want a magical end-game solution to durability.
“Forbidden and Arcanus” also includes other modifiers, such as Fiery for auto-smelting mined blocks and Demolishing for 3x3 tool breaking, but each item can only hold one modifier at a time, so players need to choose the upgrade that matters most.
Silent Gear
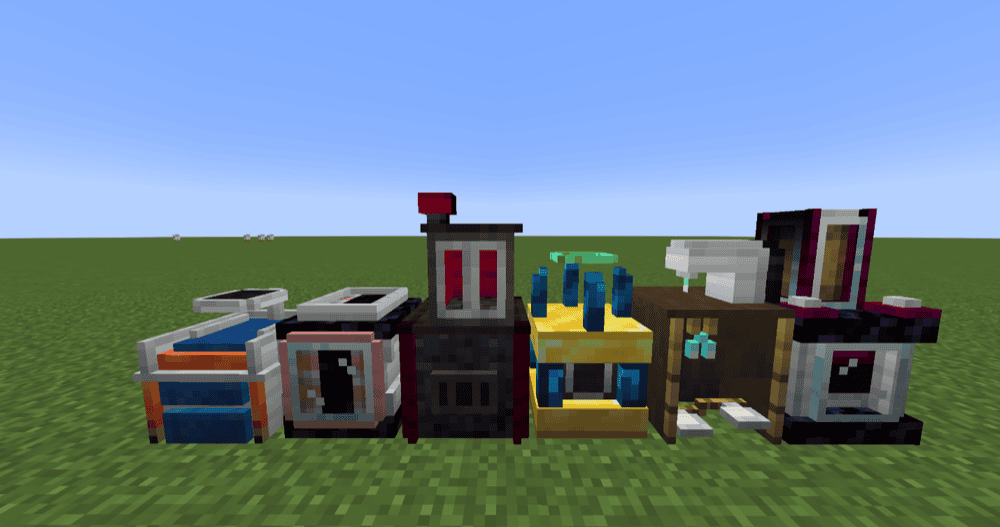
“Silent Gear” replaces the simple vanilla tool recipe with a modular gear system built around blueprints, parts, and materials. Instead of every pickaxe being made from one fixed recipe, you craft gear from separate components and choose materials that affect the final stats. The mod supports tools, weapons, and armor, with vanilla materials, extra materials, and data-pack support for custom material setups.
For repair, “Silent Gear” is different from vanilla because its gear stores more item data than a normal tool. Simply combining two “Silent Gear” items like vanilla tools is not the best method. Instead, we recommend using repair kits that can be filled with materials and used in a crafting grid, as long as the repair material is the same tier or higher than the gear’s primary part.
You can also repair “Silent Gear” items through normal anvil repairs, which cost XP but can be more material-efficient.
Pickle Tweaks
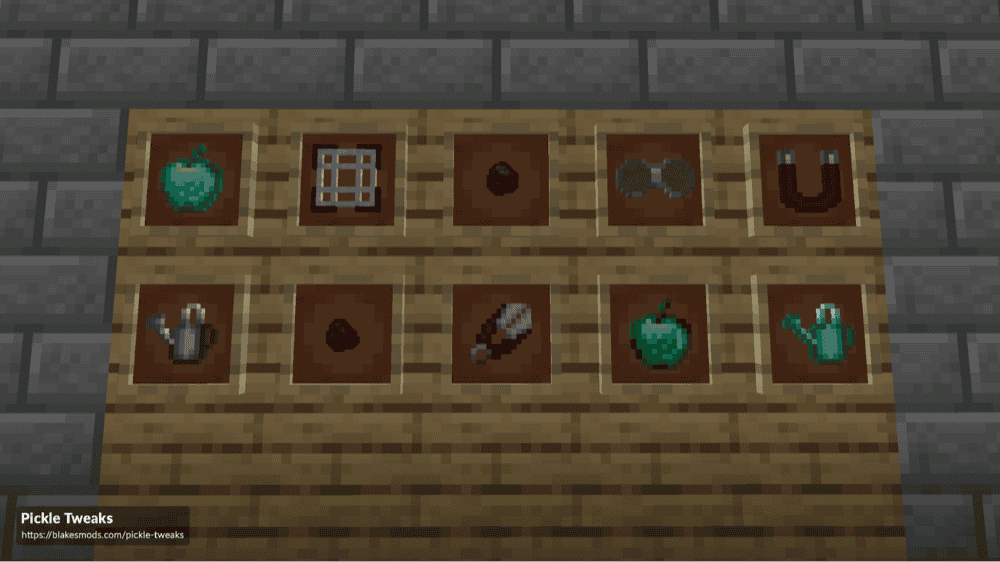
“Pickle Tweaks” adds Vanilla+ quality-of-life features, with the repair highlight being Crafting Grid Tool Repair. This lets you repair broken tools and weapons in a crafting grid using their normal repair materials, similar to how an anvil uses repair materials, but without turning the whole system into a full gear overhaul.
The mod also includes a Tool Breaking Tweaks option that can make tools and weapons become ineffective one use before breaking, giving players a chance to repair them before they disappear.
Other features include paxels, tool information tooltips, watering cans, sickles, scythes, right-click crop harvesting, item magnets, and other configurable tweaks. Each feature can be disabled individually in the configuration file, so players can keep the repair changes without using every extra feature.
Tetra
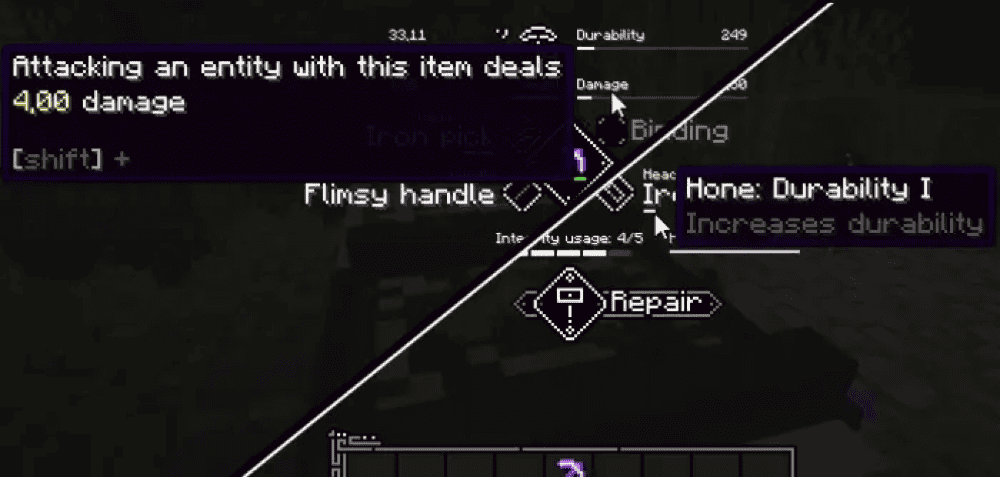
“Tetra” reframes tools as modular objects that you build, improve, and keep using over time rather than treating them as dispensable items. You start by crafting a mallet, using it on a vanilla crafting table to make a Tetra Workbench, then placing a tool, weapon, shield, or bow into the bench to view and change its modules.
Overall, “Tetra” is less about simple durability repair and more about long-term tool maintenance and progression. You can add, remove, or modify parts, preview how different materials affect stats, and improve modified items through use.
More powerful parts and schematics can be found by exploring ancient ruins or through trade and barter, so your favorite gear can grow alongside your world instead of being replaced every time you unlock a better material. The Holosphere gives an overview of module stats, improvements, and materials, which helps you compare upgrades before committing.
Anti Tool Break (Fabric)
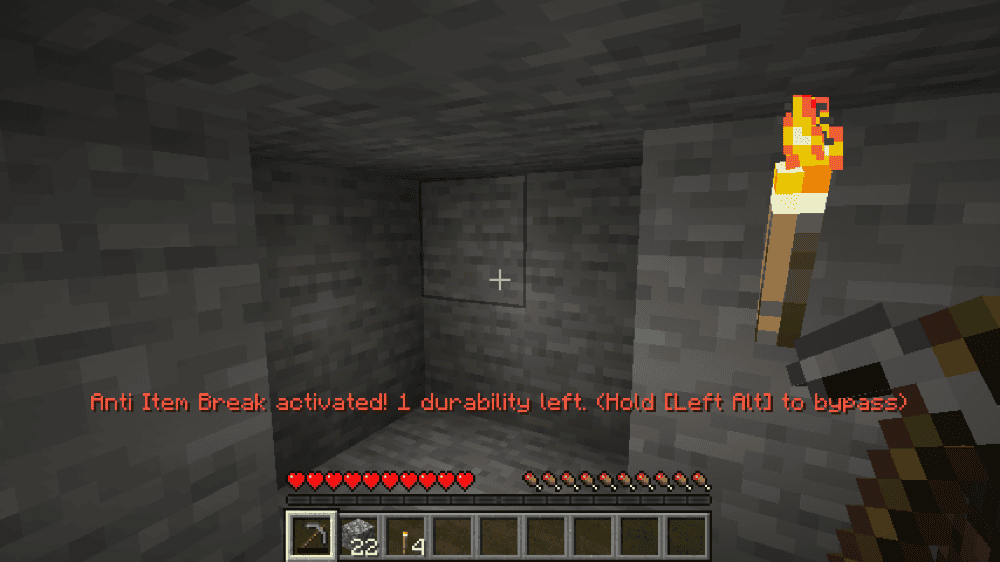
“Anti Tool Break (Fabric)” stops important tools from breaking by canceling actions when a filtered item reaches a configurable durability value. Once the tool gets too low, attacks, block breaking, and interactions are all blocked, which gives you a chance to repair the item instead of accidentally losing it.
The mod is client-side and can be configured with filters for enchanted items, non-enchanted items, materials like gold, diamond, and netherite, or other item types. By default, it protects gold, diamond, and netherite tools, plus enchanted tools above 5 durability, but you can change that threshold or bypass protection while sneaking. This makes it a simple Fabric option for players who still want normal repairs but hate accidentally breaking valuable gear.
How to Install Minecraft Mods
You can install the above mods automatically using the CurseForge app or manually by placing the mod files within your game's mods folder. Both methods allow you to easily add custom features and enhancements into your Minecraft experience.
If you want to learn more, you can read our detailed guide on how to install Minecraft mods.
Common Issues and Quick Fixes
The anvil says "Too Expensive!"
This means that your tool has too many prior-work penalties from previous anvil operations. The cost calculation exceeds 39 levels and the anvil therefore refuses to work.
Your options now are:
- Use Mending to repair it through XP from now on.
- Grindstone it to strip the enchantments and reset the history, then re-enchant.
- Use the crafting grid repair method to get a clean unenchanted tool at the cost of all existing enchantments.
My enchantments disappeared after repairing
You likely used the crafting grid or a grindstone as both methods strip non-curse enchantments. If you want to keep enchantments, always use an anvil with appropriate repair materials, combine your tool with another enchanted copy at the anvil, or use Mending to avoid needing repairs altogether.
The material I'm using at the anvil isn't working
You likely have an incompatible material for that tool type. A few examples:
- Stone tools repair with cobblestone, not stone.
- Chainmail repairs with iron ingots, not chainmail scraps.
- Elytra repair with phantom membranes, not leather.
- Maces repair with breeze rods.
We suggest double-checking the specific material for what you're trying to fix as sometimes the material pairing is not that obvious.
Mending isn't repairing my tool fast enough
Mending takes XP orbs one at a time and distributes them randomly across all equipped Mending items. If you have multiple Mending items equipped simultaneously, each orb might go to a different item and your target tool will therefore repair slowly. A quick solution is to temporarily unequip other Mending gear if you need to repair one specific item faster.
My game crashes after adding a new mod
A crash after installing a mod usually points to a version mismatch, loader mismatch, or missing dependency. Check that the mod file matches your Minecraft version and loader, then check the mod page for required libraries or APIs.
If you added several mods at once, remove the newest ones and add them back one at a time. That makes it much easier to find the culprit instead of playing the guessing game.