Iron ore in modern Minecraft generates across a huge height range, but it is not spread evenly. The two main iron peaks are around Y=16 underground and around Y=232 in high mountains. In this context, "Y" means your height level on Minecraft’s coordinate system.
For a quick answer, mine at around Y=10 to Y=20 for a reliable early source of iron, and head into mountain biomes at around Y=220 to Y=250 for bulk iron deposits later on.
The Two Iron Peaks Explained
Since Minecraft 1.18, iron has two main hotspots: one underground and one high up in mountain biomes.
Peak 1: Y=16, Underground
Iron generates underground from about Y=-24 to Y=56, with the best concentration being at around Y=16. This is the classic underground iron target in modern Minecraft, especially if you want reliable iron without needing mountain terrain.
Iron is still fairly common outside of Y=16, especially in the nearby underground levels, so Y=10 to Y=20 remains a reliable range even if you are not mining at the exact peak.
Peak 2: Y=232, Mountain Stone
The larger iron hotspot is in high mountain terrain. If you're mining in mountain stone above Y=200, iron becomes much more common, with the best concentration found at around Y=232.
The catch is that you need to actually be in mountain terrain for this to matter. Below Y=80, this layer contributes nothing – it's purely a high-altitude bonus. But in mountains, peaks, and stony cliff biomes, exposed cliff faces often reveal enormous amounts of iron that you can mine from the surface without digging at all.
Which Level Should You Target?
Early Game: Mine Around Y=10 to Y=20
This is the practical early-game target. Y=16 is the best underground level for iron, and the wider Y=10 to Y=20 range keeps you close to that sweet spot while staying in regular stone. You’ll find reliable iron here without needing mountain terrain or special preparation.
The most efficient approach here is branch mining – dig a long horizontal tunnel at Y=10 to Y=16, then branch off perpendicular tunnels every few blocks to expose as much stone as possible. You'll also pick up coal, copper, and occasionally gold and diamonds at nearby levels, which makes this a productive general mining depth.
Late Game: Mountain Biomes at Around Y=220 to Y=250
Once you need iron in serious quantities, mountain terrain is the better target. The generation density per chunk at Y=232 is dramatically higher than at Y=16, and mountain cliff faces expose ore directly without requiring any digging into the stone. Walking along the base of a tall mountain or stony cliffs biome and mining exposed iron directly from the face is often faster than any underground approach.
If you want bulk iron later on, mine exposed stone high in mountain biomes or strip-mine above Y=200. That is usually better than mining deep underground for iron.
Where Iron Doesn't Spawn as Much
Iron is less reliable at very deep levels, especially at around Y=-40 and below, where stone has mostly given way to deepslate – the darker rock found in the lower parts of the world – and mining is slower because deepslate takes longer to break. The area from Y=56 to Y=80 is also a weaker range. If you're mining only for iron, those levels are usually not the best place to look.
How to Check Your Y-Level
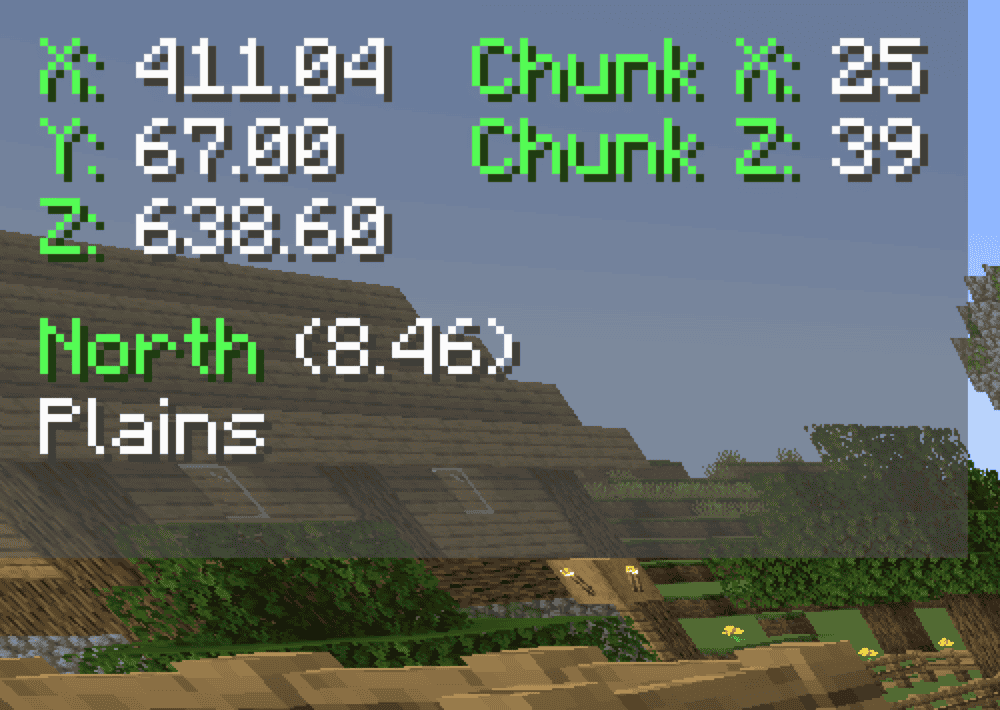
On Java Edition, press "F3" to open the debug screen. Your "Y" coordinate is listed under the XYZ line. The number shown is your feet position. On Bedrock Edition, coordinates can be turned on from the world settings under "Show Coordinates" – no debug screen needed.
If you don't want the full debug screen open while mining, there are several mods available that will show you just the coordinates as a small permanent overlay.
Mods That Help With Iron Farming
These mods fall into two groups: ones that show you ore generation data for every level in-game, and ones that keep your Y-level permanently visible on screen so you always know exactly at what depth you're mining.
Just Enough Resources
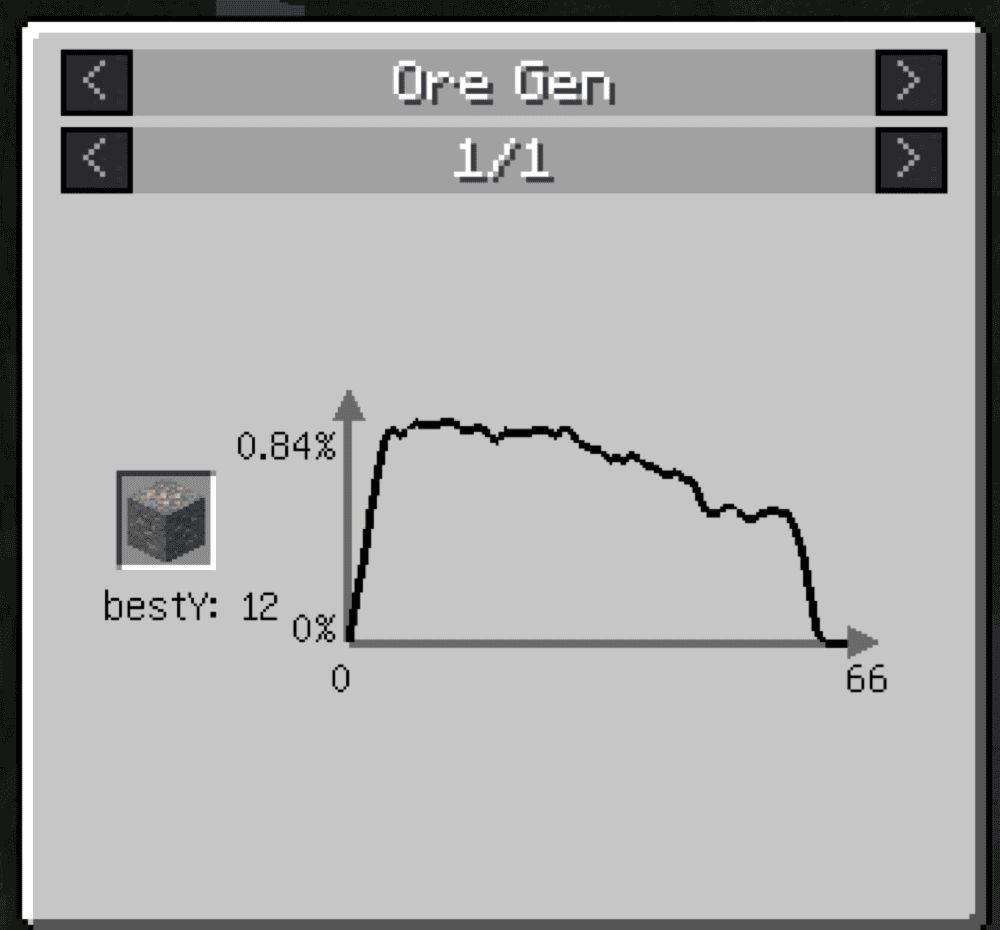
Just Enough Resources (JER) adds extra world and loot information to the in-game item viewer. Its main features include mob drops, dungeon loot, ore generation, and plant drops, so players can check resource information without leaving the game.
For ore hunting, the ore generation view shows where ores generate across different levels. Players can also make custom ore distribution graphs by adding a file called "world-gen.json" to the "configs" folder and enabling the feature in-game.
EMI Ores
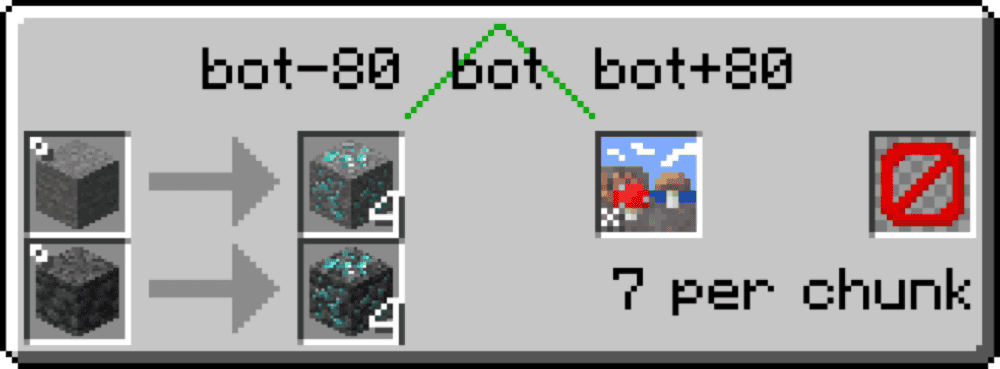
The EMI Ores addon adds ore generation information directly to the recipe-viewer mod EMI. It shows where ores generate in the world, including their Y-level distribution, vein size, vein count per chunk, and biome restrictions.
It reads ore generation data directly from the game’s world-generation files, so modded ores usually show up correctly without extra setup as long as they use Minecraft’s standard ore generation system. The mod also needs to be present on both the client and the server for it to work properly.
MiniHUD
MiniHUD adds a customizable on-screen information display that works like a smaller version of the "F3" debug screen. It can show coordinates, light level, biome, facing direction, current chunk, and other information lines all while you play, so you can keep your Y-level visible without opening the full debug overlay.
It also includes extra overlays such as slime chunk markers, spawn-related overlays, structure bounding boxes, region file boundaries, and configurable shapes. The information lines and overlays can be toggled on and off separately, and the HUD position, colors, and font settings can be adjusted from the mod’s configuration settings.
Coordinates Display
Coordinates Display adds a HUD that shows your in-game coordinates on screen. It can also display chunk coordinates, facing direction, biome information, and your Minecraft version, so you can keep track of your Y-level and location without opening the full debug screen.
It includes multiple display modes, a configurable HUD position screen, color customization, keybindings, death position saving, and a position-marking feature for saving and sharing locations.
How to Install Minecraft Mods
You can install the above mods automatically using the CurseForge app or manually by placing the mod files within your game’s mods folder. Both methods allow you to easily add custom features and enhancements into your vanilla Minecraft experience.If you want to learn more, you can read our detailed guide on how to install Minecraft mods.
Common Issues and Quick Fixes
You’re finding very little iron at Y=16
Check the terrain you’re mining in. Y=16 is a reliable underground iron level, but the biggest iron concentrations are still in high mountain stone at around Y=232. If Y=16 feels sparse, cover more horizontal ground with branch mining or switch to mountain terrain above Y=200 for denser iron ore deposits.
Confusing Y-level measurements on different versions
The two-peak distribution for iron was introduced in Java Edition 1.18 as part of the Caves and Cliffs Part II update. If you're playing on an older world or a version before 1.18, iron had a much simpler distribution that was roughly flat from Y=5 to Y=54. The mountain peak at Y=232 doesn't exist in pre-1.18 worlds. The distribution has not changed since 1.18, so any version from 1.18 onward works the same way.
Iron ore is not dropping iron ingots
Deepslate iron ore works the same way as regular iron ore when mined without Silk Touch – both drop Raw Iron, not Iron Ingots. If you’re getting Raw Iron, that is the expected outcome. Raw Iron must then be smelted into Iron Ingots in a furnace or blast furnace. Fortune increases the amount of Raw Iron dropped, but it does not make the ore drop ingots directly.
Just Enough Resources isn’t showing any ore data
JER requires JEI or REI to be installed alongside it. Without the recipe viewer mod, JER has no interface through which it can display its data. Install JEI or REI first, then JER, and make sure all three match your Minecraft version and loader. If the ore data tab shows up but has no entries for a modded ore, that specific ore generation may not be in a format JER can read. If so, check the mod's page or GitHub for any known data pack compatibility notes.
Your mod does not load or crashes at startup
Make sure the mod file matches your exact Minecraft version and mod loader – Fabric mods will not load on Forge or NeoForge, and the wrong Minecraft version can cause crashes or silent failures. Install any required dependencies listed on the mod’s CurseForge page, and double-check that those dependency files also match your version and loader.