A quick start guide on how to get started as a CurseForge Author, how to upload your first project, and what the next steps could be. This guide is intended for new authors who want to learn more about the platform.
In this guide, we'll walk you through the process of becoming a CurseForge Author, how to upload your first project, and what to expect from the platform.
Sounds good? Let's get started!
The Most Important: The CurseForge Account
To get started on this journey, we need to create an account, which lets you access the Author Portal, the place where you can start your modding career. This is where you create your projects, upload the files needed, and also keep track of your CurseForge Points! (.. and your downloads, of course).
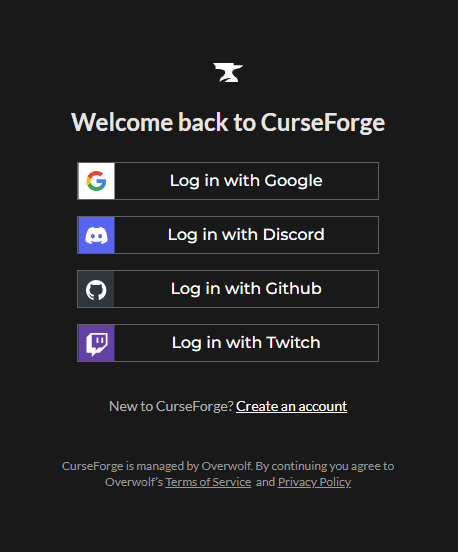
So, to create the account, visit the Author Portal, log in with different providers, such as Google, Discord, GitHub, and Twitch. Be sure to read both the Terms of Service, the Privacy Policy, and the Rewards Program Terms of Service before proceeding.
Fill in all the required fields and create your profile. Once you have created your account, you can start creating your projects and uploading your files.
Creating Your First Project
I guess you already have a project in mind, or something that you have on another platform, and you want to upload it to CurseForge.
Great choice! CurseForge is a great platform for modders, and it's a great place to share your work with the community. Anyway, let's not waste any more time, and let's get to the good stuff.
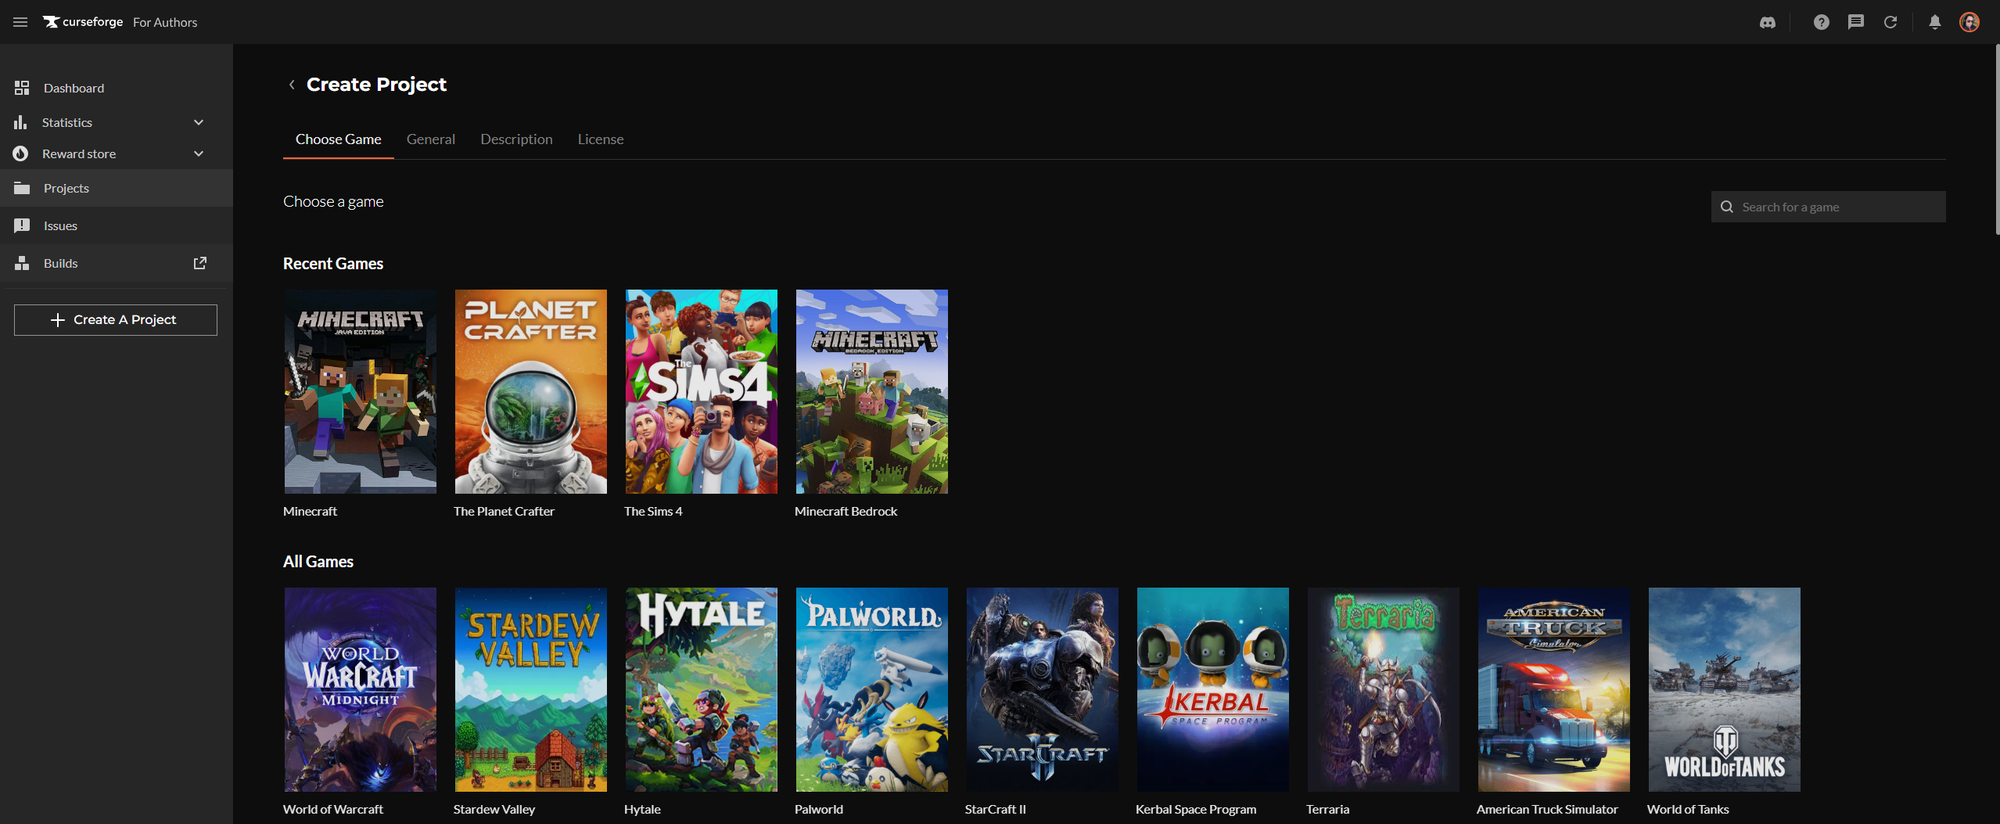
I suppose you're still logged in to the Authors Portal; if not, just log in again! Then we click the Create A Project button, we'll then be given a choice of games that the platform supports. We'll stick with Minecraft for this guide, but it works the same for most other games, except for some that are managed through their respective development kits (Hogwarts Legacy, ARK).
The next step is the "General" tab, where we need to enter some basic information about your project, like the project name (shown on the website and in the app), a short summary of what the project is about, and a logotype (1:1 ratio, at least 400x400 pixels).
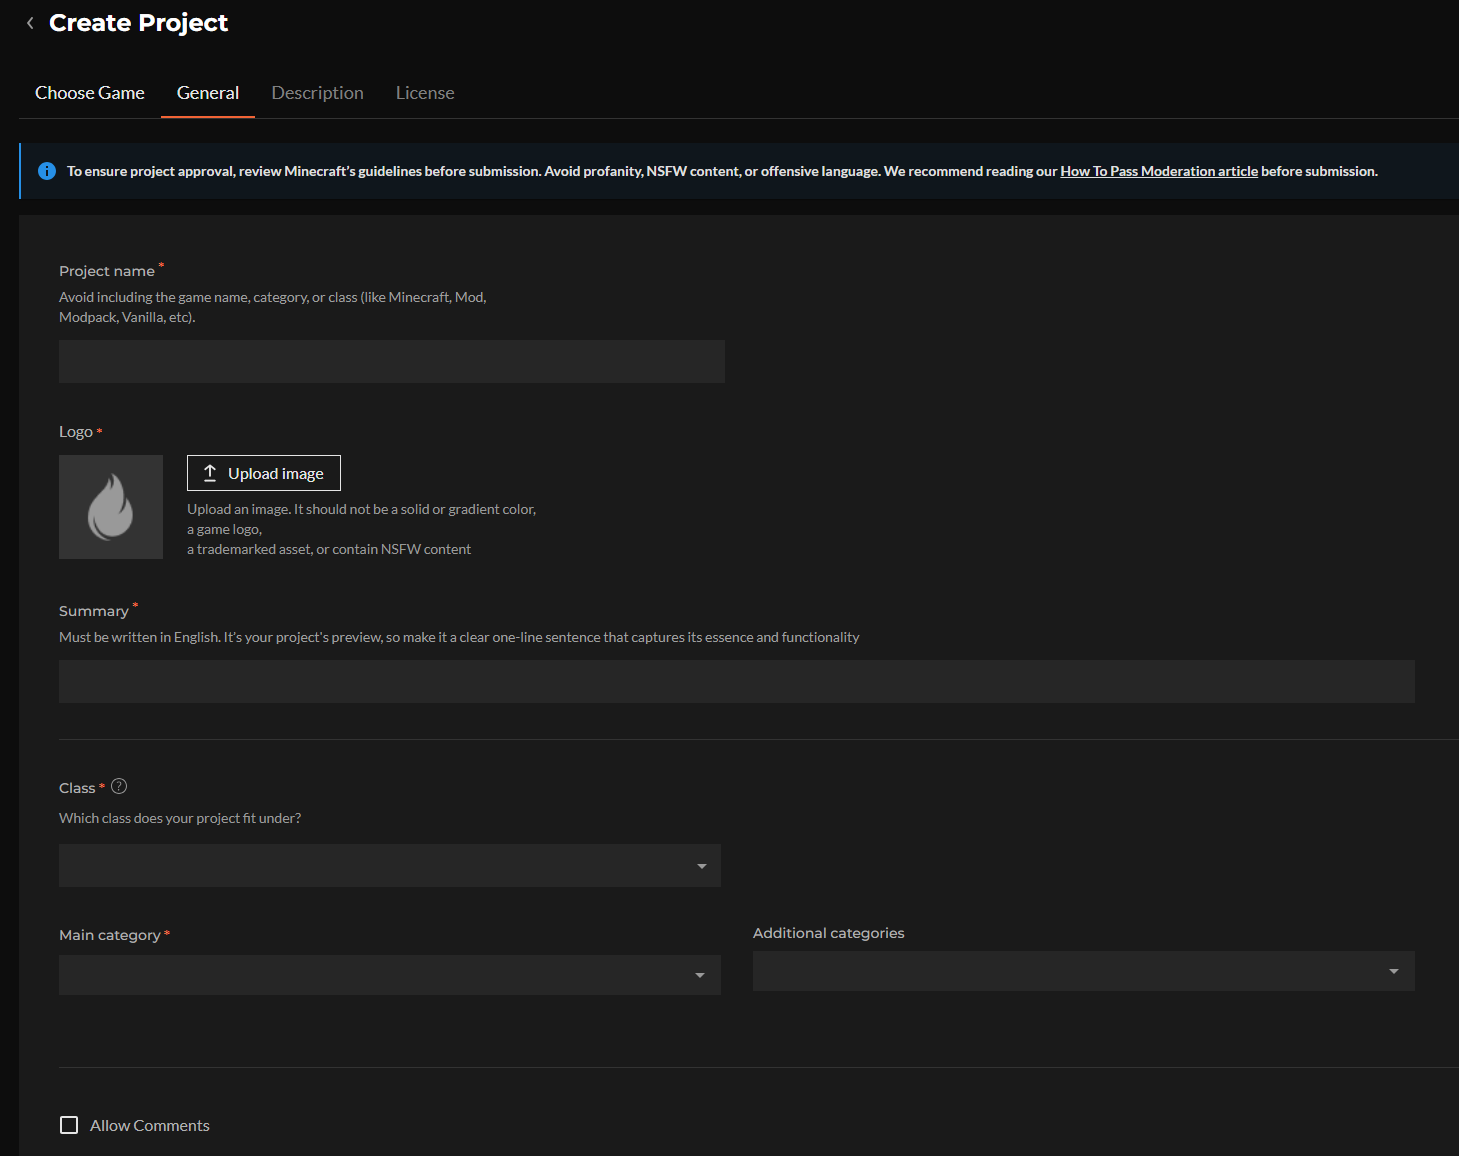
Then we get to the fun part of this, we need to select the correct project class and categories.. for Minecraft, we have a few different classes, and for this guide, we'll stick with a "Mods" project class, now we need to select a few fitting categories for the project, this is really important, as it helps users find your project by looking for different categories, so be sure to select ones that match your project the best.
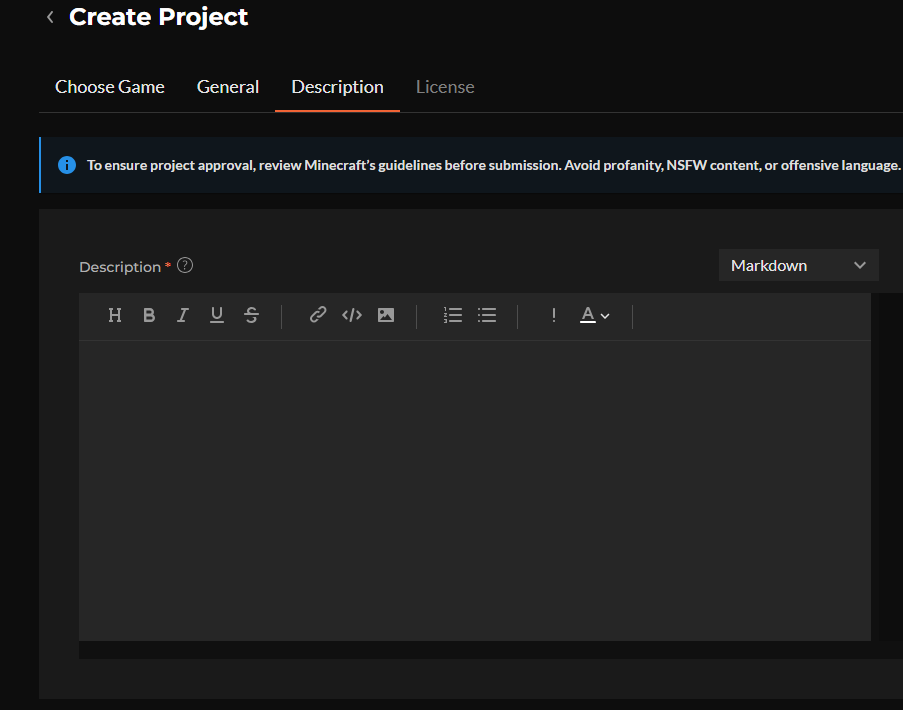
Ok, so far so good! Let's head on to the "Description" tab. Here, we can enter a more detailed description of our project. This is where you can really sell your project to users, so be sure to write a good description and add images and videos to make it more appealing. I recommend drawing inspiration from other projects to see how they write their descriptions and showcase their projects. Avoid writing things like "for my friends" or "for my server", as this doesn't really tell users what your project is about, doesn't really sell it to them, and won't pass moderation.
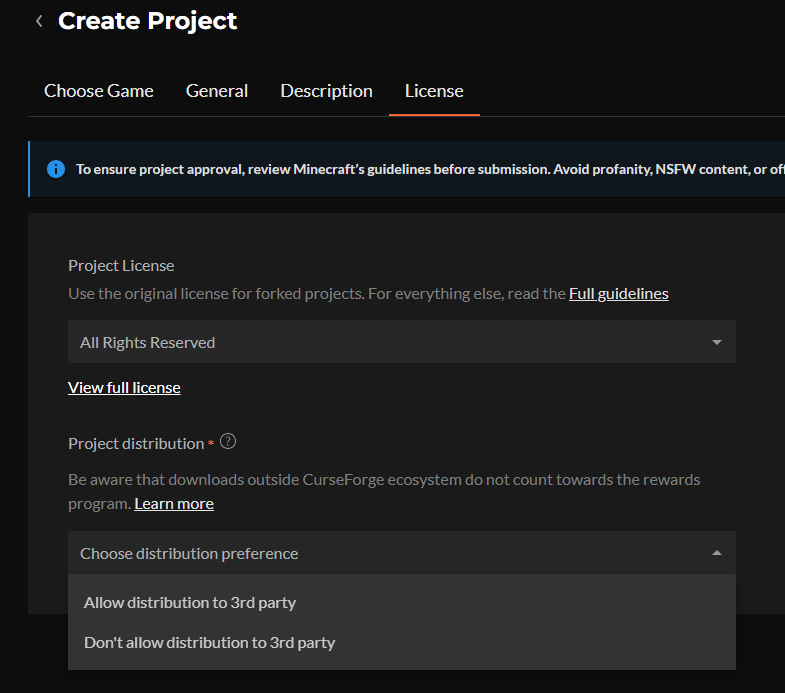
The last tab is "License", where you can select a license for your project. This is really important, as it tells users what they can and can't do with your project, so be sure to select a license that best matches your project. If you're not sure which license to choose, you can read more about the different licenses on the Choose an open source license website. It is also in this tab that you decide whether to allow third-party downloads from outside the CurseForge ecosystem (which will not count towards the rewards program).
Great! Now with everything filled out, logotype uploaded, description properly written, we can finally go ahead and click "Create", to save the project, and get ready for the next step, which is uploading the files, which is the most important part of the process, as this is what the users will download and use in their games.. and also what triggers the project moderation process.
Uploading The First Project Files
Now that we have created our project, we can start uploading our files to it! To do this, we need to go to the "Files" tab of our project and click on the "Add File" button.

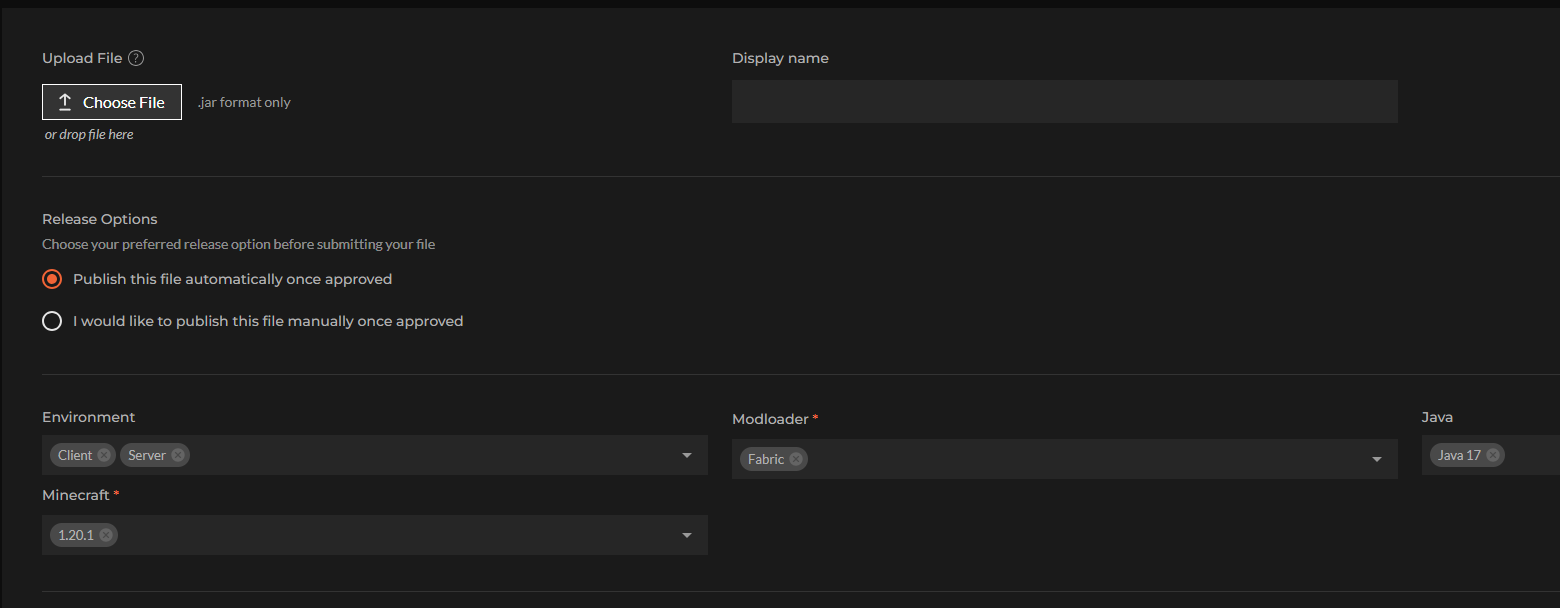
Clicking this button will open up the page where you get to select what file to upload (unless you dragged it in already), you get to select a different Display Name (optional), how you want to release it (automatically or manually), and then based on which game and class you select, you also get a different amount of options to fill out, as an example, with our Minecraft mod, we can select which "Environment" the file is for, which Minecraft version(s), what modloader(s) and the Java version(s) it supports.
We can select a "Release Type", to mark the file as an alpha, beta or release version (alpha is not normally visible in the app or website), and there's also the "Changelog", where you can write about the changes you made in this file, and what users can expect from it, this is really important, as it helps users understand what they are downloading, and what they can expect from it.
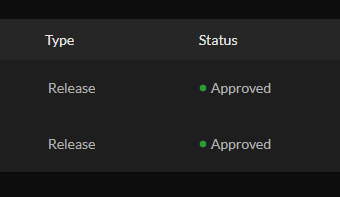
Now, when you upload this file and save all information, it will be sent to moderation. Once it passes moderation, it will be available for users to download and use in their games. The moderation process can take anywhere from a few minutes to three workdays, depending on how large the moderation queue is. You can check the status of your file in the "Files" tab of your project. If it gets rejected, you will receive a notification with the reason for the rejection, and you can then go back, fix the issues, and resubmit the file for moderation. (You can also check the general approval status of all projects in the Projects list)
Project Moderation
Amazing, now you've uploaded your first Minecraft mod to CurseForge, all we need to do now is wait for the moderation team to check the project and the uploaded file. As we wrote before, it can take anywhere from minutes to three workdays, and when the status of your files changes, you will receive notifications in the portal.
Let us say that your project and/or file was rejected, you'll receive a notification about it. Be sure to click the notification so you can read the explanation of why the project/file was rejected. There could be several reasons, from simple things like fixing the summary or description to more complex ones.
.. so where do we go from here? Well, keep the project(s) updated, research which game versions are popular, and, if you want to cover more ground and get more exposure, do so (as long as it actually works). Listen to players when they come with constructive criticism, bask in glory when they praise your mod, and learn not to listen to the abusive users who are just angry for different reasons.
One way to get more downloads for your mods, is to contact modpack authors, and see if your mod is a good fit for their modpack, do not contact people aggressively though, step down if asked, and don't send random direct messages, instead use the built in messaging function on CurseForge, and don't get angry or sad if they won't reply, or don't want to add your mod to their pack. You could always try to make your own showcase modpack.
FAQ - Being An Author
Question: What does it mean to be an author on CurseForge?
Answer: Technically, it gives you permission to upload projects in the CurseForge ecosystem, allowing other users to enjoy the content that you make.
Question: What types of projects can I publish on CurseForge?
Answer: Wow.. that list is quite extensive, so I can't list everything here. But mods, resource packs, shaders, and libraries are just a few of the things you can upload, and different games have different options as well, and if something is missing, you can always ask the team if they would be willing to add support for it!
Question: How do I create and publish my first project?
Answer: Well, you scroll up and read the beginning of the article, instead of skipping to this FAQ! 😄
Question: What information and assets are required before a project can be approved?
Answer: That also differs per game and type of project that you work on, but for most of the part, you need a good project name, logotype, summary, and description (and of course a file, projects are kind of useless without uploaded files)
Question: How does the project review and approval process work?
Answer: I'm glad you asked! So, when you have uploaded your file to your project, it gets sent for review. They run malware checks, among other things, and then a human takes a look at it as well to check project metadata, among other things. The rest is a little bit more than I know about, but you can read a bit about it here and here.
Question: How do I upload new versions and manage releases for different game versions?
Answer: Also a good question! I've seen some new authors who uploaded updates as "Additional Files" instead of new files. But my best tip is to use the "Add File" button at the top right of the files list, instead of the "Add Additional File" option when you expand the uploaded file. Additional files are used for sources, documentation, modpack server files, among other things (depending on the base file)
Question: Can I earn money from my CurseForge projects, and how does the rewards program work?
Answer: Yes, you can. The rewards system gives you CurseForge Points based on how popular your mod is on the CurseForge platform. The number of points you earn depends on the size of the pool and how many you share it with. There are more answers on how the rewards system works in this FAQ.
Question: What are the best practices for writing project descriptions and documentation?
Answer: I would say.. check out how other people write their descriptions and documentation, don't be afraid to take inspiration (don't steal though..). As for my own recommendation, don't use images only; include text in the description. Using only images absolutely destroys accessibility, so people with screen readers would never know what a project is about. Just because it looks cool/better, doesn't mean it is a great idea, but I do recommend using some images and videos to showcase your project.
Question: How should I handle bug reports, feature requests, and community feedback?
Answer: Ultimately, that is entirely up to you; it is your project after all. But keep an open mind, treat users with respect. I use a GitHub repository, where people can create issues/requests for my projects. It is what works best for me, and I have comments enabled on my projects, so that people can comment there as well.
Question: What can I do to increase downloads and visibility for my project?
Answer: You could promote your project on forums, Reddit, and Discord (where allowed), and maybe ask YouTubers and others on social media to review it. There are many ways to gain visibility; some are good, some are bad.