
It's dusk, you're halfway across a plank bridge, and a zombie is already waiting at the far end. A bridge looks like the simplest build in the game, yet the blocks and lights you pick decide what can spawn on it, burn it, or blow a hole in it.
To help you pick the right crossing, we've gathered ten bridge ideas, from a plank footbridge over a creek to an automatic piston bridge that wakes up as you cross it. And one of them even runs over a Nether lava sea!
In this guide, you'll find the materials, the optimal build order, a pro tip or two, and the mistakes to avoid for every bridge idea, plus a handful of mods saved for the very end.
Want to pair your fancy bridge with an even cooler castle? Check out our guide on the best Minecraft castle ideas.
1. Simple Plank Bridge
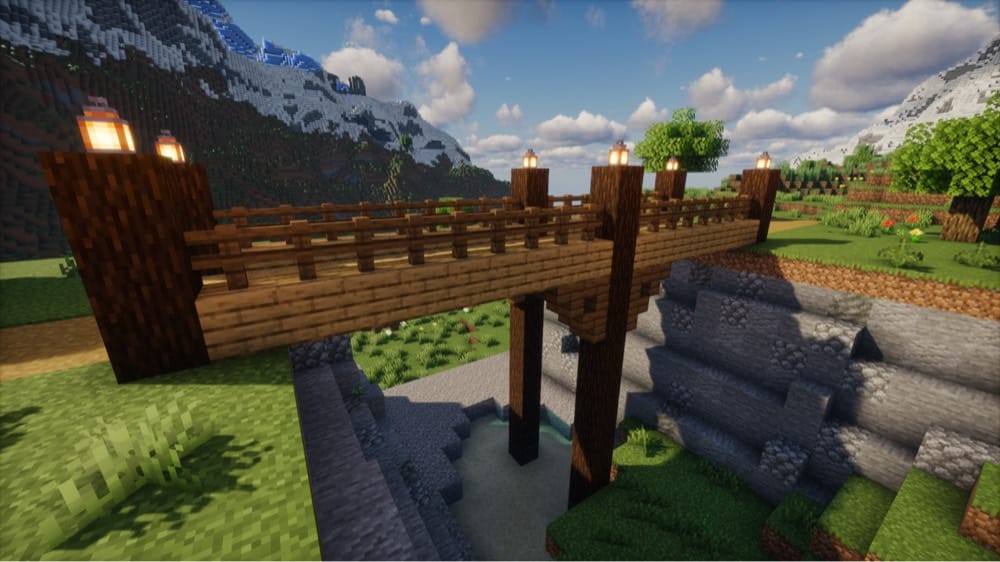
Sooner or later, every survival world needs a bridge of some sort. And while making an ugly bridge out of planks is quite simple to do, building one using different blocks, lanterns, and fences along each edge takes considerably more effort – but it also looks so much better.
- Materials you will need: planks, slabs, fences, logs for the posts, stairs for bracing under the deck, and lanterns or torches.
- Recommended build order:
- Lay the deck out from the bank.
- Run fences along both edges.
- Set log posts at the corners and under the middle.
- Brace the underside with stairs.
- Top each post with a lantern or torch, no more than about 14 blocks apart, to keep the deck fully lit and stop hostile mobs from spawning.
Pro Tip for Your First Plank Bridge
We recommend a deck of bottom slabs – the ones that sit in the lower half of a block. Mobs cannot spawn on them at any light level, so even the dark stretches between lights stay spawn-free.
Top Plank Bridge Mistake to Avoid
Fair warning: most planks, slabs, and fences burn, and lava can set them on fire, so it pays to keep a plank deck well clear of it.
2. Stone Arch Bridge
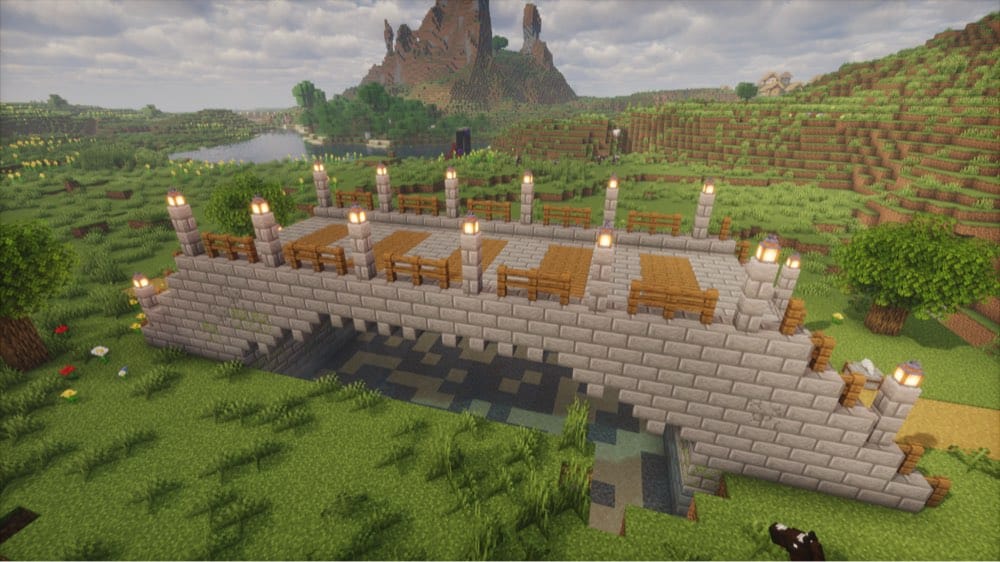
Once a plank bridge starts to feel temporary, a stone arch is the natural upgrade. Its curve comes from upside-down stairs stepping up from each pier toward the middle, and you get an upside-down stair by aiming at a block's underside or the top half of its side.
- Materials you will need: stone bricks, stone brick stairs and slabs, a stonecutter, planks for the inlaid deck panels, stone posts, fences, and lanterns.
- Recommended build order:
- Set a pier on each bank.
- Step the stairs up toward the middle.
- Lay slabs over the top.
- Inlay planks in the deck.
- Line both edges with stone posts, fences, and lanterns.
Pro Tip for Your First Stone Arch Bridge
Try cutting the stairs in a stonecutter. It turns each block into one stair, while a crafting table needs six blocks to make four.
Top Stone Arch Bridge Mistake to Avoid
The big one here is expecting stone bricks to survive a creeper. Their blast resistance – how well a block withstands explosions – is 6, well under the 12.16 a creeper's blast can break.
3. Covered Bridge
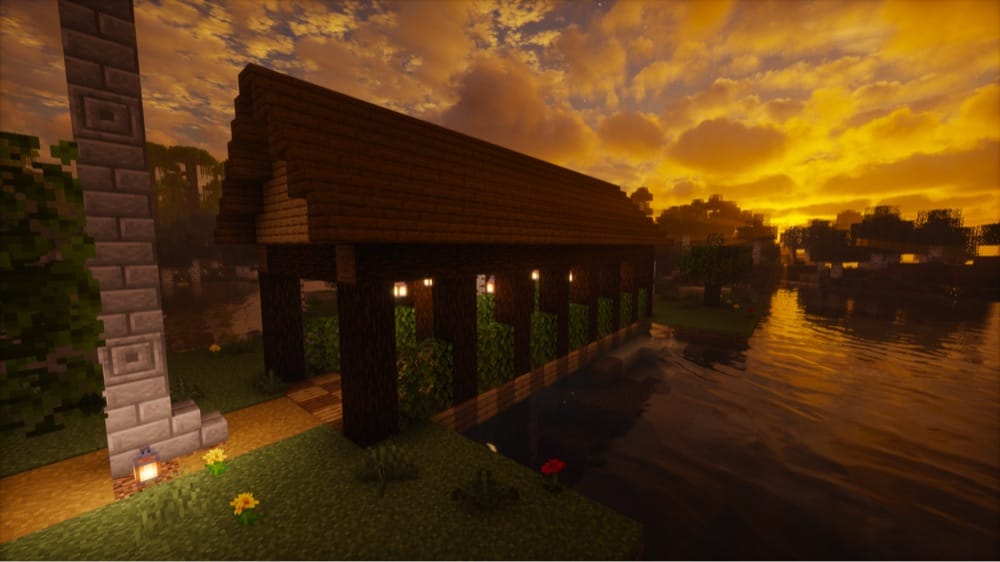
Put a roof over a crossing and your bridge suddenly becomes a small building laid across a gap: log posts down both sides, leafy hedges between them, and a pitched roof of stairs and slabs. Logs turn to match the face you place them against, so one block serves as post and beam.
- Materials you will need: logs, planks, stairs and slabs for the roof, leaves for the hedges, lanterns, and a lightning rod.
- Recommended build order:
- Lay a plank deck 3 to 5 blocks wide.
- Raise log posts and join them with log beams.
- Tuck leaves between the posts.
- Roof it with stairs and slabs in stepped layers.
- Light the deck with lanterns.
Pro Tip for Your First Covered Bridge
Try setting a lightning rod – a block that draws lightning toward itself – on a stone post above the roof, so a strike lands there instead of on the timber. A struck rod can still start a fire within 2 blocks of the air above its tip, though, so make sure no wood sits in that zone.
Top Covered Bridge Mistake to Avoid
The catch with a roof is that daylight fades by one level with every block it travels in from an open end or side, so a long, closed-in stretch can turn dark enough for hostile mobs to spawn even by day, and at night an unlit deck can spawn them anywhere. Lighting the inside the same way you would an open deck keeps them away.
4. Rope Bridge
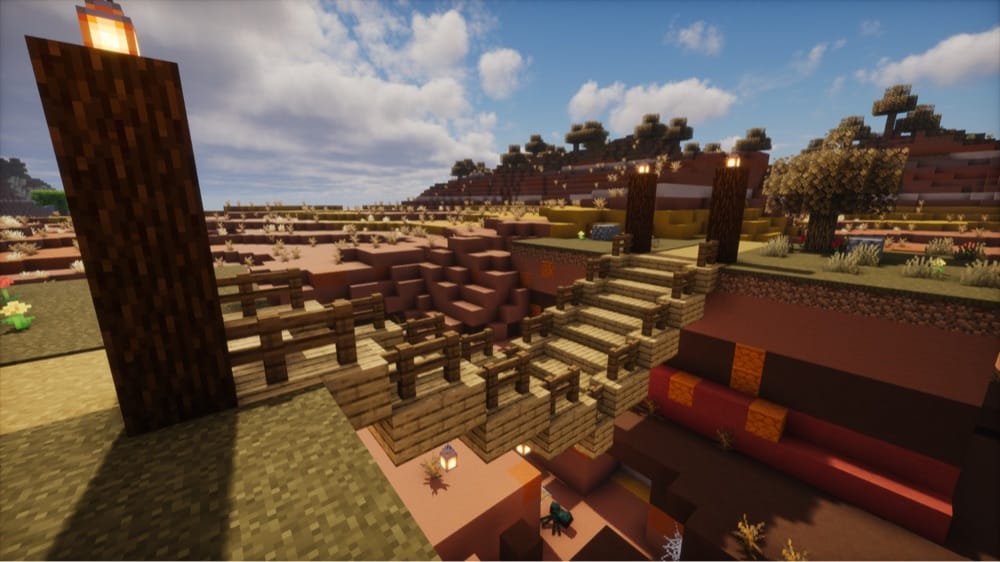
Canyons are typically less than 15 blocks wide, which suits a rope bridge: a plank deck that dips in the middle, a fence handrail on each side, and log posts topped with lanterns. A fence blocks you as if it were 1.5 blocks tall, so you cannot hop over it by accident.
- Materials you will need: slabs and planks for the deck, fences for the handrails, logs for the posts, iron chains, and lanterns.
- Recommended build order:
- Set a log post on each rim.
- Lay the deck out from both ends and step it down half a block at a time toward the middle.
- Add fence handrails along both sides.
- Top the posts with lanterns and hang a few more from chains underneath.
Pro Tip for Your First Rope Bridge
Slabs keep the dip walkable as long as each step down is only half a block, since you can walk up a half-block rise without jumping.
Common Rope Bridge Mistakes to Avoid
- Using a chain as the only railing. A horizontal chain in the block right above the walkway sits low enough to step over.
- Using top slabs for the dip. A top slab has a complete top surface where hostile mobs can spawn, while a bottom slab does not.
5. Suspension Bridge
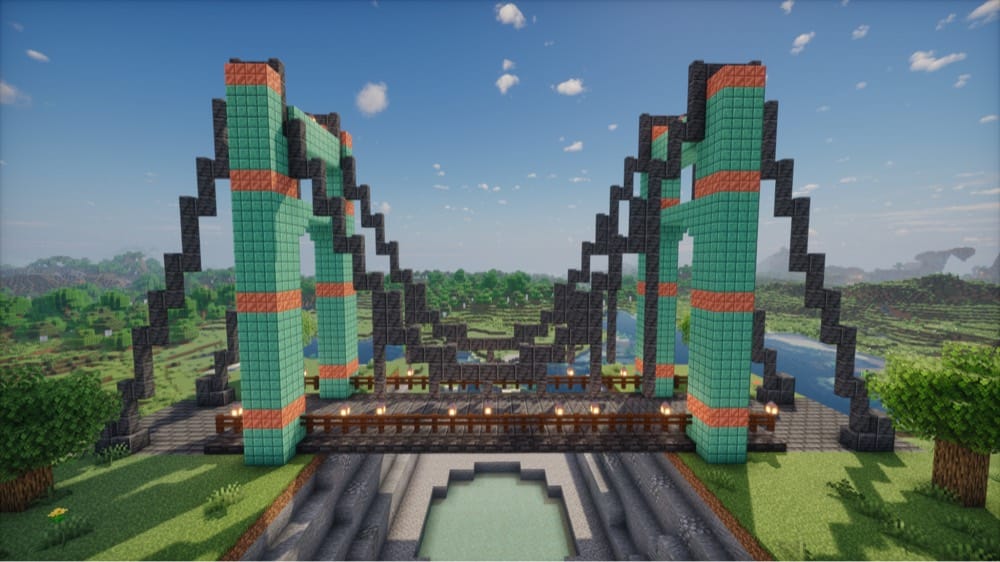
Mineshafts that cross a canyon already show the look: plank bridges, some of them hung from iron chains. The deck stays up without cables, so they are only for looks.
Chains hang in mid-air without any support, and because they run along one axis only – east-west, north-south, or straight up and down – the sag has to be built as steps. The towers can be of any solid block, from logs and stone bricks to brightly colored concrete.
- Materials you will need: logs, stone bricks, or concrete for the towers, scaffolding to climb them, slabs for the deck, iron bars or fences for the railings, iron chains or matching blocks for the cables and hangers, and lanterns.
- Recommended build order:
- Raise a tower on each bank.
- Run the deck across.
- String the cable between the towers in steps.
- Drop vertical hangers to just above the deck.
- Add railings and lanterns.
Pro Tip for Your First Suspension Bridge
Try stopping a few of the vertical hangers one block above the deck and hanging a lantern from the bottom of each so the lights look like part of the cables.
Top Suspension Bridge Mistake to Avoid
Sand, gravel, and concrete powder are the blocks to leave out of the walkway. All three fall once nothing is under them – and over a canyon, nothing ever is – so planks, slabs, and stone are the safer picks. Concrete that has already set in stays put as well.
6. Nether Brick Bridge
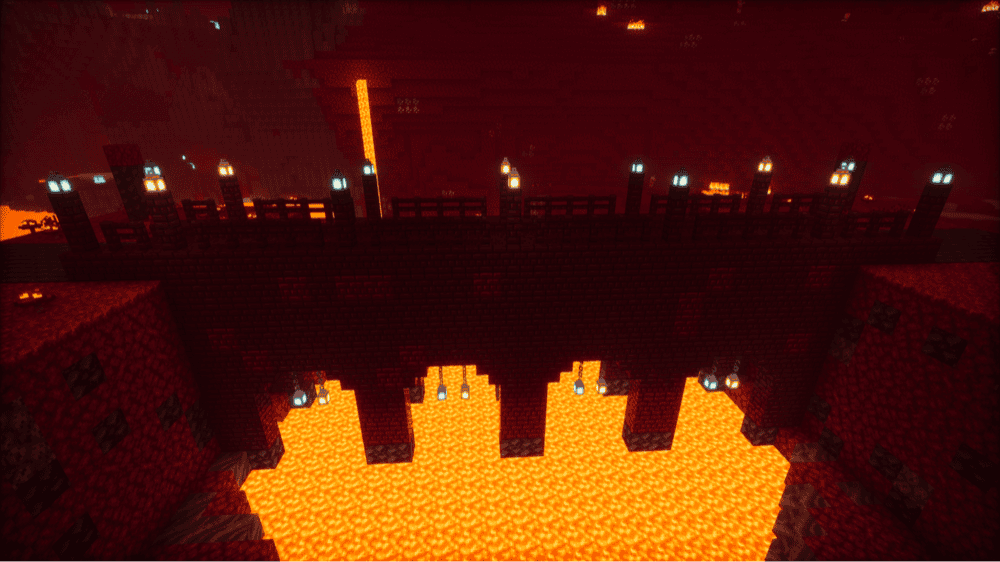
Crossing a Nether lava sea is tense enough without the bridge burning or crumbling under you. Over lava, most wooden blocks burn and ghast fireballs break weaker ones, while Nether bricks do not burn and a ghast fireball cannot break them, so a walkway, walls, and arches made from them avoid both problems.
- Materials you will need: Nether bricks, Nether brick slabs, stairs, walls, and fences, iron chains, and lanterns (idle piglins steer clear of soul lanterns, but piglin brutes do not, so best to stay away from those).
- Recommended build order:
- Smelt netherrack into Nether brick and turn it into blocks.
- Lay the walkway out from solid ground.
- Add arched pillars down toward the lava for the fortress look.
- Line the sides with fences or a low wall.
- Hang lanterns from chains under the arches.
Pro Tip for Your First Nether Brick Bridge
The bottom-slab trick from the plank bridge matters even more here, since magma cubes and hoglins spawn at any light level, so lights will not keep them off. A walkway of bottom Nether brick slabs leaves them no complete top surface to spawn on, though a ghast can still drift in from open air.
Top Nether Brick Bridge Mistake to Avoid
If we had to name one, it's mixing weaker blocks into the walkway, walls, or railings, since netherrack, glass, planks, and wooden fences can all be blown apart by a ghast fireball.
7. Ice Bridge
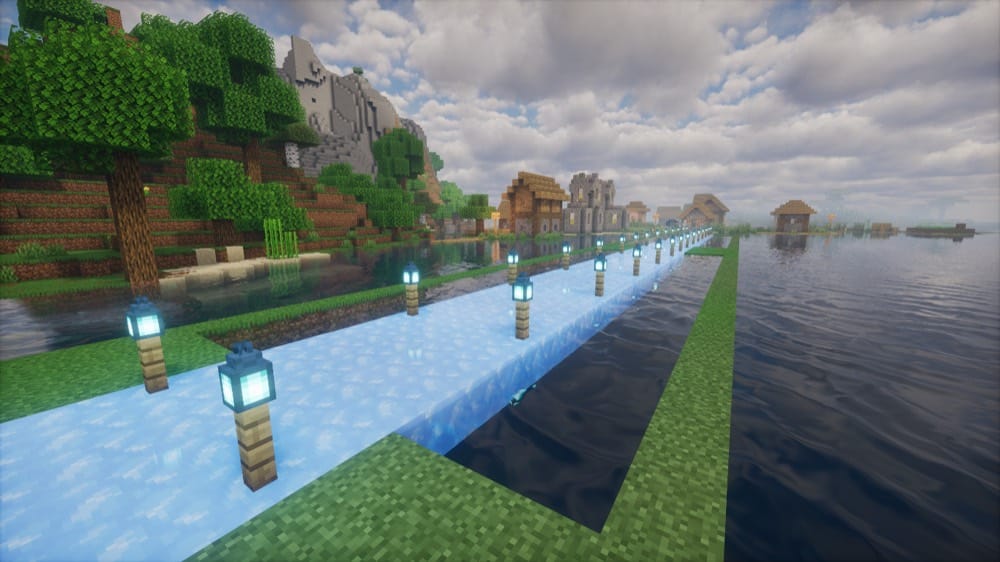
Did you know that an ice road over a bay or a wide river can double as a boat lane?
Regular ice melts within 3 blocks of bright lights like torches and lanterns, but packed ice (made from nine ice) and blue ice (made from nine packed ice) stay frozen. All three need a tool with Silk Touch – an enchantment that makes a block drop itself – to collect.
- Materials you will need: packed ice or blue ice, a pickaxe with Silk Touch, a boat, fences for the posts, and lanterns (soul lanterns beside regular ice).
- Recommended build order:
- Collect the ice.
- Lay the lane out straight from the shore, a few blocks wide.
- Line both edges with fence posts topped with lanterns, no more than about 14 blocks apart.
Pro Tip for Your First Ice Bridge
If speed is the main goal, blue ice is the one to lay. Boats reach top speeds of about 8 blocks per second on open water, 40 on ice and packed ice, and more than 70 on blue ice.
Common Ice Bridge Mistakes to Avoid
- Expecting boots with Frost Walker – an enchantment that freezes the water beneath you – to leave a bridge behind. The frosted ice they make over water cracks and melts back into water in daylight or bright light.
- Assuming packed or blue ice keeps mobs off the way regular ice does. Regular ice only lets polar bears spawn on it, but mobs can spawn on packed ice, and blue ice is not on the no-spawn list either, so light them like any other deck.
8. Glass Skybridge
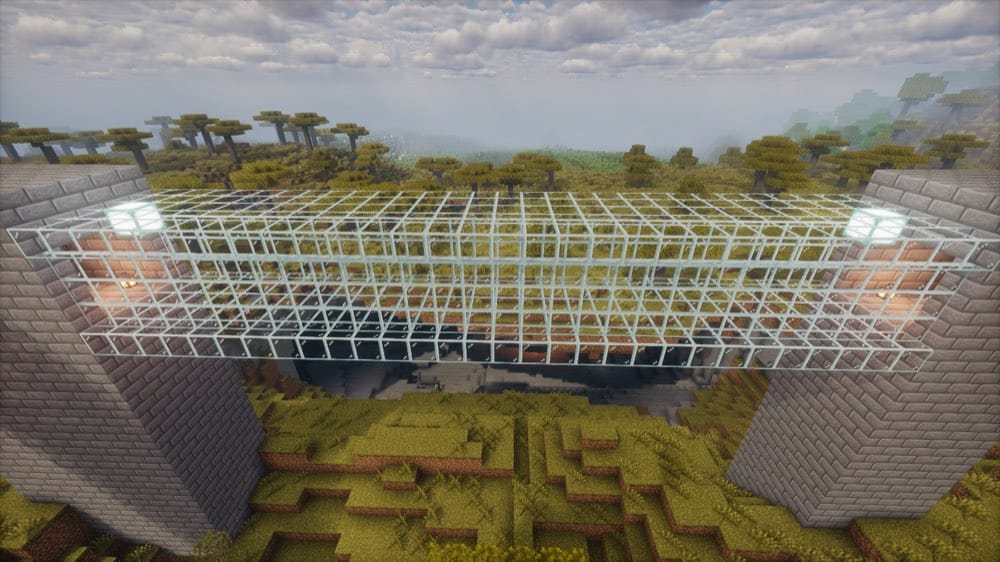
A glass tube between two towers lets you see the whole drop below.
Mobs cannot spawn on glass blocks or see through them, so the glass needs no lighting and the mobs underneath cannot see you through the floor. Any full-block or top-slab sections at each end still need light, though.
- Materials you will need: glass (smelted from sand), glass panes for the walls, stone bricks for the towers, and lanterns or sea lanterns for the ends.
- Recommended build order:
- Raise two towers to the same height (or pick two cliff tops).
- Lay the glass deck from one to the other.
- Build glass pane walls along both edges.
- Close the top with glass blocks.
- Light the ends.
Pro Tip for Your First Glass Skybridge
Glass panes save sand on the walls, since six glass blocks make sixteen panes.
Common Glass Skybridge Mistakes to Avoid
- Laying glass panes as the floor. Panes only stand upright, so the walkway needs full glass blocks.
- Breaking a misplaced glass block without Silk Touch. It drops nothing, so the block is gone for good.
9. Automatic Piston Bridge
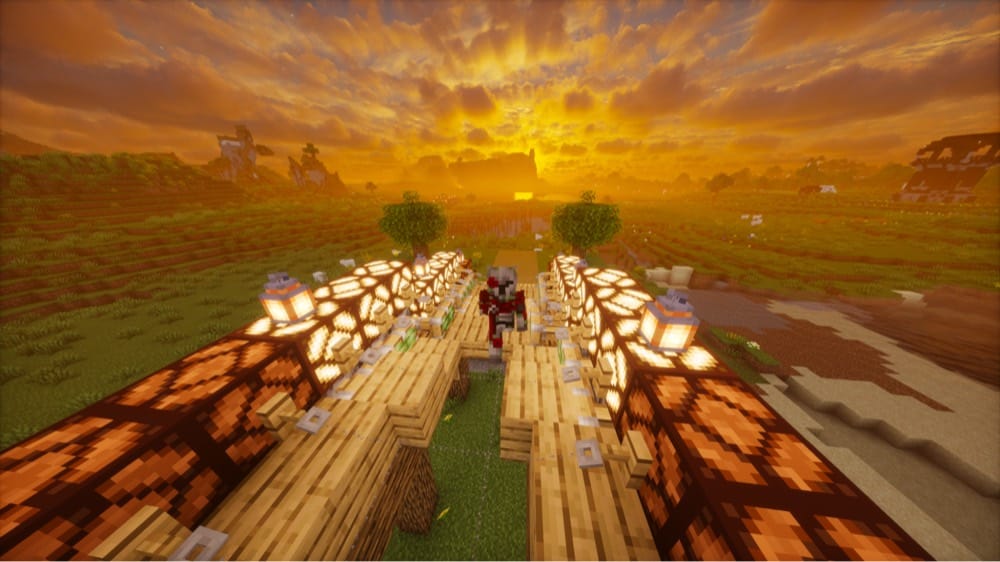
An automatic bridge reacts to you as you cross it: lamps flare up and sticky pistons shove deck blocks into place.
It all runs on a tripwire: a line of string strung between two tripwire hooks, which both switch on for as long as anything touches the string. A hook powers the block it is fixed to, so hooks fixed to redstone lamps light the lamps and power the sticky pistons beneath them, with no redstone dust needed.
A sticky piston, on the other hand, pushes the block on its face out when powered and pulls it back when the power stops, but only for that one block, so every plank gets its own piston.
- Materials you will need: planks and stairs for the deck, sticky pistons (a piston plus a slimeball, which slimes drop), redstone lamps, tripwire hooks, and string.
- Recommended build order:
- Set two rows of sticky pistons facing each other with four blocks between them, one pair in every column along the crossing.
- Put a plank on the face of each piston.
- Ramp both ends of the bridge with stairs.
- Stack a redstone lamp on each piston.
- Fix a tripwire hook to the inner face of each lamp, one block above the plank, so each pair of hooks faces each other across the gap.
- String a tripwire between each pair of hooks, and repeat the set along the whole bridge.
Pro Tip for Your First Automatic Piston Bridge
A lamp can do two jobs here. Because a tripwire hook powers the block it is fixed to, the lamp lights the walkway and carries the signal down to its piston, which keeps the whole build free of dust and torches. The lit lamps also show which stretch of the bridge is awake.
Top Automatic Piston Bridge Mistake to Avoid
Putting a tripwire hook in the path of a moving block is the one to watch. A piston that pushes a block into a hook's space breaks it, and so does flowing water, so keep each hook one block above the planks the pistons move.
10. Red Garden Bridge
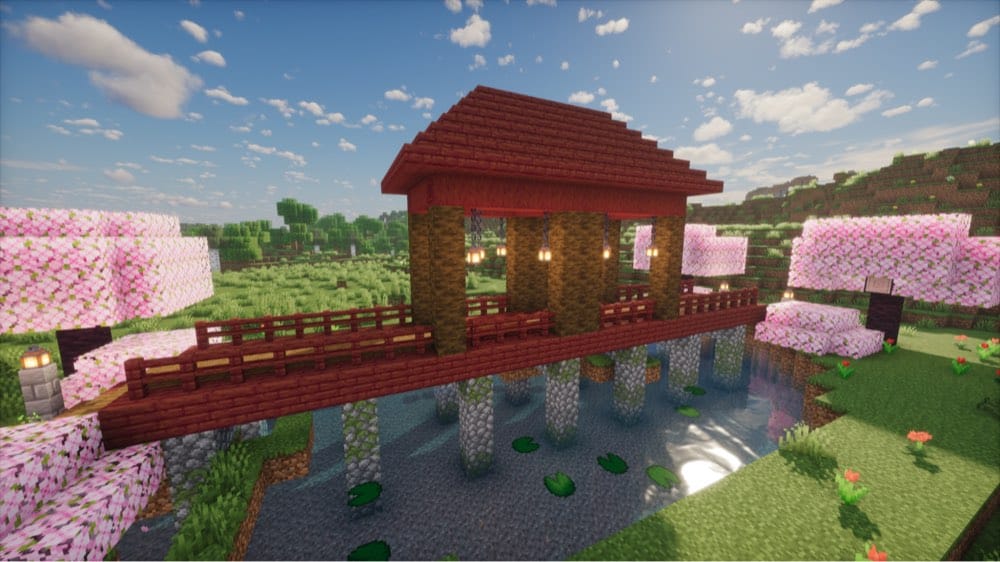
With red wood, a stepped roof over the middle, and a lantern hanging at every post, even a short crossing over a pond gets a look of its own. Mangrove planks give you a deep red-orange for the roof, while the red concrete stairs and slabs added in Java Edition version 26.3 bring red without the fire risk.
- Materials you will need: mangrove planks (made from the logs of Mangrove Swamp trees) with matching stairs and slabs, planks for the deck, mangrove fences and trapdoors, cobblestone for the piers, iron chains, and lanterns.
- Recommended build order:
- Lay a plank deck across stone piers.
- Raise a post at each corner of the middle section.
- Roof it with stairs and slabs in stepped layers.
- Hang a lantern from a chain at every post.
- Trim the deck with trapdoors
Pro Tip for Your First Red Garden Bridge
Leaves soften the ends of the bridge. Placed leaves never decay, so they make a canopy that stays put at either end. Cherry leaves (from Cherry Groves) add pink and red poplar leaves (from Dappled Forests) add red, and you'll need shears or a tool with Silk Touch to collect either.
Top Red Garden Bridge Mistake to Avoid
Building the rise from each bank in full-block steps is the one to watch, since every step becomes a jump. Stairs and slabs keep the crossing walkable.
Mods to Lay, Light, and Dress Up Your Bridges
Every bridge above works in vanilla, but a few mods can hand you finished bridge pieces, taller street lamps, and chains that actually sag between posts. The five mods below cover those, plus a laser bridge and a faster way to lay a deck.
If you want even more options, check out our list of the best Minecraft building mods.
Macaw's Bridges
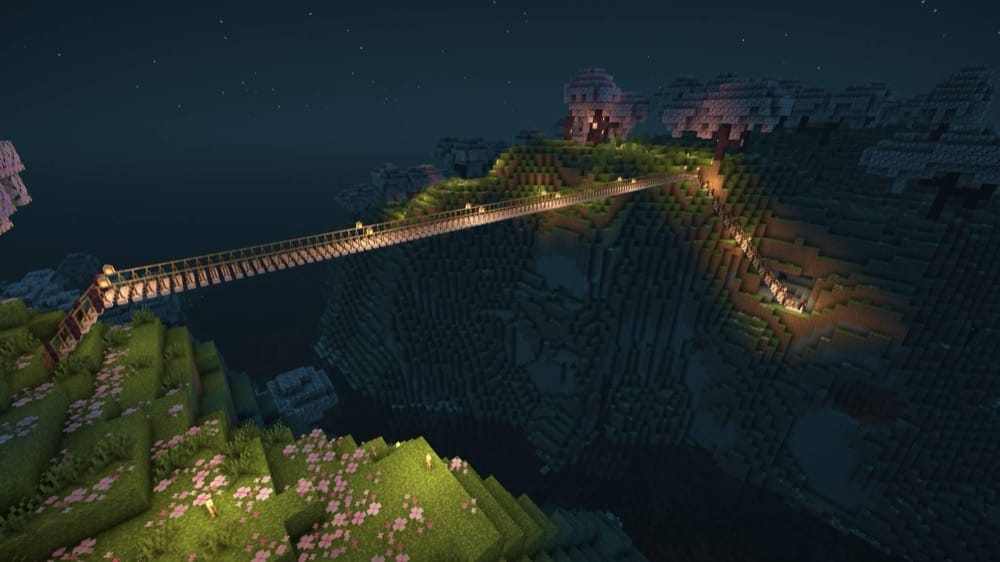
“Macaw's Bridges” is the mod to reach for when you would rather place ready-made bridge pieces than shape every plank and fence yourself. It adds a variety of bridges you place block by block, along with matching bridge stairs for each end.
Wider bridges need one extra step, though. Once a bridge is wider than two blocks, make a pair of pliers and right-click the bridge with them to add its end piece.
Macaw's Lights and Lamps
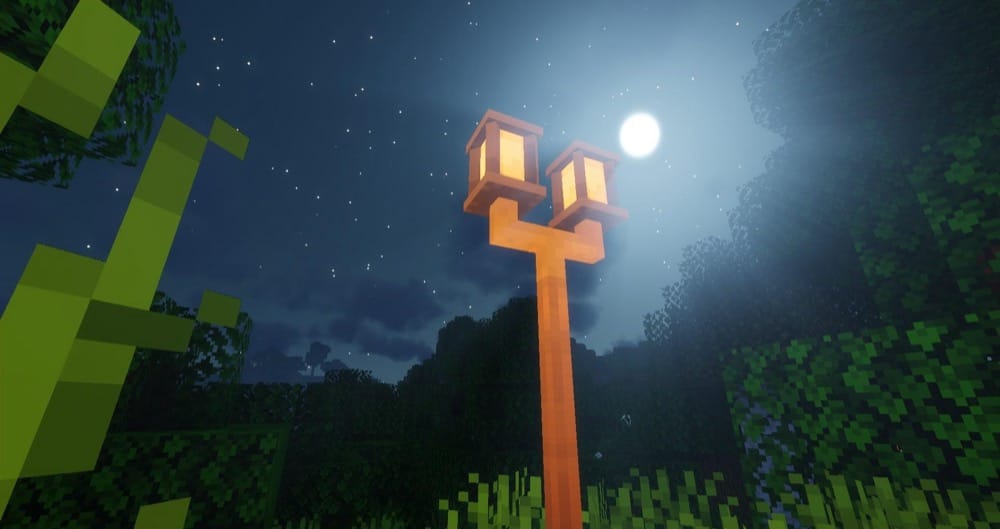
“Macaw's Lights and Lamps” gives a long deck something better than a row of torches. Street lamp posts, wall lanterns, light slabs, and tiki torches all join the vanilla torch here.
Street lamps can be stacked as tall as you want and come in 16 colors, so a lamp on every post can match the deck.
Laser Bridges & Doors
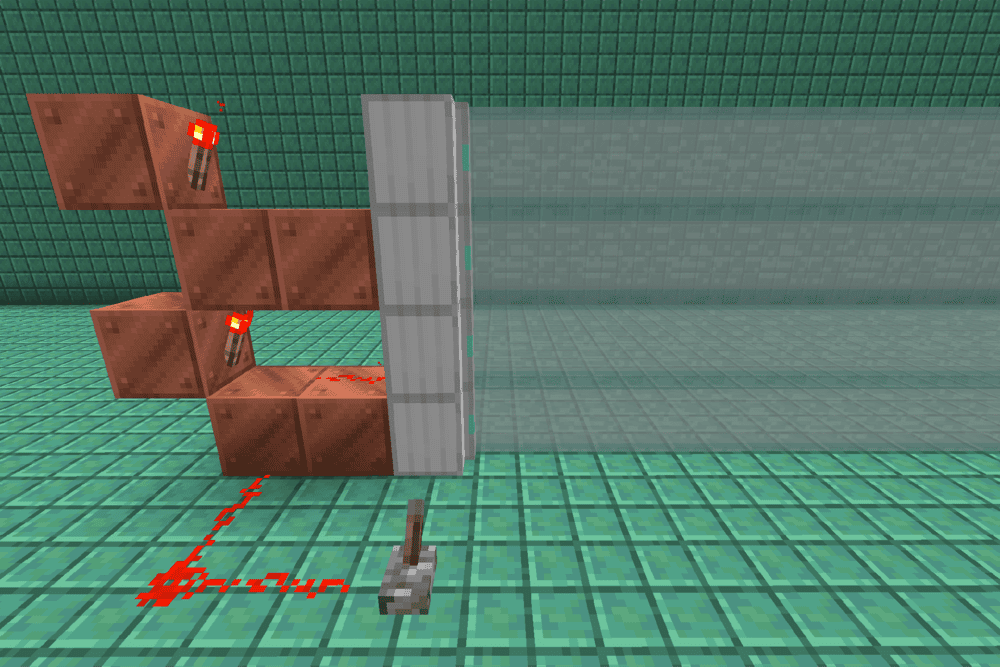
“Laser Bridges & Doors” is for the crossing you only want there when you flip a lever. Futuristic-looking laser bridges, doors, and fences form whenever a laser source block receives a redstone signal.
A laser's length follows the strength of that signal, up to a default maximum of 15, which you can change in-game or in the configuration file.
Effortless Building
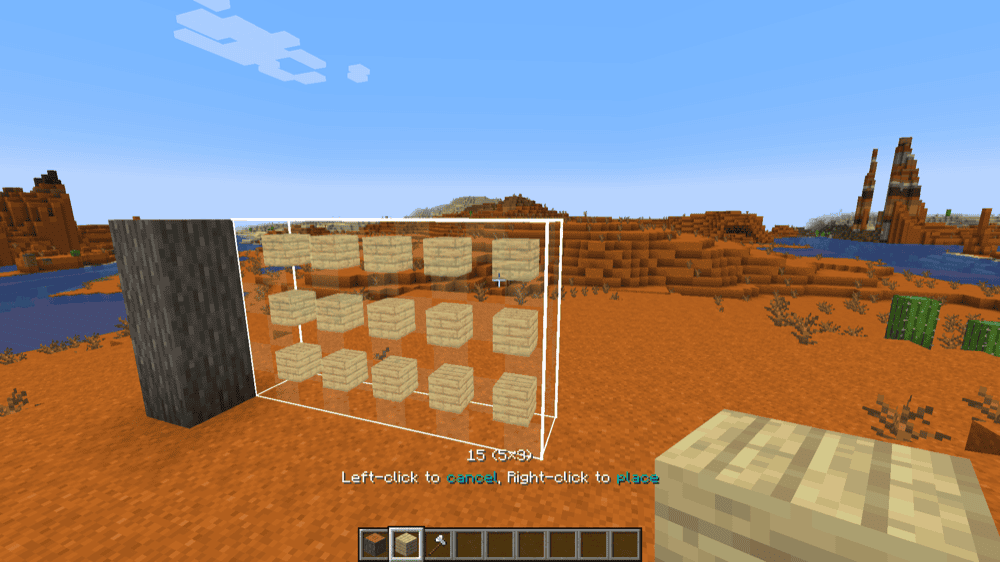
“Effortless Building” takes the slog out of a long deck, where you would otherwise place every block one at a time. It lets you place and break many blocks at once, so a run of deck blocks or a line of railings goes down as one shape.
Simply hold "Alt" to pick a build mode such as "Line" or "Floor", then right-click where the shape starts and again where it ends. It works especially well in survival, where every shape uses blocks from your inventory.
Reconnectible Chains
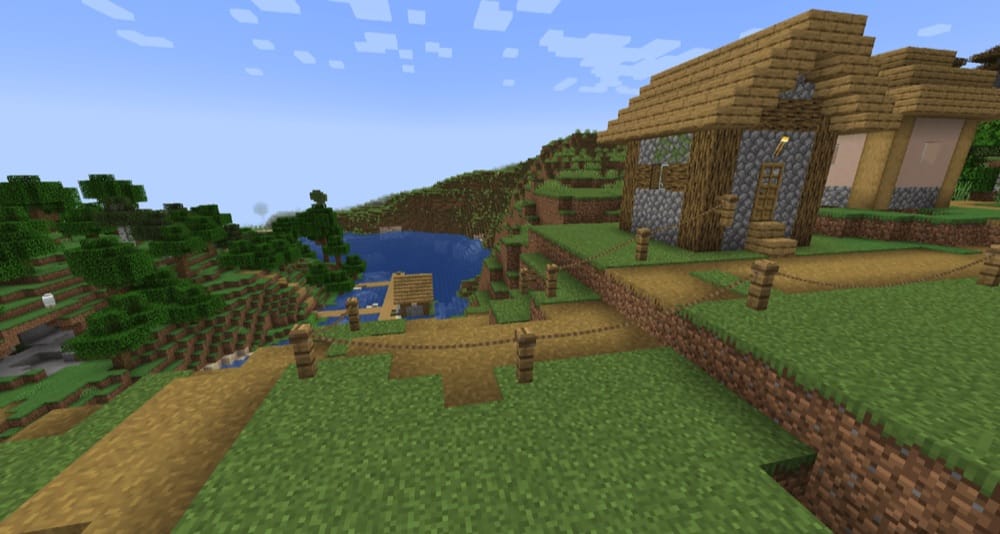
“Reconnectible Chains” gives a suspension or rope bridge the sagging side cables that vanilla chains, which only run in straight lines, cannot form. In other words, this mod lets you connect fences and walls with a decorative chain that hangs between them.
Right-clicking a chain with shears adjusts how much slack it has, so every chain can have its own sag.
How to Install Minecraft Mods
You can install the above mods automatically using the CurseForge app or manually by placing the mod files within your game's mods folder. Both methods allow you to easily add custom features and enhancements into your Minecraft experience.
If you want to learn more, you can read our detailed guide on how to install Minecraft mods.
Common Issues and Quick Fixes
Mobs keep spawning on my bridge
Hostile mobs spawn on solid, complete top surfaces wherever the block light – the light from torches, lanterns, and similar blocks – is 0, so an unlit deck of full blocks or top slabs can spawn them at night or during a thunderstorm.
We recommend placing a light source about every 14 blocks, or alternatively, a floor of bottom slabs, trapdoors, or glass, since no mob can spawn on those at any light level.
My wooden bridge caught fire near lava
Most wooden blocks burn, from planks to fences and gates, and lava nearby can set them on fire. The solution is to keep any wooden stretch well away from lava or rebuild it in stone or Nether bricks. Crimson and warped planks are a third option in Java Edition, since they do not burn.
My ice bridge melted – now what?
Regular ice melts when the block light right next to it rises above 11, which happens within 3 blocks of a torch (light level 14) or a lantern (15), while sunlight leaves it alone.
Rebuilding the stretch in packed ice or blue ice, both of which do not melt, or lighting it with soul lanterns, which give off light level 10 and do not melt ice, stops it from breaking again.
My automatic bridge does not react
A tripwire only works as a complete circuit: two hooks facing each other with 1 to 40 strings between them. A hook that sits folded against its block is not part of a working circuit, so make sure to check if each pair faces across the slot with an unbroken line of string.
Anything that touches the string sets it off, mobs and dropped items included, so a bridge that fires on its own may have something wandering into it.
My game crashes on startup after installing mods
A startup crash usually means one of three things:
- The mod file does not match your Minecraft version.
- The mod was made for a different loader.
- A required dependency is missing.
Check that you installed the correct Forge, Fabric, Quilt, or NeoForge file for your profile, then look at the mod page for any required files, especially for Fabric API on Fabric profiles and for Quilted Fabric API on Quilt profiles.